1 TenancyBox - Laravel SaaS Starter Kit
TenancyBox - Laravel SaaS Starter Kit is a powerful web-based SaaS starter kit designed to accelerate the development of SaaS platforms. It includes essential modules like Dashboard, billing, user and role management, a dynamic Module Generator, and a comprehensive Settings panel. This modern tool is built using the latest technologies including Bootstrap 5 (Front-end), Laravel 12.* (Back-end), PHP, and MySQL. Laravel makes it easy to maintain and extend the application. The system also supports dark and light themes, multiple layout options (vertical, horizontal, two-column), and four sidebar size variations all structured with clean, well-commented, and organized code.
In this guide, we explore all the features of the TenancyBox and how to use those features and options in this suite.
Key Features
- Packages Subscriptions
- Companies Management
- Billing
- Inquiries
- Blogs
- Guides
- Landing Settings
- Pulse
- Nightwatch
- Translation - 14 Languages
- Users Management
- Roles Management with flexible permissions
- Custom Module Generator (No-Code Module)
- System Settings
- Theme Settings
- Email Settings
- Email Templates
- Dashboard Settings
- Auto Backup Database
- Activity Log
Thanks for purchasing this item.
Please read the complete documentation carefully before starting.
If you have any questions beyond the scope of this documentation, feel free to contact us via
codecanyon product support.
Thanks a lot!
1.1 Quick Start Guide
Get Started in 15 Minutes
Follow these steps to get TenancyBox up and running quickly:
1Prerequisites
- ✓ PHP 8.2+ installed
- ✓ Composer installed
- ✓ MySQL database ready
- ✓ Web server configured
2Upload Files
- 📁 Extract TenancyBox-1.0.zip
- 📤 Upload Installation folder
- 🔐 Set folder permissions
3Run Installer
- 🌐 Visit https://yourdomain.com/install
- ⚙️ Follow installation wizard
4Start Building
- 🎨 Customize settings
- 🚀 Launch your SaaS
Need Help?
Contact our support team at support@chetsapp.com or refer to the detailed installation guide below.
2 Installation
After all software prerequisites are done, download the ZIP archive and take the
TenancyBox-1.0.zip, then unzip it to your desired place.
- If you are using XAMPP, place your folder inside the
htdocs/directory. - If you are using WAMP, place your folder inside the
www/directory. - If you are using LIVE SERVER, place your folder inside the
public_html/directory. - If you are using LINUX, place your folder inside the
var/www/html/directory.
- In this ZIP file, we have provided the
Installationfolder: Installationfolder has frontend and backend together which you can deploy in shared hosting or live server and run your application for initial setup. It is very quick.
Step 1: Open your shared hosting cPanel.
Step 2: Click on file upload.
Step 3: Upload the TenancyBox-1.0/Installation folder content to the root
directory of public_html or You can create your own folder/subfolder inside the
public_html and upload TenancyBox-1.0/Installation folder's contents
on that folder.
Step 4: Give recursive permission as mentioned.
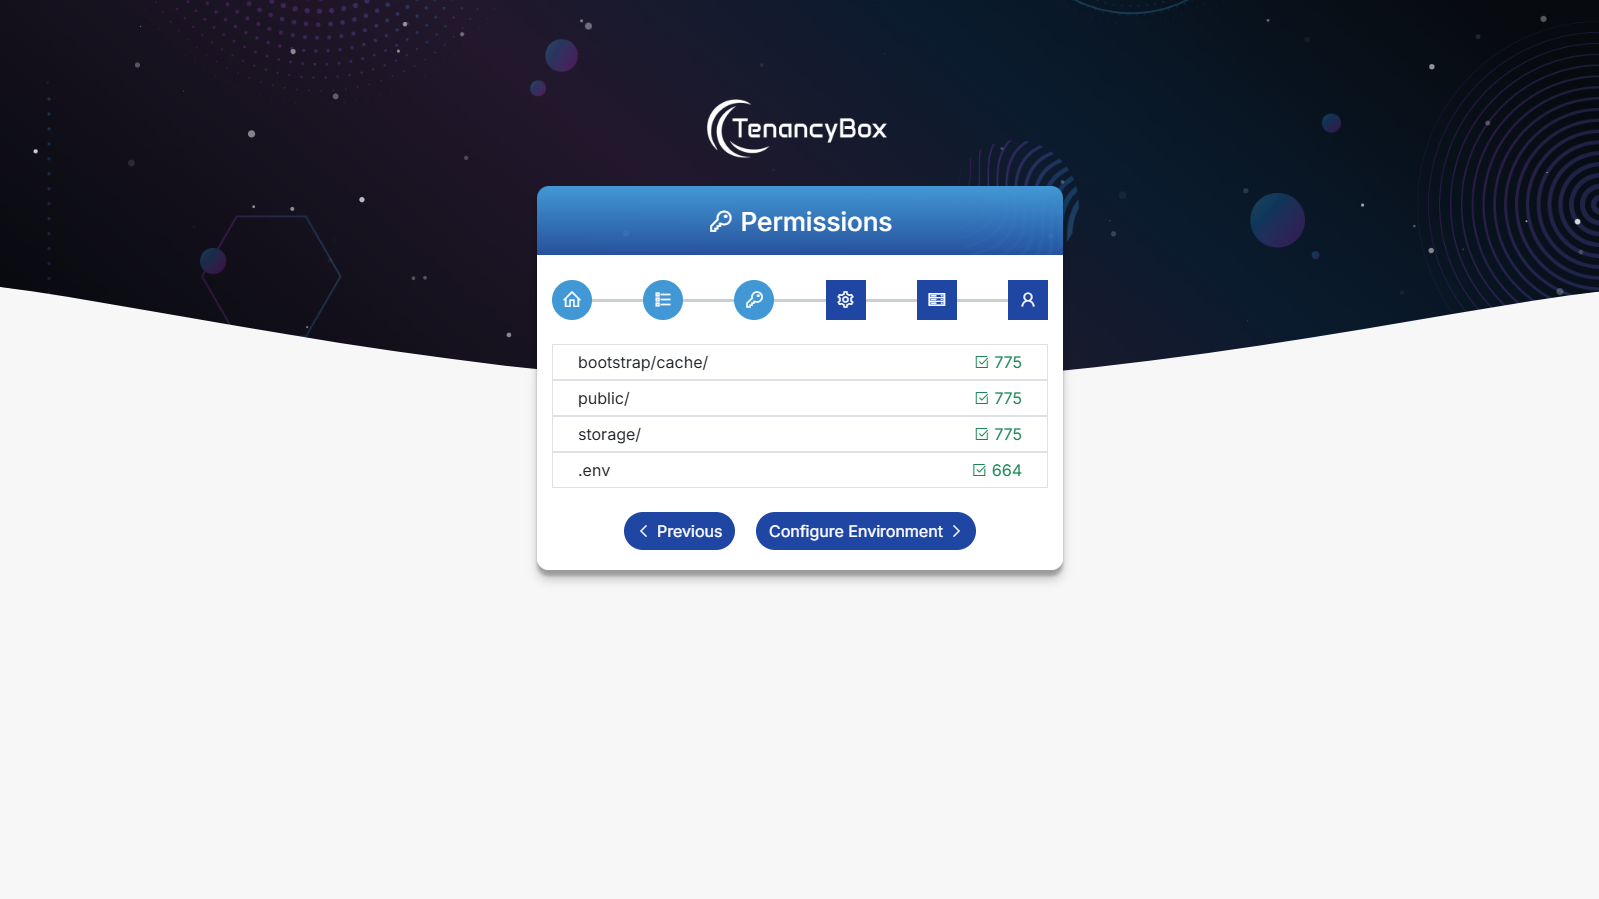
bootstrap/cache=>775public=>775storage=>775.env=>664
Step 5: If everything went well, open your domain URL.
- ( https://example.com/install )
If you have uploaded theInstallationfolder topublic_html/, then your URL becomehttps://example.com/install -
You have to configure host for the tenant (subdomain).
Example:
Domain: https://example.com/installDocument Root: /public_html/tenancyboxServerAlias: *.example.com -
Subdomain
( https://tenancybox.example.com/install )
If you have created your folder/subfolder inside thepublic_htmland uploadedTenancyBox-1.0/Installationfolder's content inside it, then your URL becomeshttps://tenancybox.example.com/install -
You have to configure host for the tenant (subdomain).
Note - It is compulsory to create a new subdomain if you want to deploy the project inside the subfolder. Subdomain document root should be/public_html/folderand access URL should behttps://tenancybox.example.com/installExample :
Subdomain : https://tenancybox.example.com/installDocument Root : /public_html/tenancyboxServerAlias: *.tenancybox.example.com
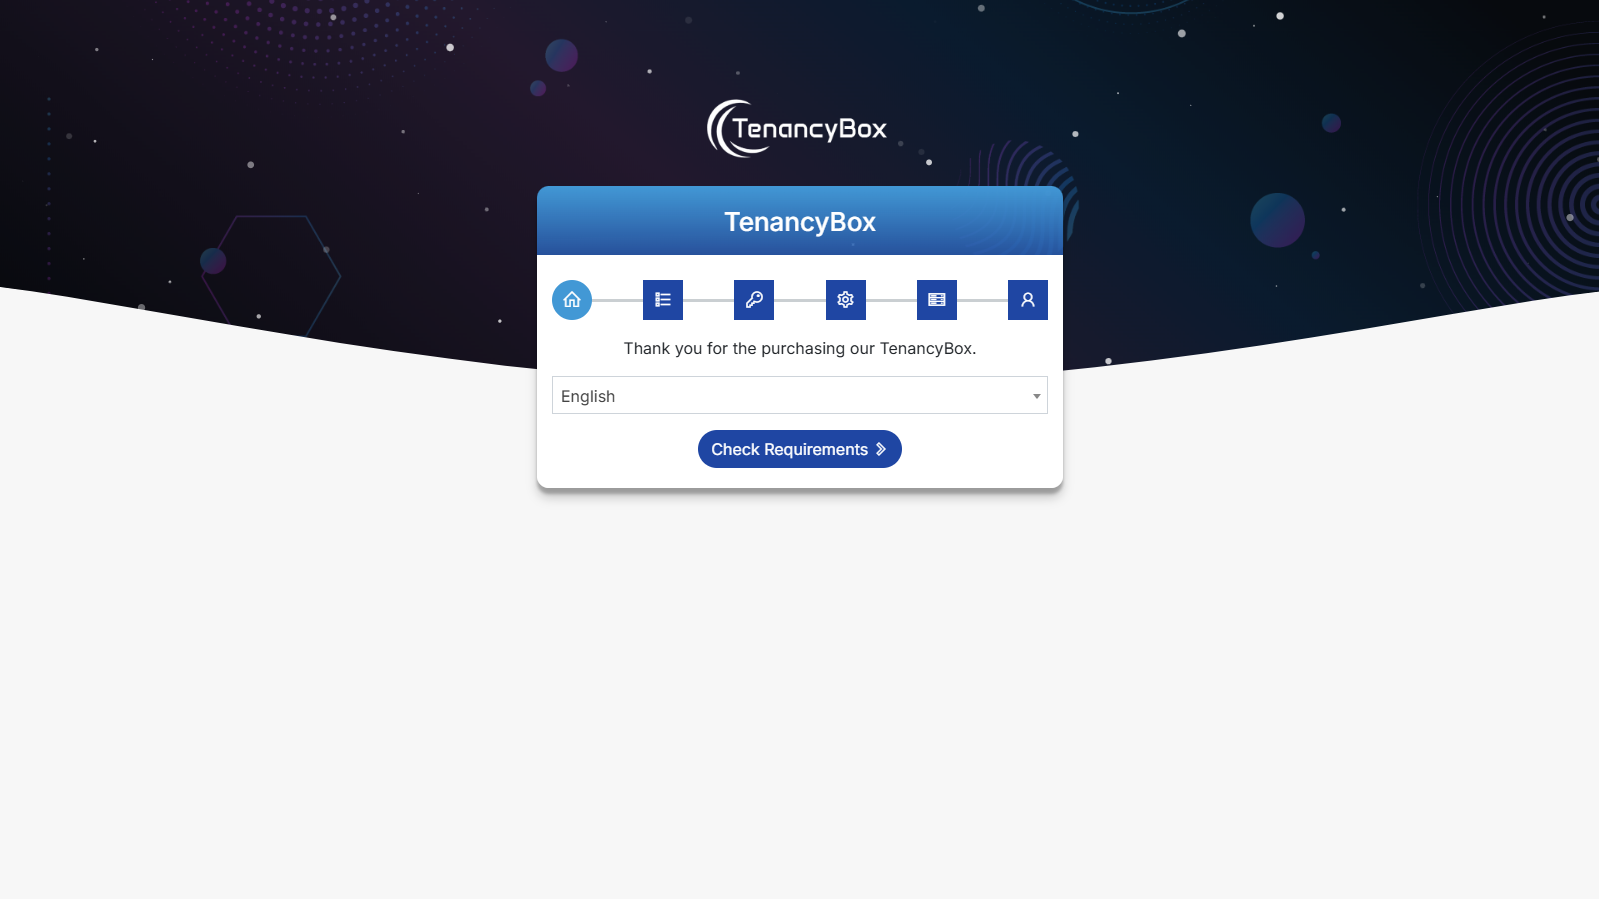
After this, You can see the screen like this. Next, click on the Check Requirements button.
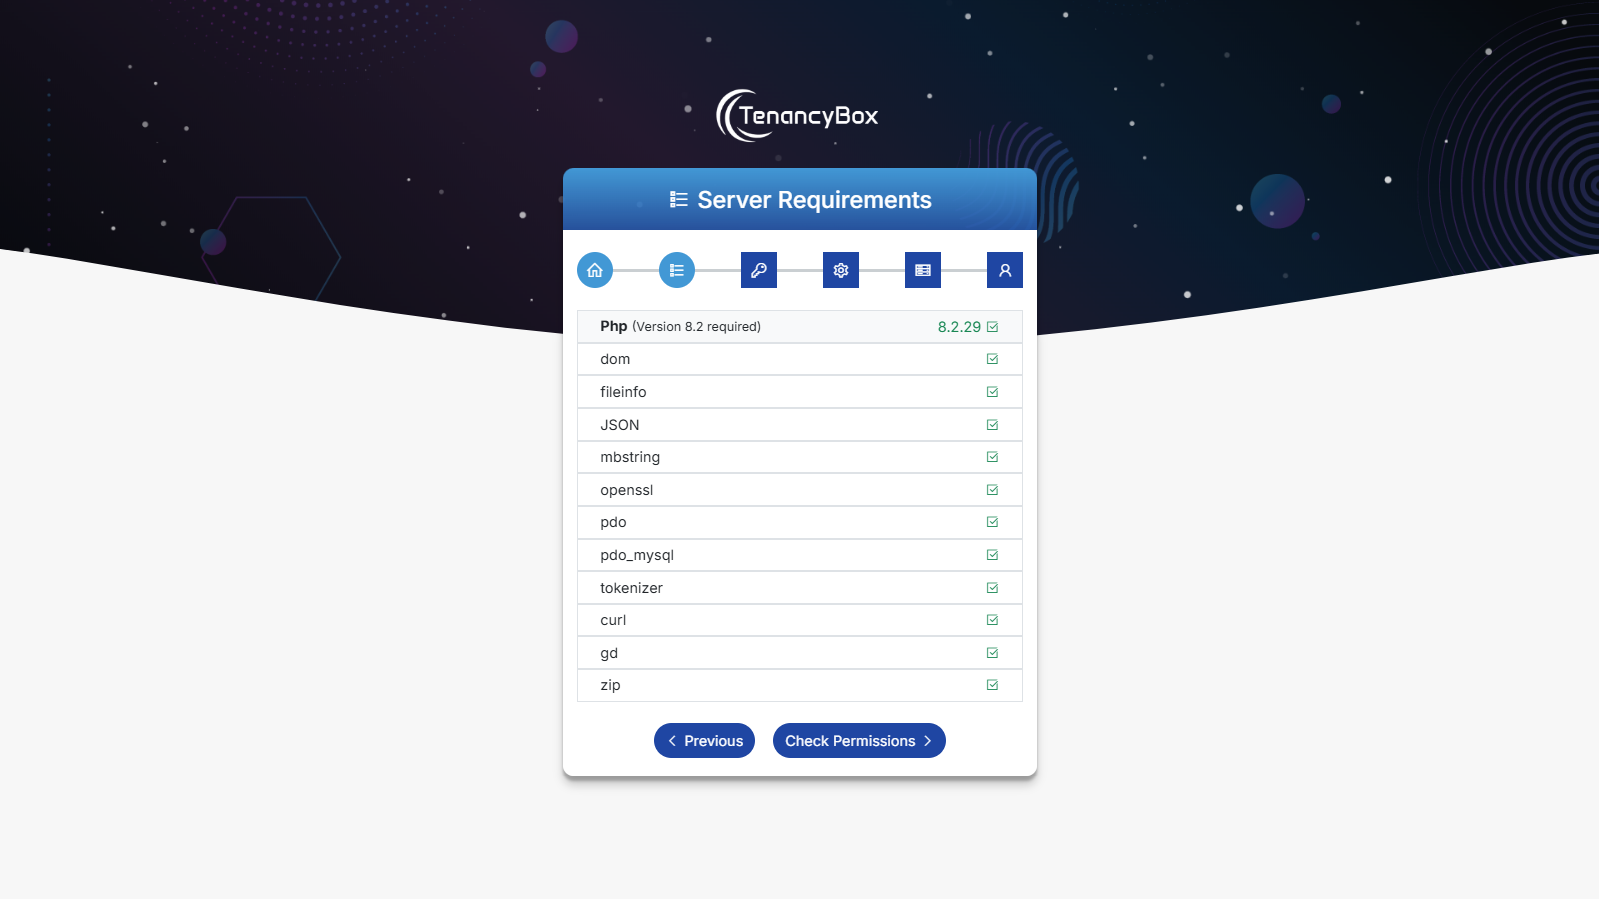
Step 6: Fulfill the server requirements by installing the required following PHP extensions, if not installed. Next, click on the Check Permissions button.
Step 7: Check and give required permissions to the folders/files. Next, click on Configure Environment button.
If you have any issues regarding folder/file permissions, you can give them manually permissions to those folders and files.
To get more help check laravel configuration documentation.
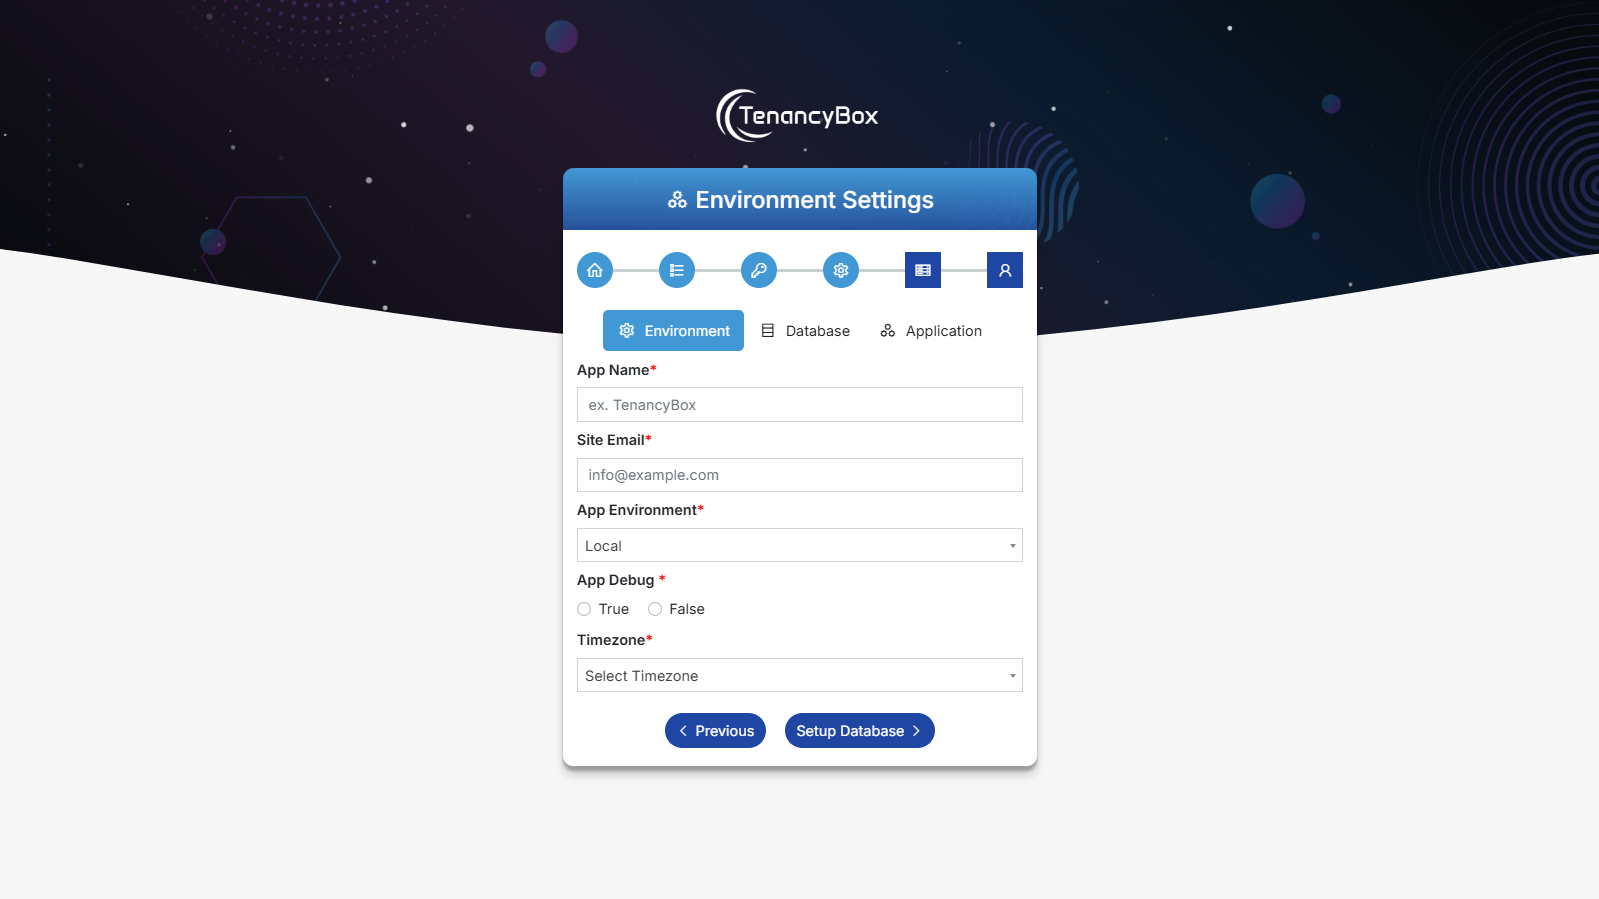
Step 9: Check and set your application environment configurations like the
application's name, email, environment, debug mode, and timezone. This setting will be replaced
with a .env file. Next, click
on the Setup Database button.
- App Name: Your application name, whatever you want.
- Site Email: Your site email, whatever you want.
- App Environment: Select your debugging mode like Local, Development, QA, Production, etc...
- App Debug: Set your application in debug mode or not.
- Timezone: Select the timezone related to your country.
Step 10: Create a database on your web host.
- Most cPanel comes with PHPMyAdmin and MySQL Database Wizard. Use the MySQL Database wizard to create a Database and User, then assign the user to the database allowing all privileges. Note down the username and password you'll need that soon.
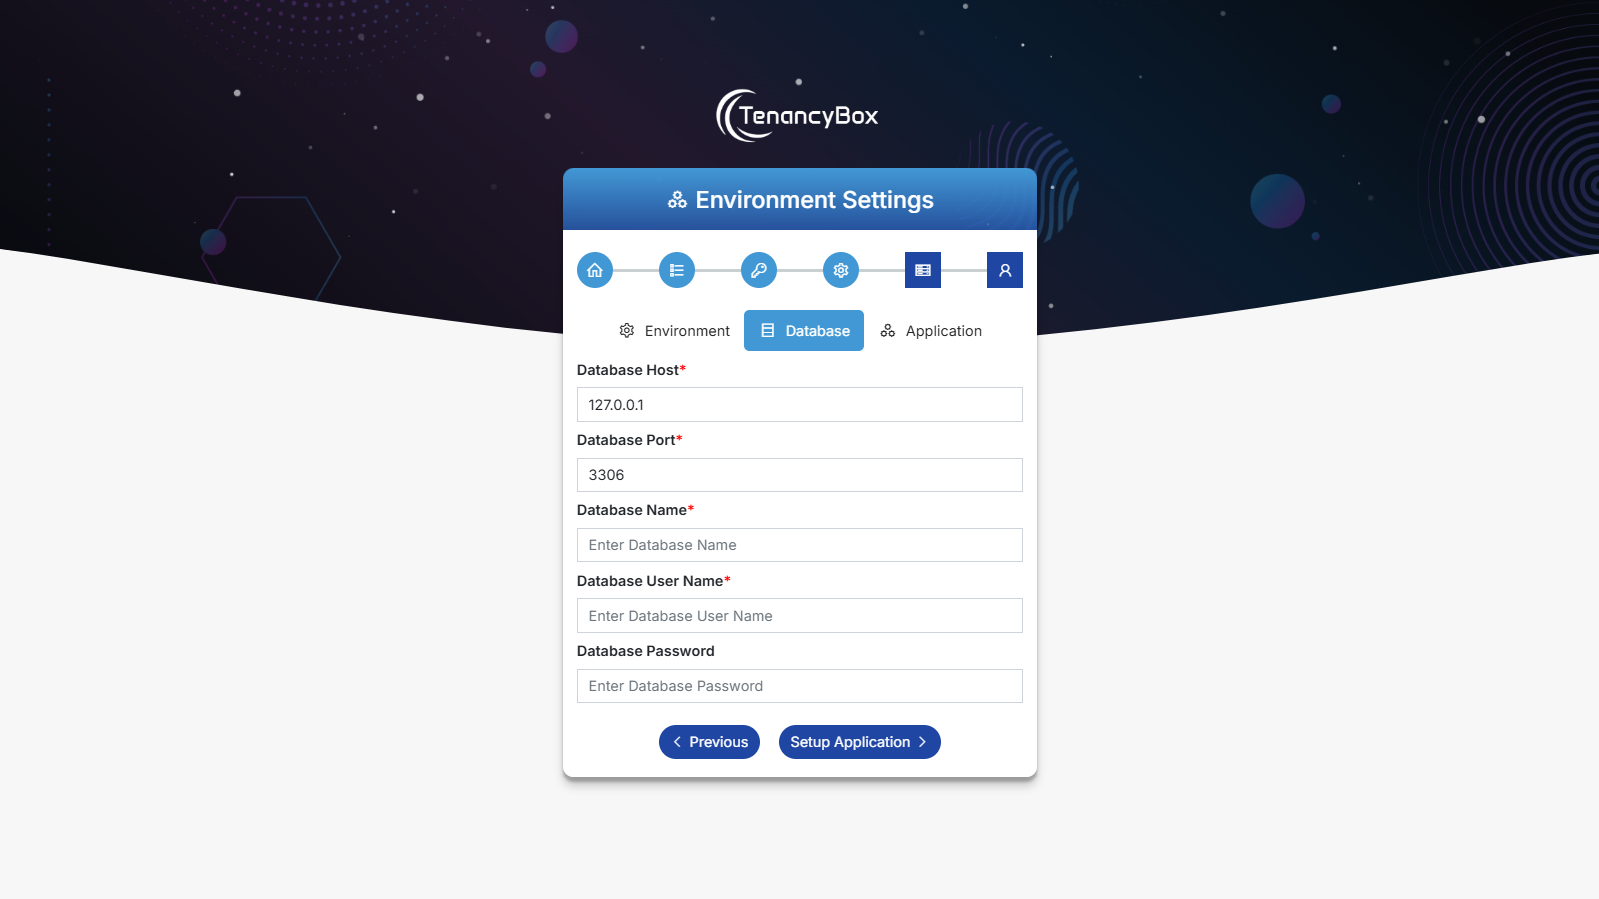
Step 11: Check and set your database environment configurations like database name, host, port, username, and password. Next, click on Setup Application Button.
-
Database Host: Your database host. For more info check your PHPMyAdmin
configurations.
Examples:localhost, 127.0.0.1 -
Database Port: Your database port. For more info check your PHPMyAdmin
configurations.
Example:3306 - Database Name: Your database name.
- Database Username: Your database username.
- Database password: Your database password. This field is optional depending on your PHPMyAdmin login credentials.
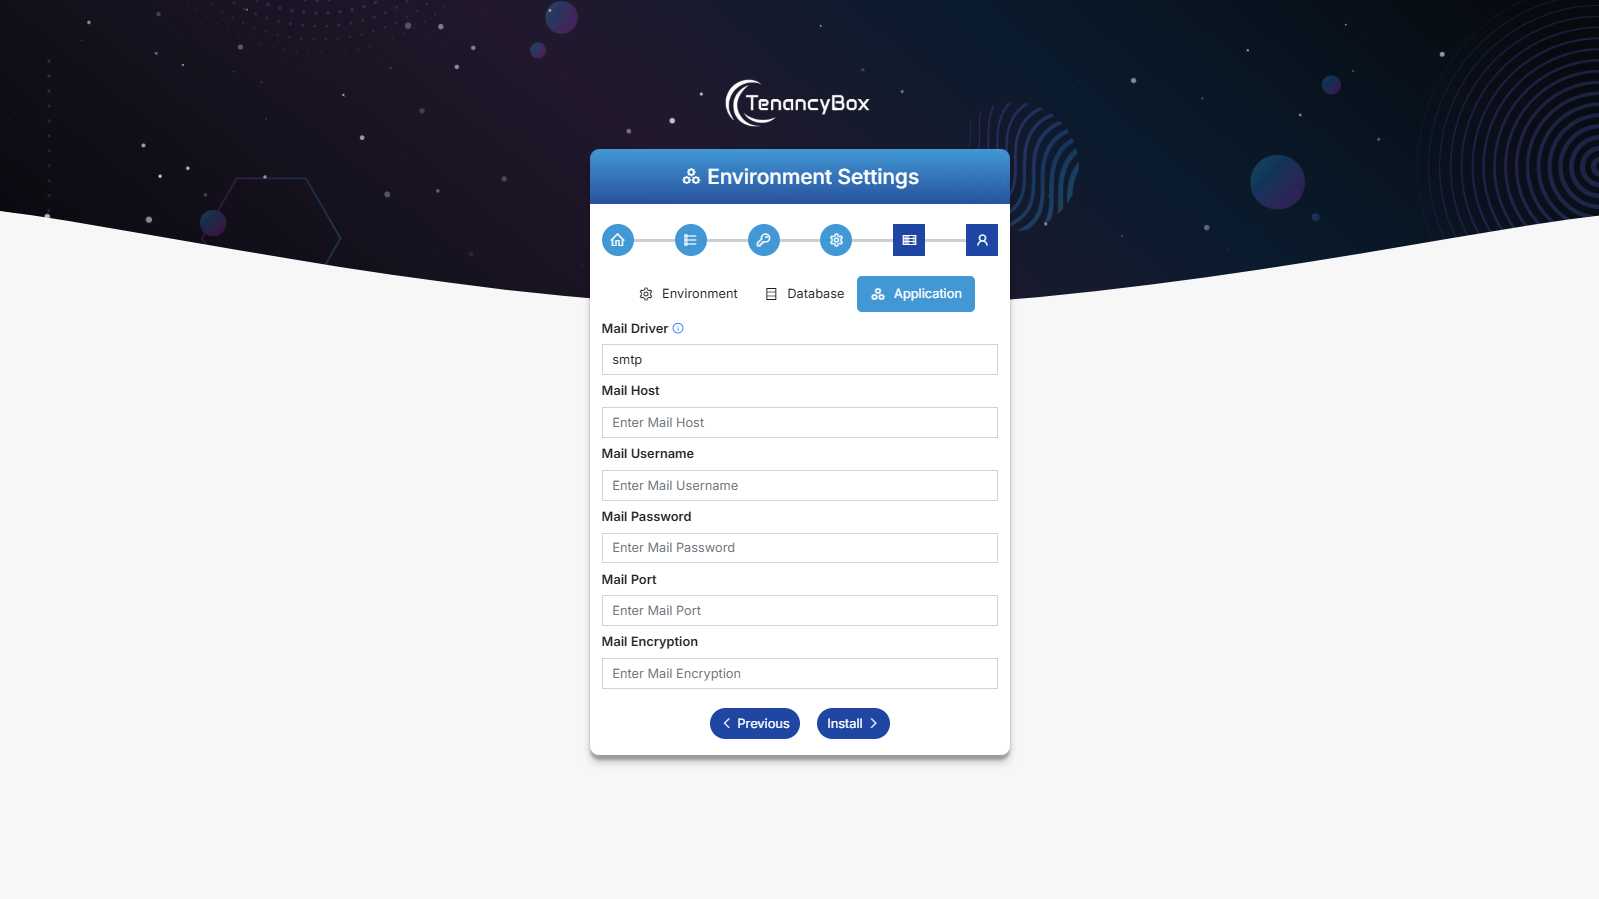
Step 12: Set up your SMTP mail configurations like mail driver, host, username, password, port, encryption, etc. You can skip this step at the time of installation, but it is compulsory to configure email settings for email notification. Next, click on the Install Button.
- Mail Driver: SMTP.
- Mail Host: Your SMTP mail server host.
- Mail Username: Outgoing mail address.
- Mail Password: Outgoing mail password.
- Mail Port: Outgoing mail port.
- Mail Encryption: It should be tls or ssl.
-
Example:
Mail Driver: smtp
Mail Host: smtp.gmail.com
Mail Port: 587
Mail Username: example@gmail.com
Mail Password: Example@123!
Mail Encryption: tlsNote: You can find your server email settings under cPanel Mail Client Manual Settings.
Start -> Email -> E-Mail Accounts -> Connect Device -> Mail Client Manual Settings
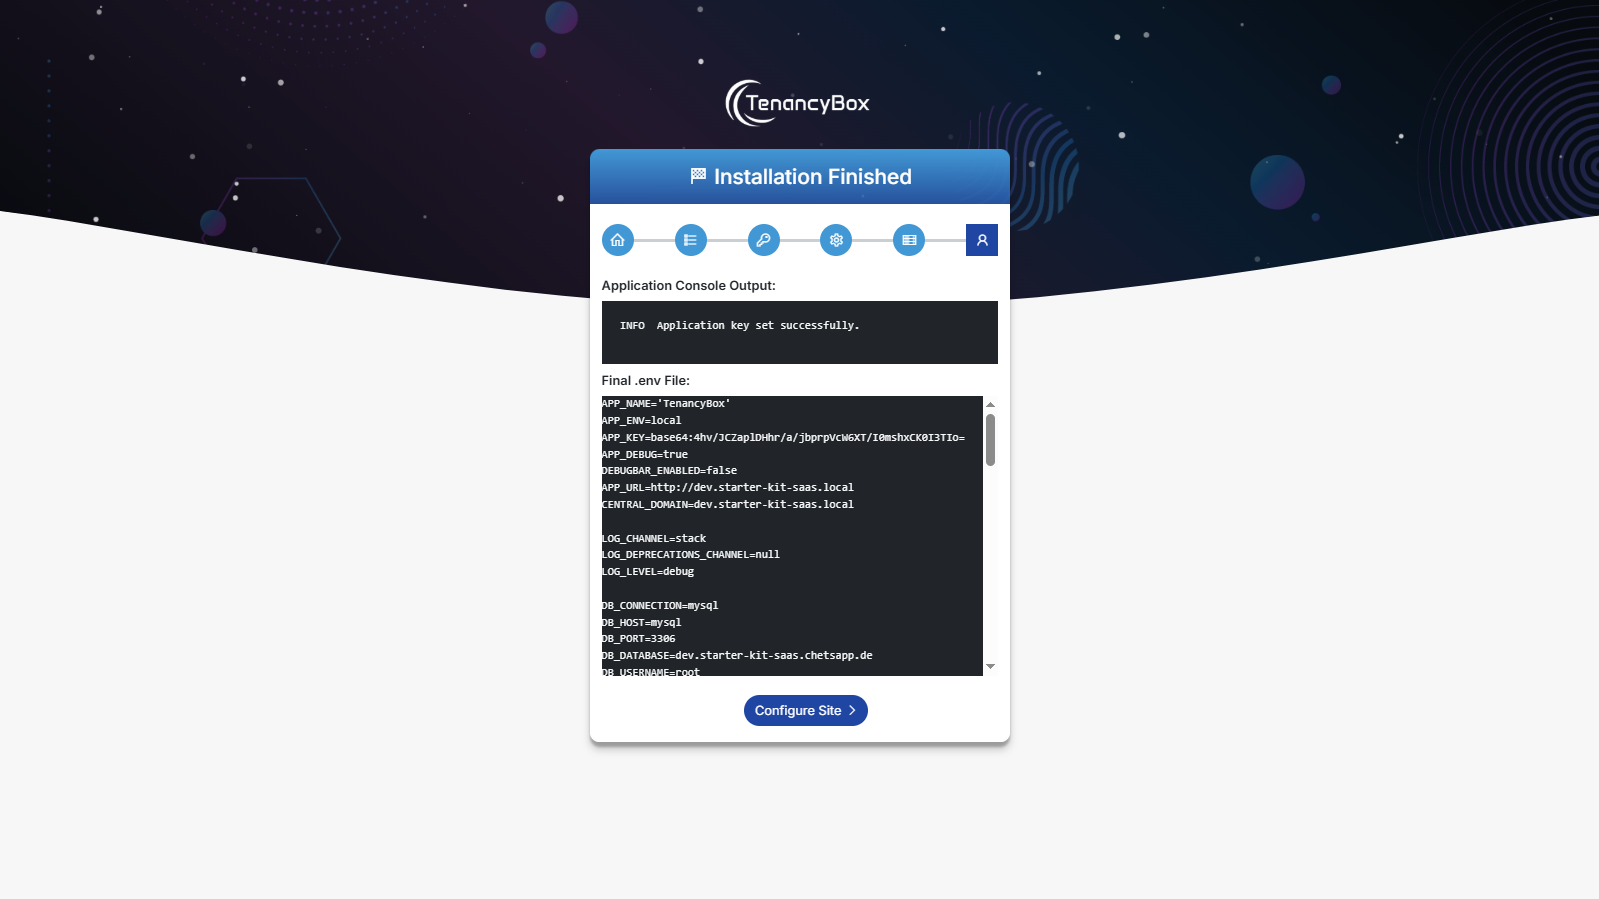
Step 13: After successful installation, you get the following screen, otherwise back to the preview steps. Next, click on the Configure Site button.
Step 14: Configure your site admin user by adding a name, username, email, and password. Next, click on the Save and Finish button.
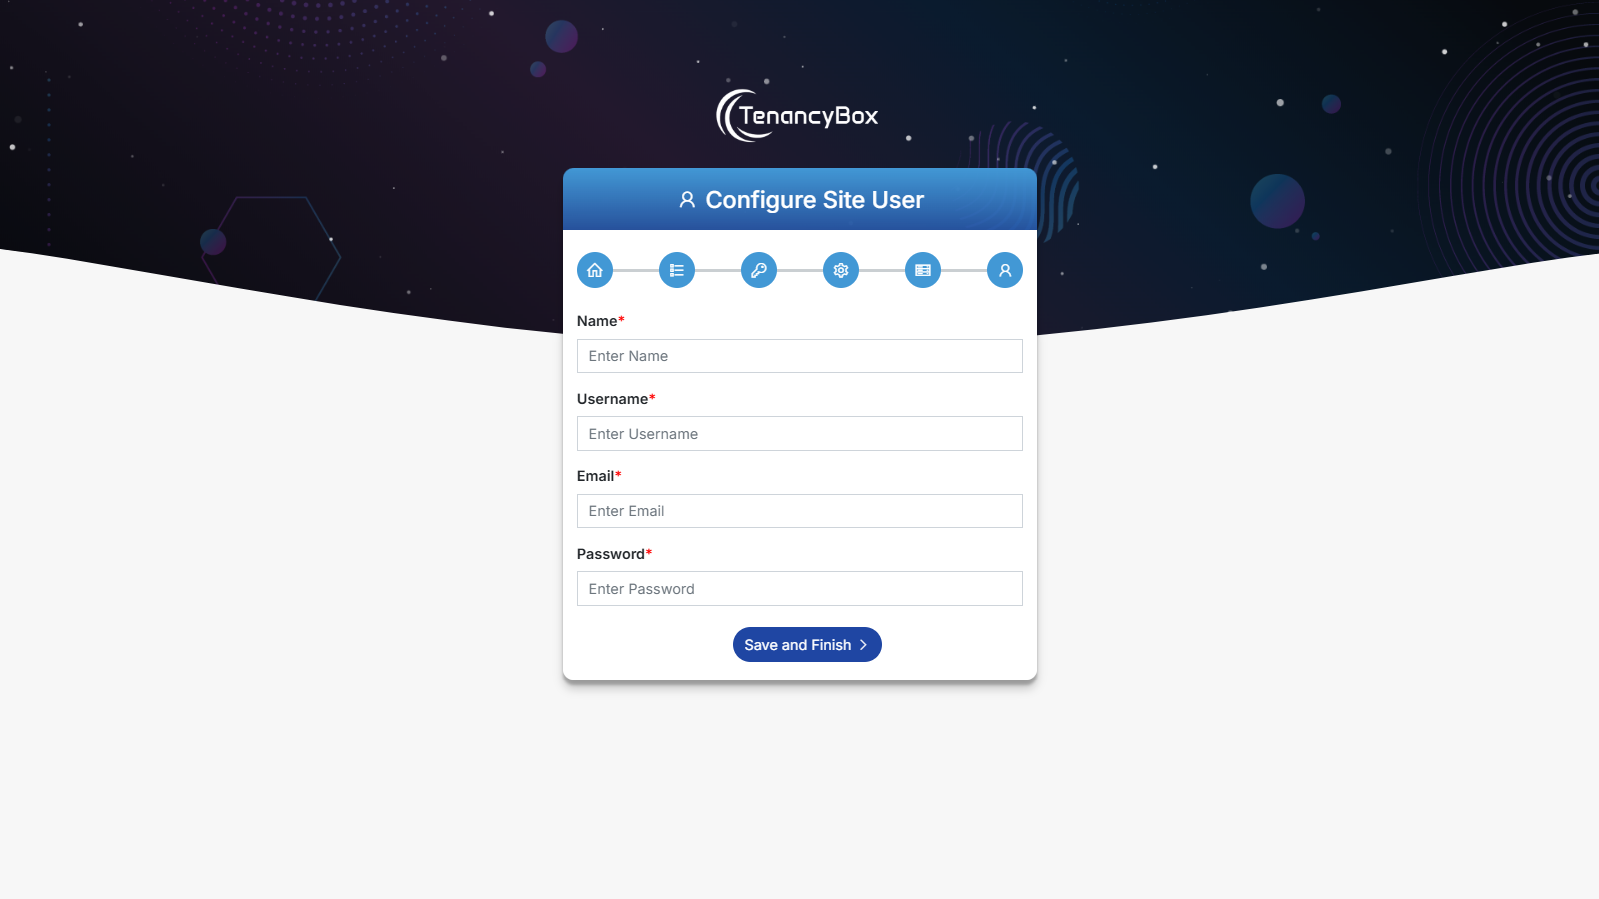
Step 15: After successful installation you can access SaaS admin panel via
https://example.com/login
If you get any issues then read FAQ.
3 Troubleshooting
3.1Prerequisites
Server Requirements
- PHP >= 8.2
- BCMath PHP Extension
- Ctype PHP Extension
- cURL PHP Extension
- DOM PHP Extension
- Fileinfo PHP Extension
- Filter PHP Extension
- Hash PHP Extension
- Mbstring PHP Extension
- OpenSSL PHP Extension
- PCRE PHP Extension
- PDO PHP Extension
- Session PHP Extension
- Tokenizer PHP Extension
- XML PHP Extension
- JSON PHP Extension
- PHP Zip Extension
- mod_rewrite Apache
- Cron (Running Per Minute)
- Composer
Install Composer (Globally)
To get more help check composer documentation.
3.2FAQ
- Check the
.envfile exists on the project root folder. If not then upload from zip.
Installation\lang\
4 TenancyBox Key Features
- An Efficient Dashboard
- Role-wise permission and menu
- Dark + Light Color Schemes
- Menu with background image
- Integrated 5 Icon sets
- Useful helper classes
- Date Picker, Time Picker and DateTime Picker
- DataTables
- Organized Folder Structure
- SCSS Support
- Cross Browser Compatibility with Edge, Firefox, Safari, Opera, Chrome
- Mobile Compatible
- Creative Layout
- Clean and Professional Code
- Easy to Customize
- Email Queue
- & much more...
5 How to Use
TenancyBox is easy to use among all users. Please note the below steps for How to use TenancyBox.
Super Admin
After login into the TenancyBox SaaS tool with your credentials, you can see the dashboard appear on the screen.
- 1. Manage packages by clicking the Packages menu from the left sidebar. now you can see the default packages listing page appear on the screen. Here you can create a new package, edit an existing package, and delete the package. Also, you can set max users limit, package duration and price, package modules, and Stripe plan id, PayPal plan id for the payment.
- 2. Manage companies by clicking the Companies menu from the left sidebar. Here you can create a new company, edit company details, change the company package, and delete the company.
- 3. Manage company bills by clicking the Billing menu from the left sidebar. Here you can manage offline payments (Verify, Reject, Download, etc ...) also you can check online payments and download them.
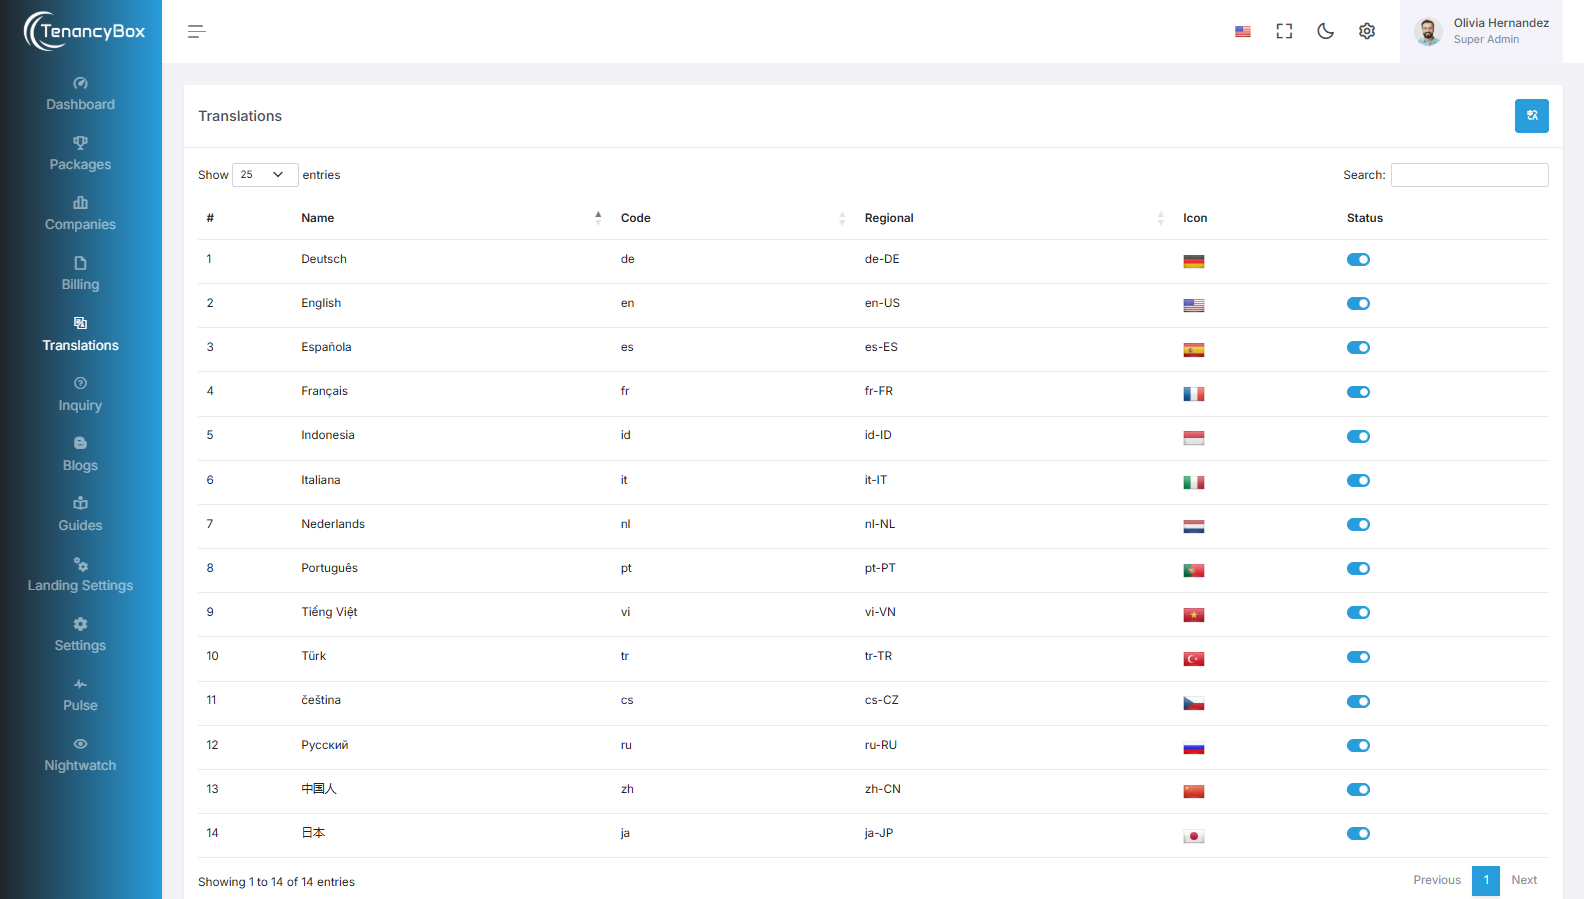
- 4. Manage languages by clicking the Translation menu from the left sidebar. You can change the icon and Enable/Disable language. Also, you can update the translation using the translation manager.
- 5. You can see Inquiries by clicking the Inquiries menu from the left sidebar. Here you can manage the status accordingly.
- 6. You can see landing page settings by clicking the Landing Settings menu from the left sidebar. Here you can manage landing page content and theme settings.
- 7. You can see tool settings by clicking the Settings menu from the left sidebar. Here you can configure all settings like company details, system, Theme, Email (SMTP), Email Template Modify, Notification enables/disable, Cron job, Database backup, Payment, and Bill.
Company
After signing up a new company. An admin user can login into the TenancyBox tool with credentials, user can see the dashboard appear on the screen.
The initial registered user has full admin rights to manage TenancyBox also we have included 3 default roles that can be manageable from HRM -> Roles
- Admin - can have full access.
- Employee - has limited access to selected modules.
- 1. Manage roles by clicking the roles menu from the left sidebar. Now you can see that the roles the listing page appears on the screen. Create/edit a role by clicking on the buttons. You can change permissions (View, Create, Edit, Delete) of modules on the role detail page.
- 2. Create users by clicking the users menu from the left sidebar. Now you can see that the users listing page appears on the screen. Create users with fill-up necessary fields and also assign permissions to that users using roles (Like admin, employee, etc).
- 3. Billing to view your current plan, usage, and billing details. You can Change Package to upgrade/downgrade your plan. View bill history in the Bills section with details like amount, status, and duration. Use Online or Offline Payment tabs to track payments separately.
- 4. Module Generator from the sidebar to see all modules. Create Module to add a new module with table name, module name, and icon. Add columns with type, input type, default, and validation rules. Create to save the module. Use the Status toggle and Actions for edits.
You can know more about roles, users, settings and other modules in detail in the below section.
6 Super Admin Module
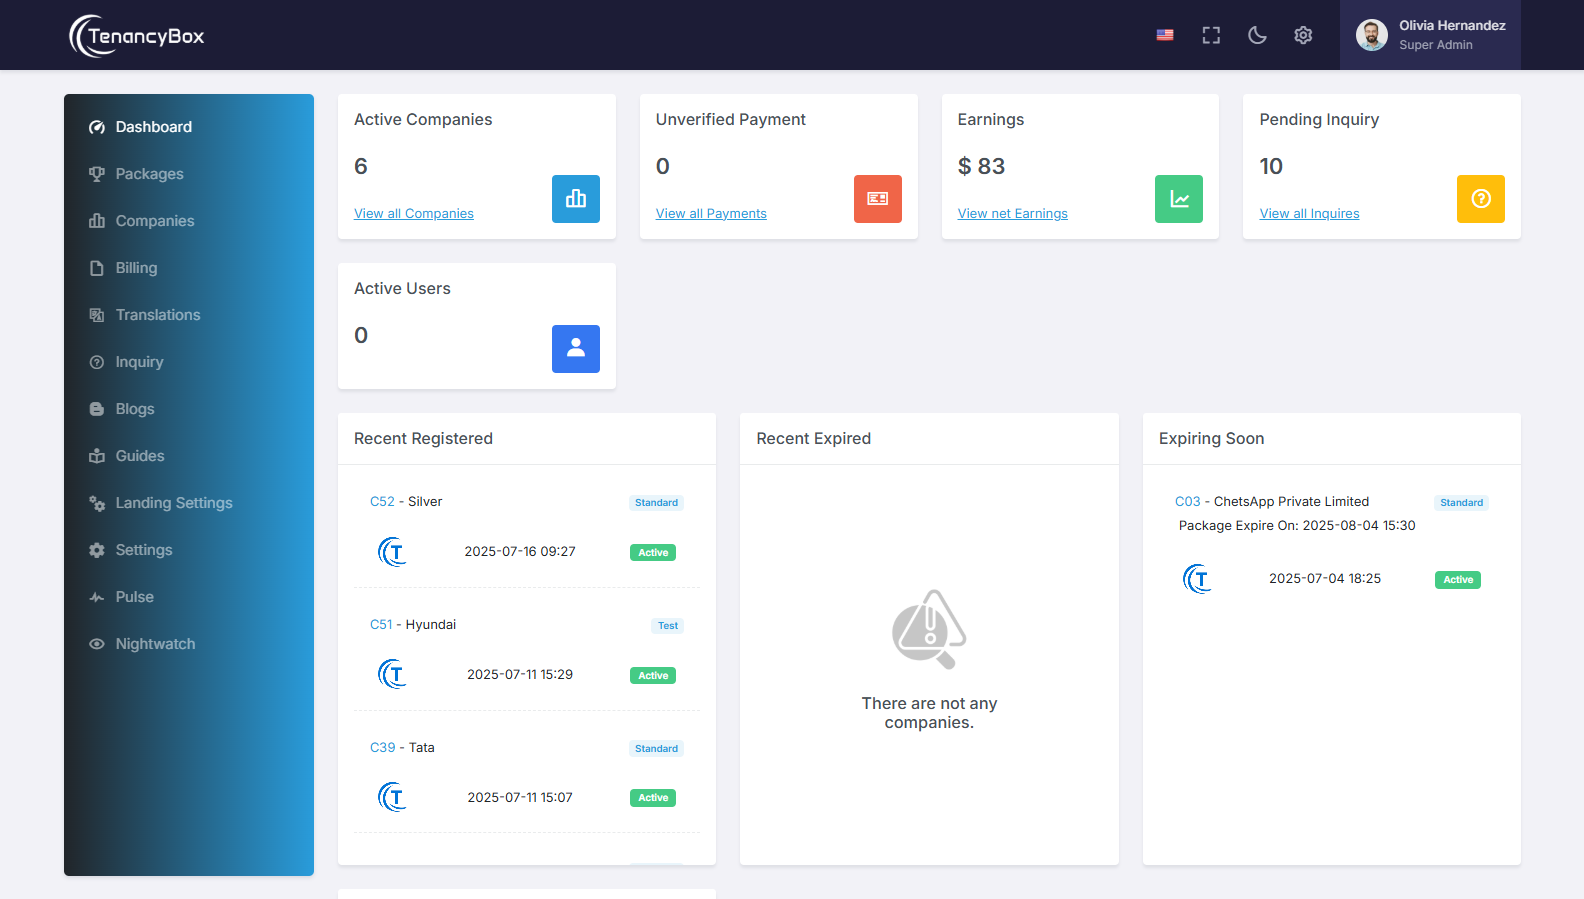
Dashboard
- Active company count, unverified payment requests, earnings, and pending inquiries are shown in the dashboard widgets.
- The list of recently registered and expired companies, along with the activity list, gives you a deeper understanding of what's going on in your companies.
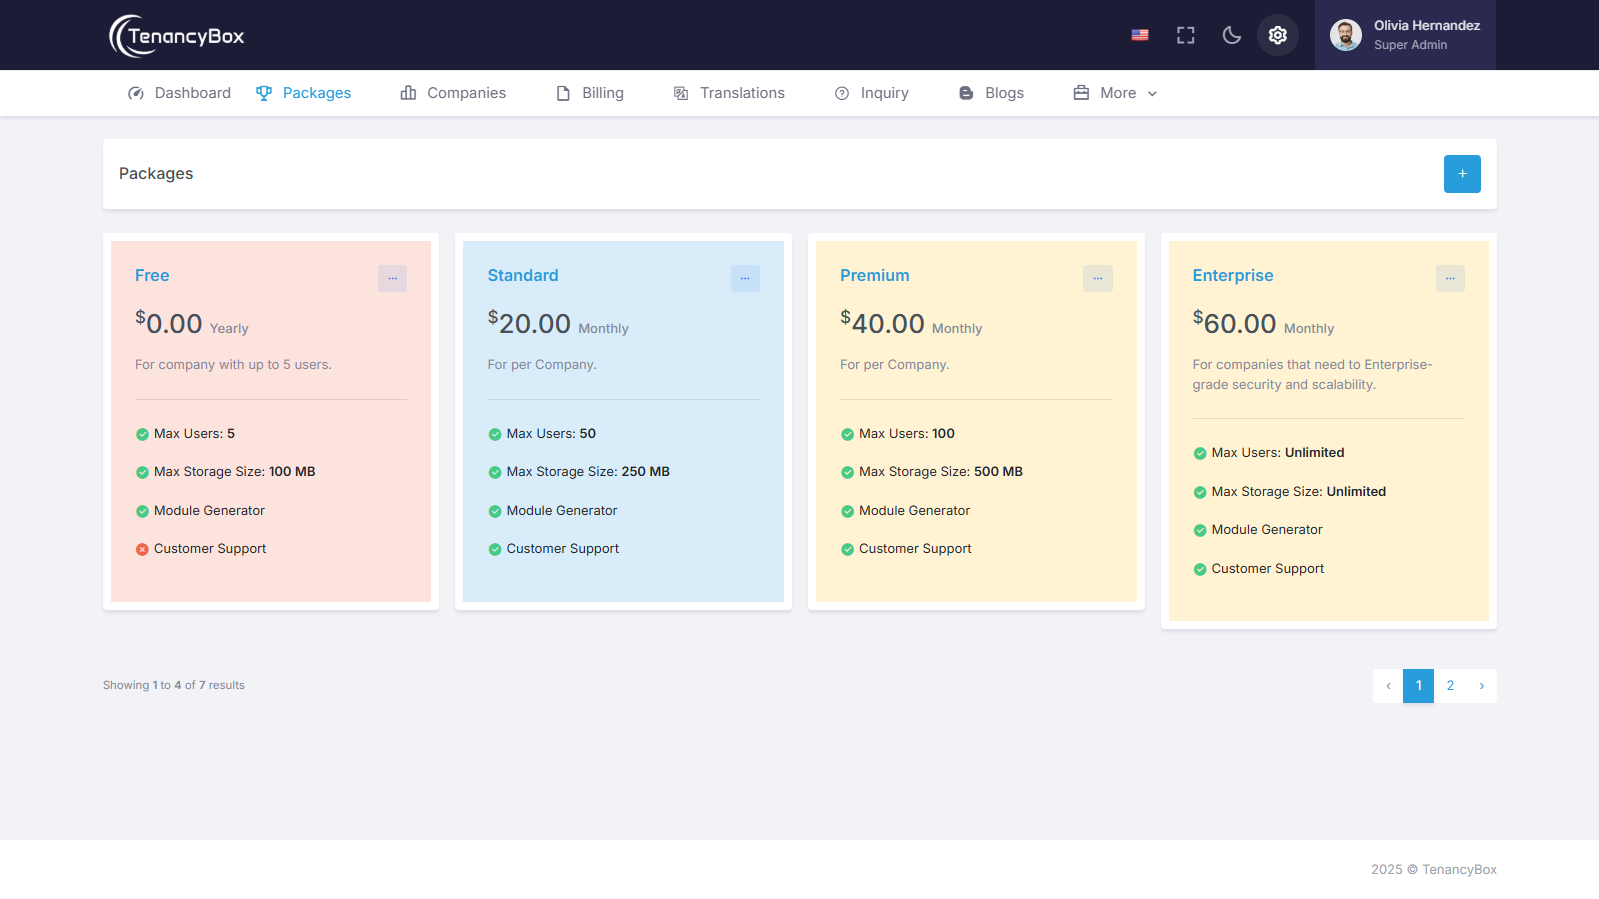
Packages
- Create, edit, and delete packages based on your business needs.
- You can change the price, duration and number of users limits as needed.
- You can also restrict modules in particular packages by unchecking them.
- The free package is the default package with user limits, and you can modify it as well.
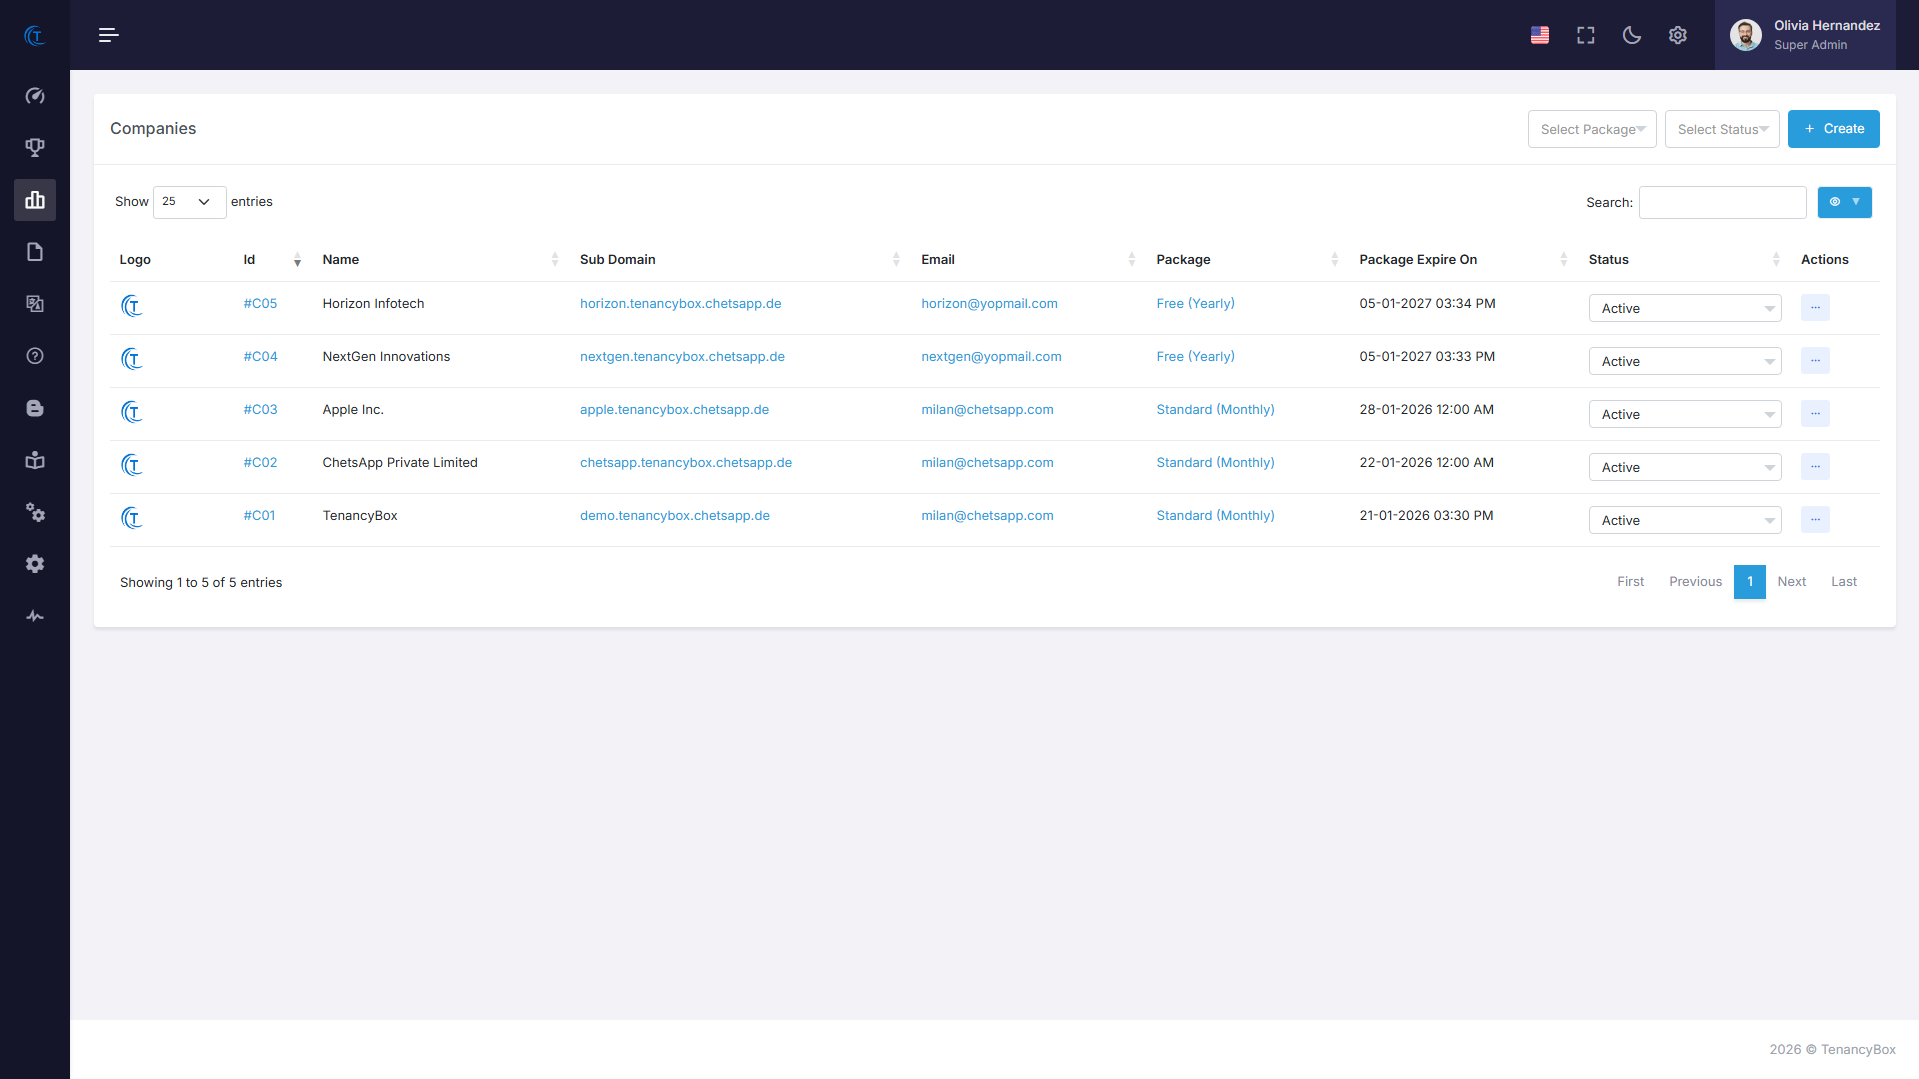
Companies
- Create company admin information and other details, such as company logo, email, and language.
- You can update, view, change the status, and delete companies.
- A list of companies with their package expiration date and current package.
- Use filters and the column visibility option for your convenience.
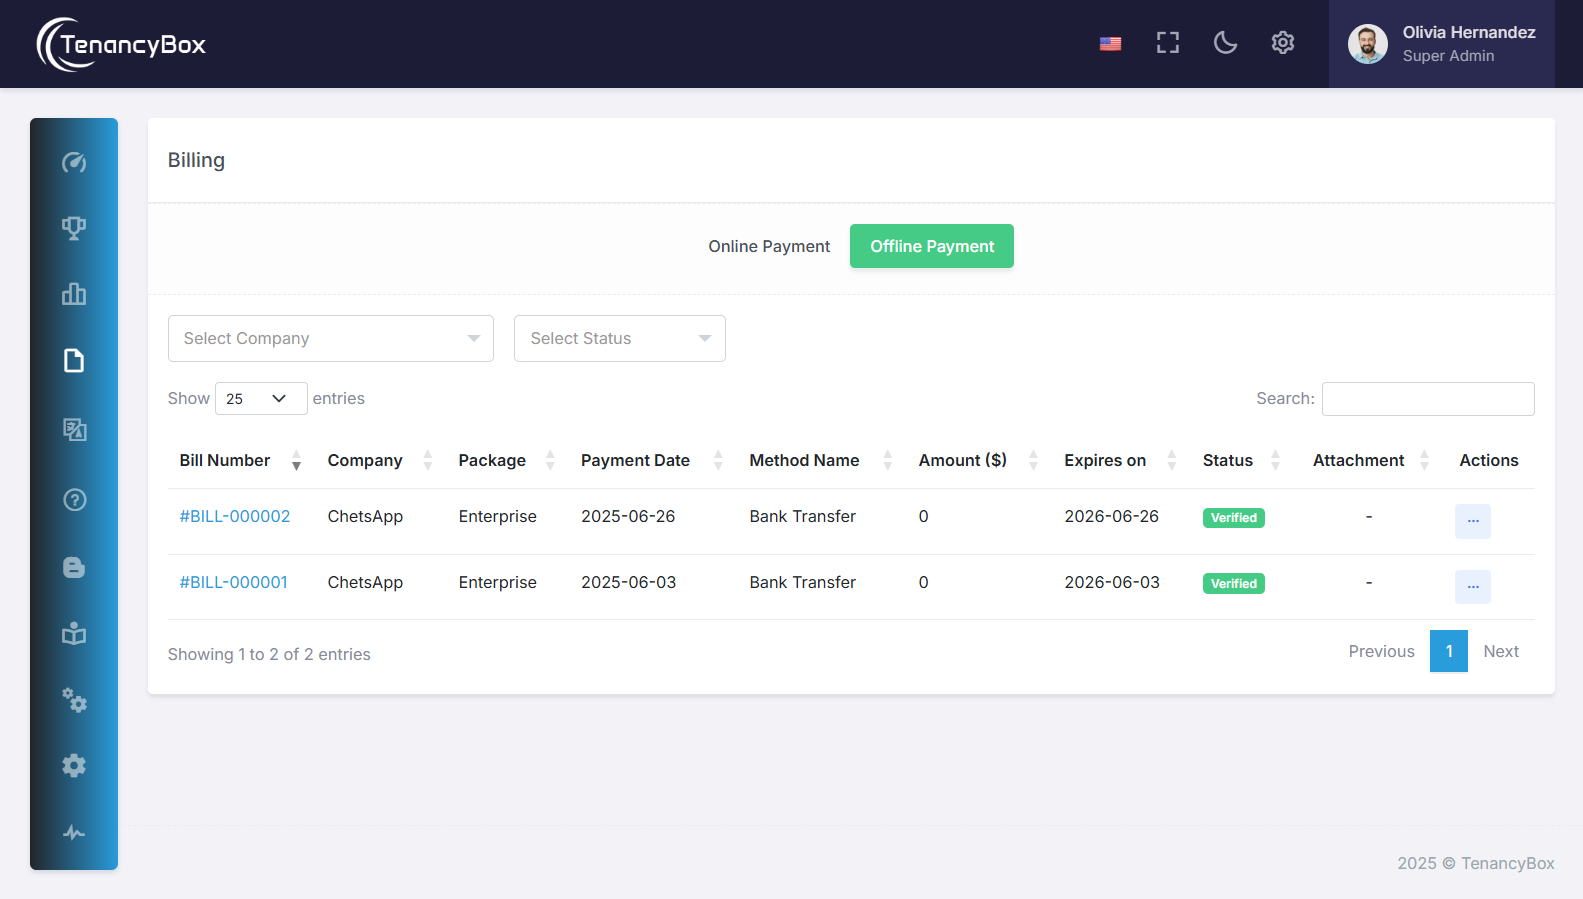
Billing
- It shows offline and online payment transactions with bill numbers, amounts, and other bill details of registered companies.
- You can verify, reject, and view payment requests from companies here.
- Use filters to sort companies' transactions.
Translation (Languages)
- A list of available languages with their language codes and icons.
- You can activate/inactivate a particular language as per your needs.
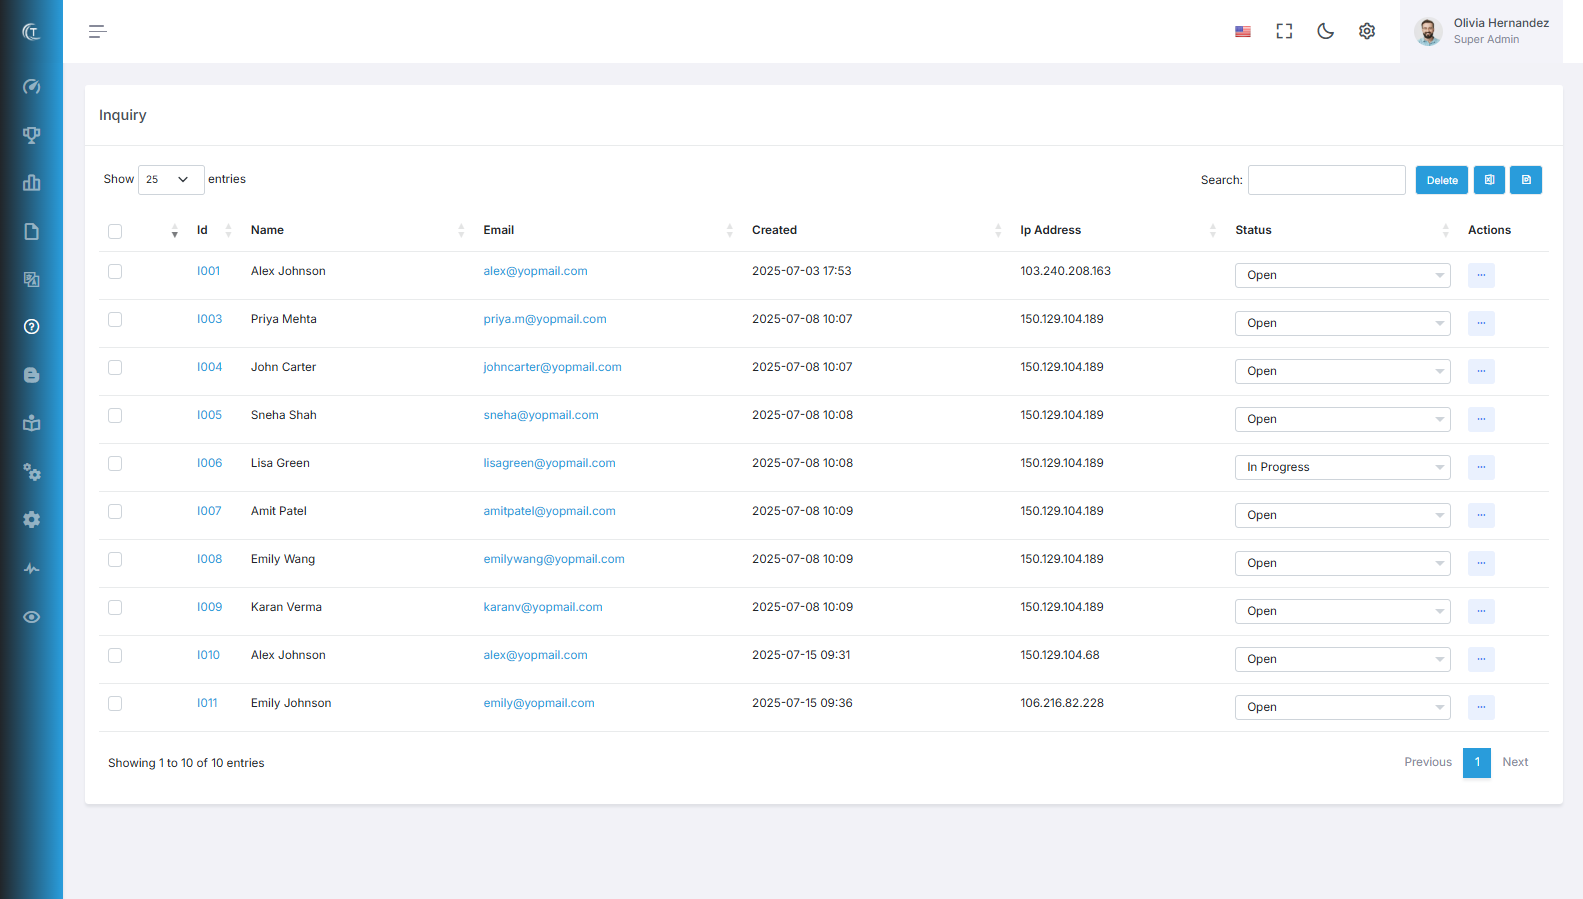
Inquiries
- A list of user inquiries from the landing page of TenancyBox, along with the user's IP address.
- You will receive an email notification when it is created.
- You can change the status of the inquiry by selecting an option from the dropdown.
- You can also reply to the inquiry via email.
- In the detail page, you can create your history records, as well as edit and delete the records.
- Export all inquiries to Excel and PDF.
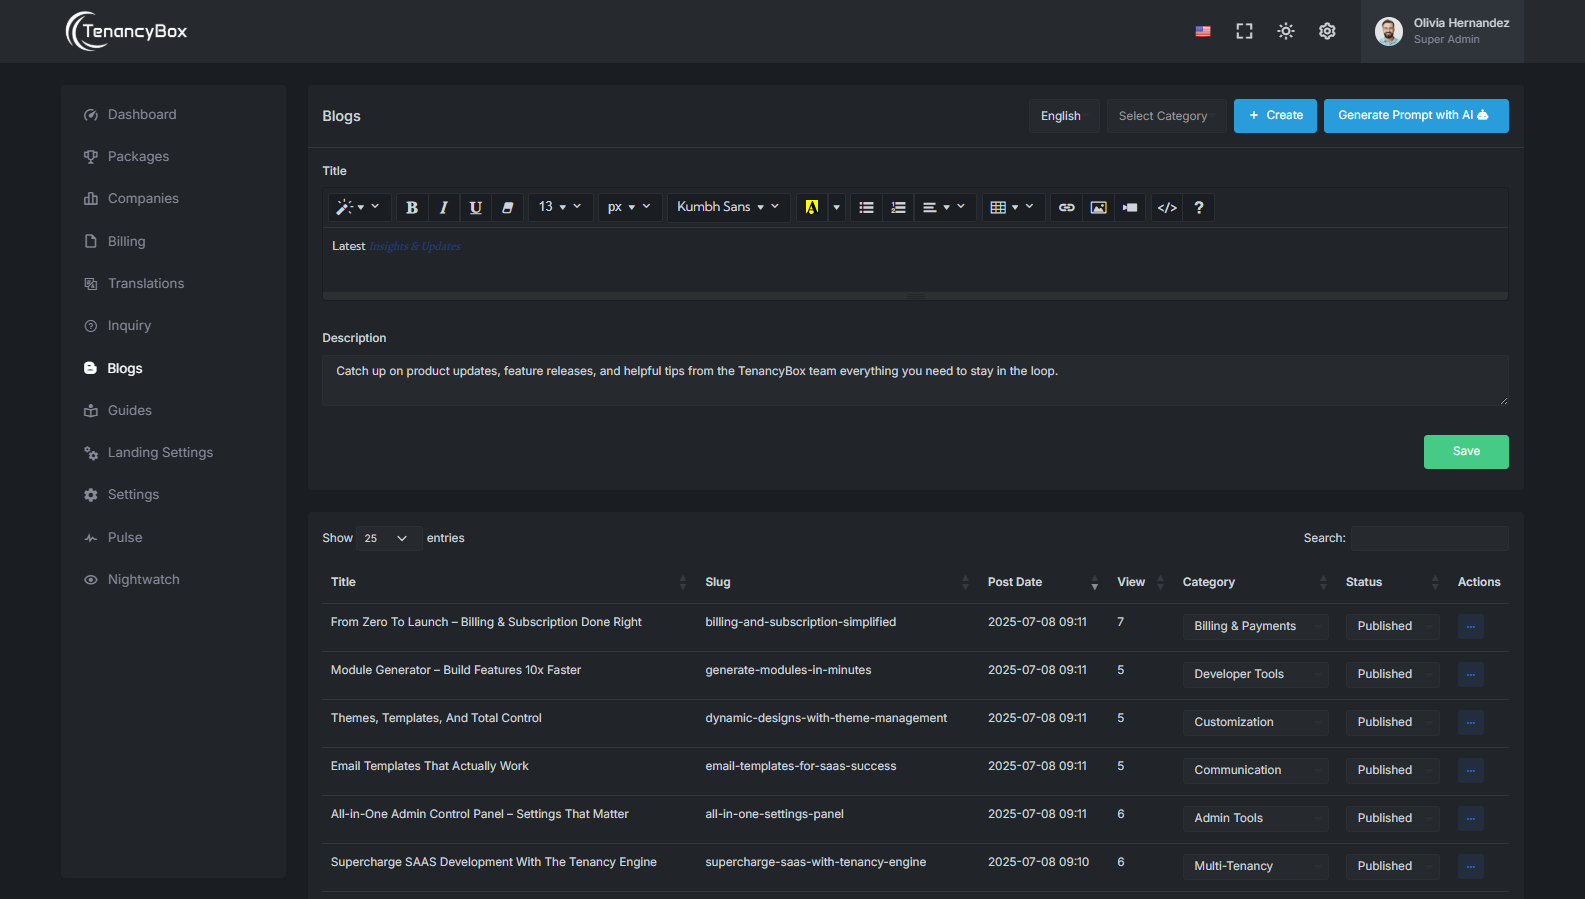
Blogs
- The Blog Module is a content management tool for creating, organizing, and customizing blog posts within a website.
- Easily add, edit, and organize blog posts with categories and status updates.
- Simple navigation with search, pagination, and filtering features to manage blog entries effectively.
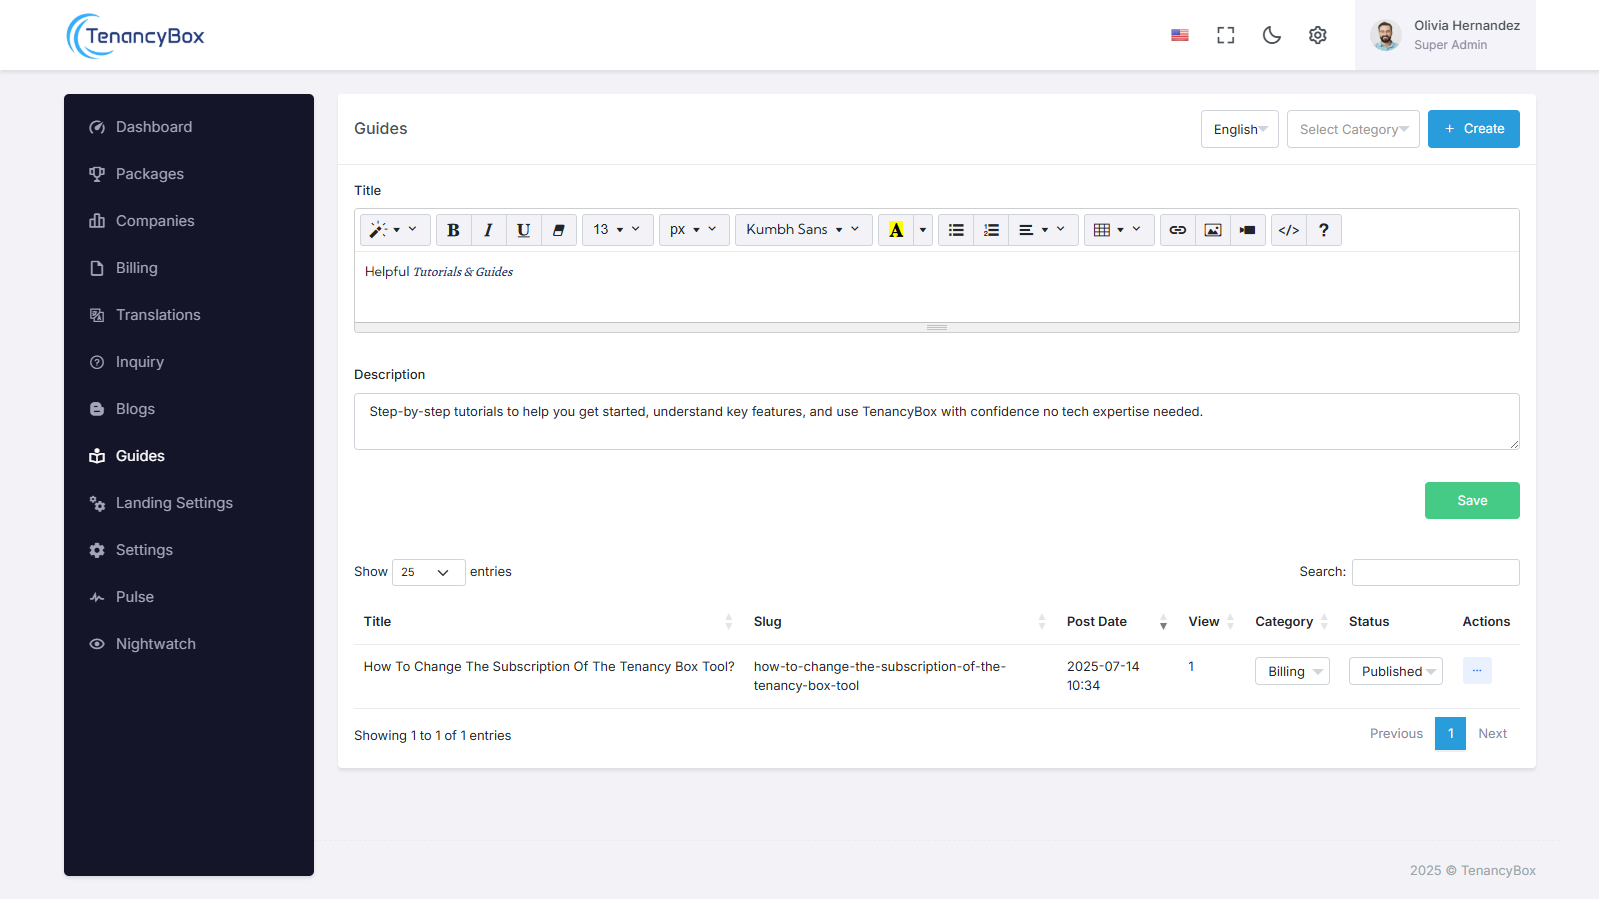
Guides
- The Guide Module is used to create, manage, and customize user-friendly tutorials and guides, helping users understand and effectively utilize the software's features and functionalities.
- Add, edit, and organize guides and tutorials with categories and status updates.
- Display entries with pagination and search functionality for easy navigation.
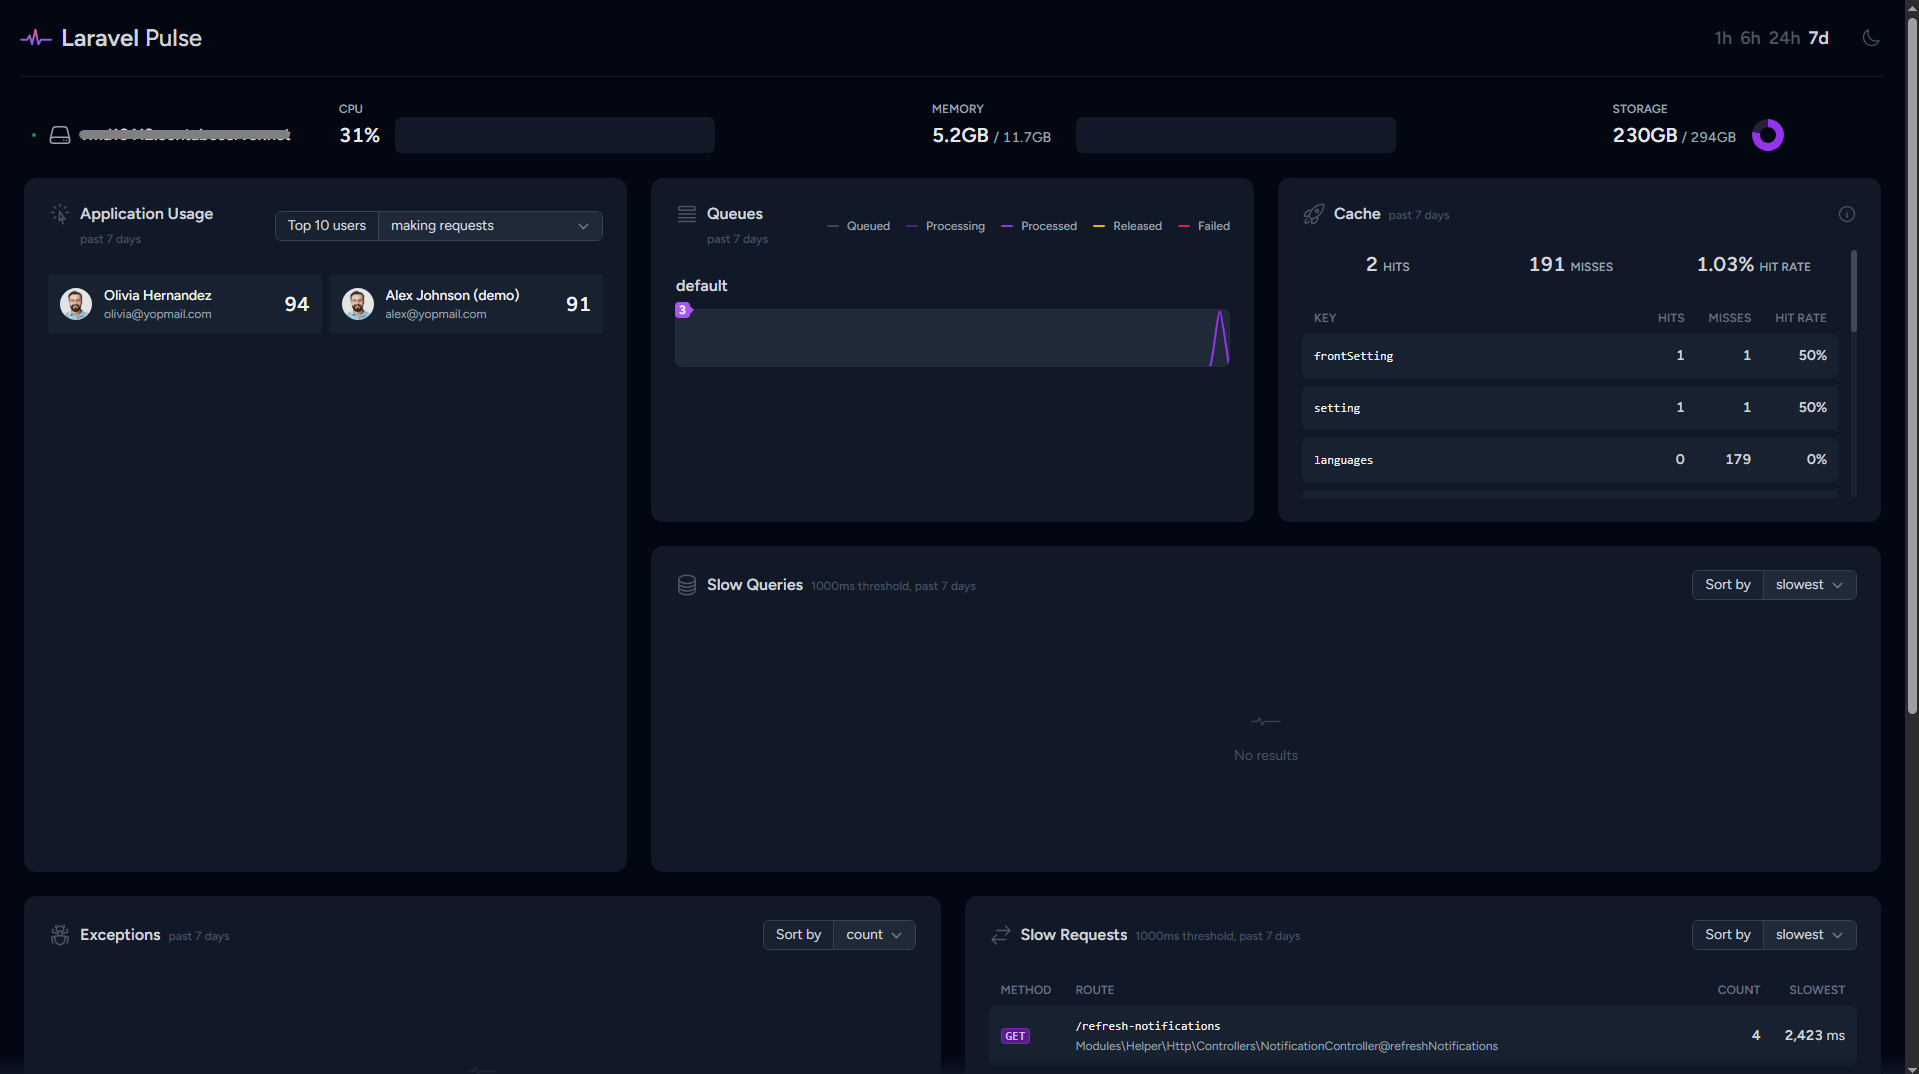
Pulse
- The Pulse module provides real-time monitoring of application usage, including user activity, queue processing, cache performance, slow queries, exceptions, and slow requests to optimize system performance and troubleshooting.
- It offers detailed insights into the application's health, helping developers quickly identify and address performance bottlenecks and errors.
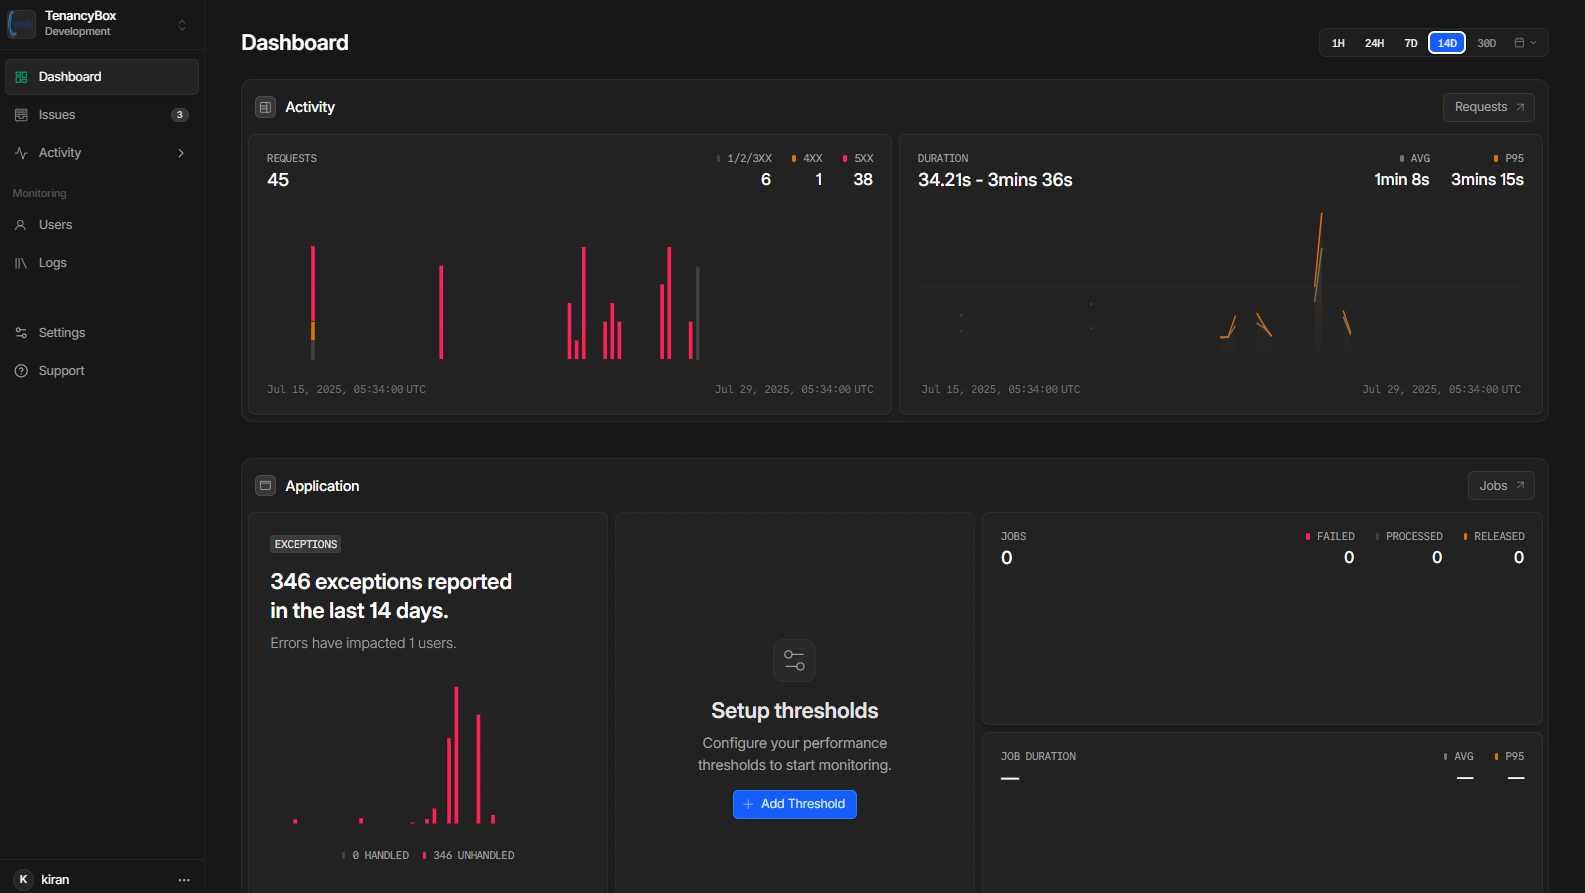
Nightwatch
- The Nightwatch module enables real-time exception monitoring across your entire platform, capturing application errors and unexpected issues across tenants.
- It allows super admins to track, analyze, and debug problems efficiently through centralized error logs, reducing downtime and improving reliability.
- Integration is achieved by configuring a secure API URL and token, with status toggling to enable or disable monitoring as needed.
- Nightwatch enhances platform observability, empowering your team to proactively respond to issues before they impact users.
7 Landing Page Settings
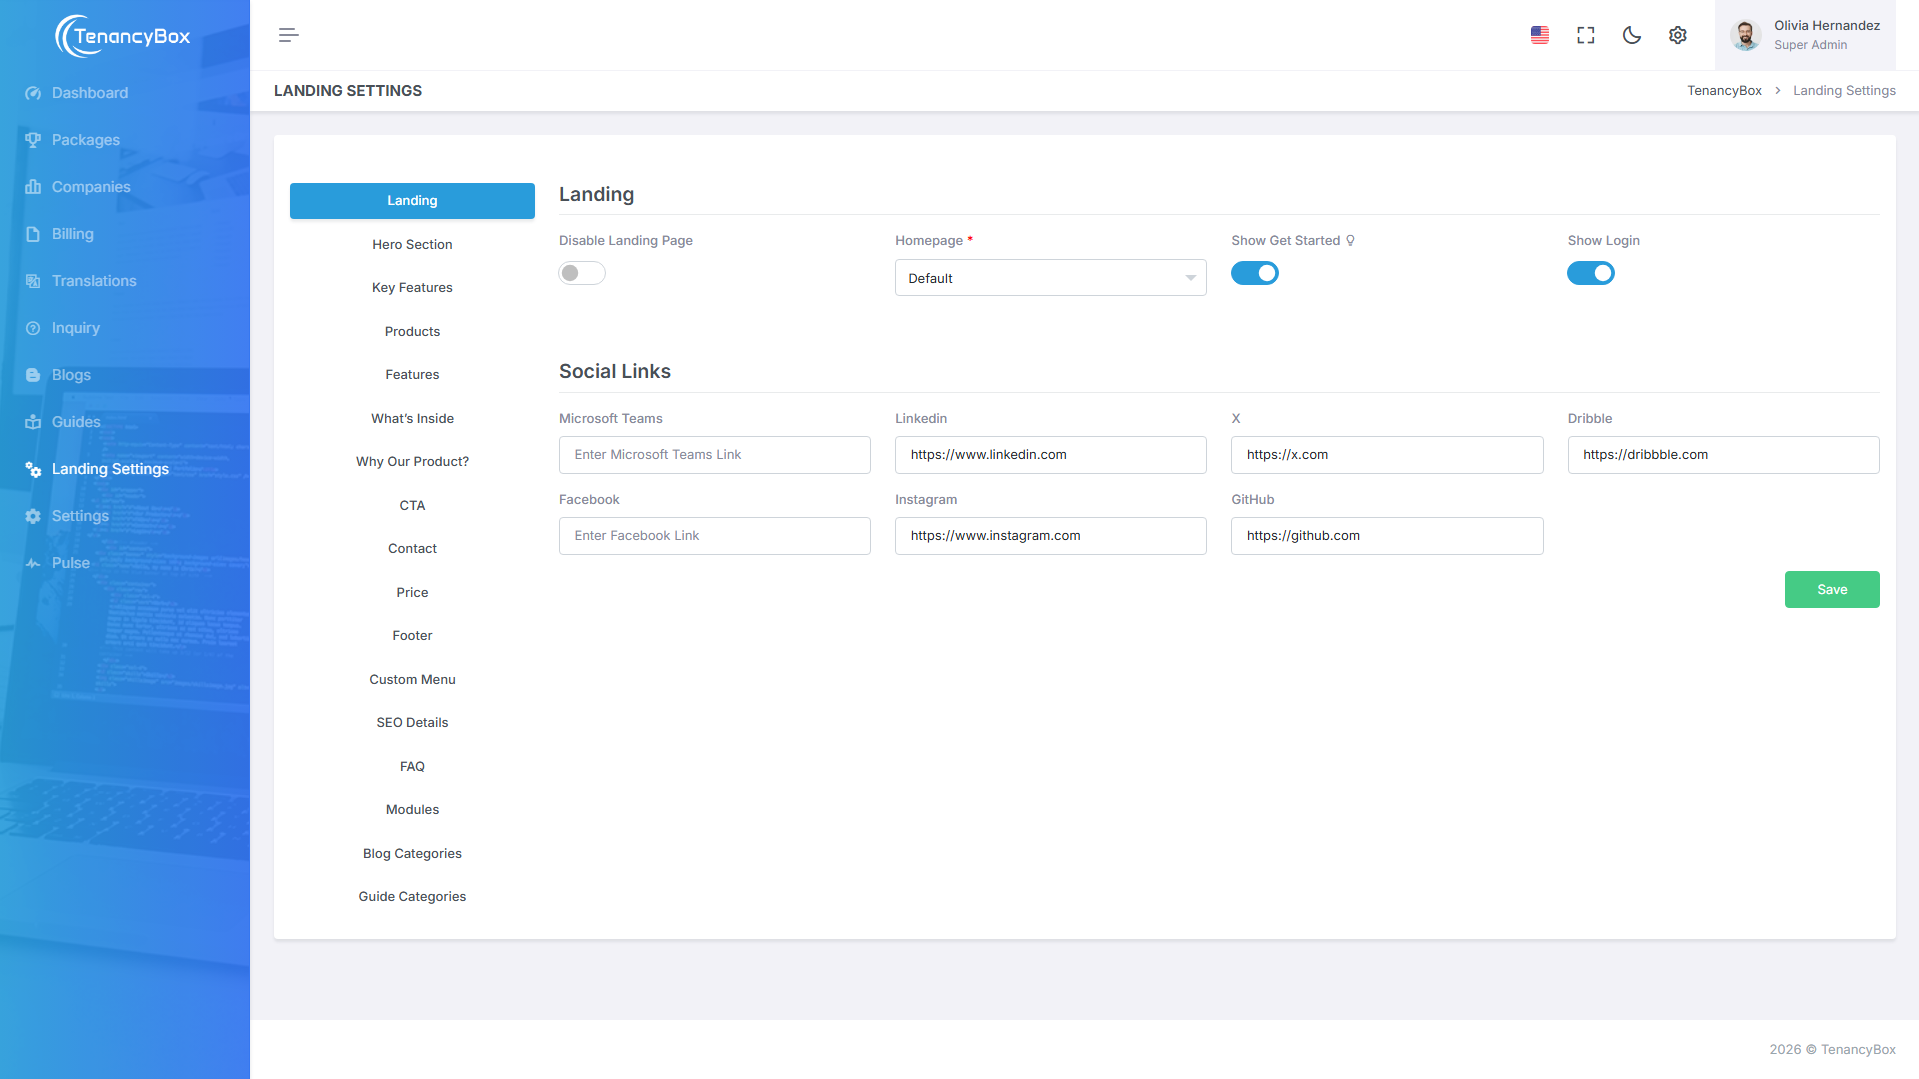
Landing Settings
- Enable or disable the landing page view for users.
- Select the home page, or you can also provide a custom URL to redirect to.
- Hide or show the login and "Get Started" view.
- Update social media links from the bottom social links section.
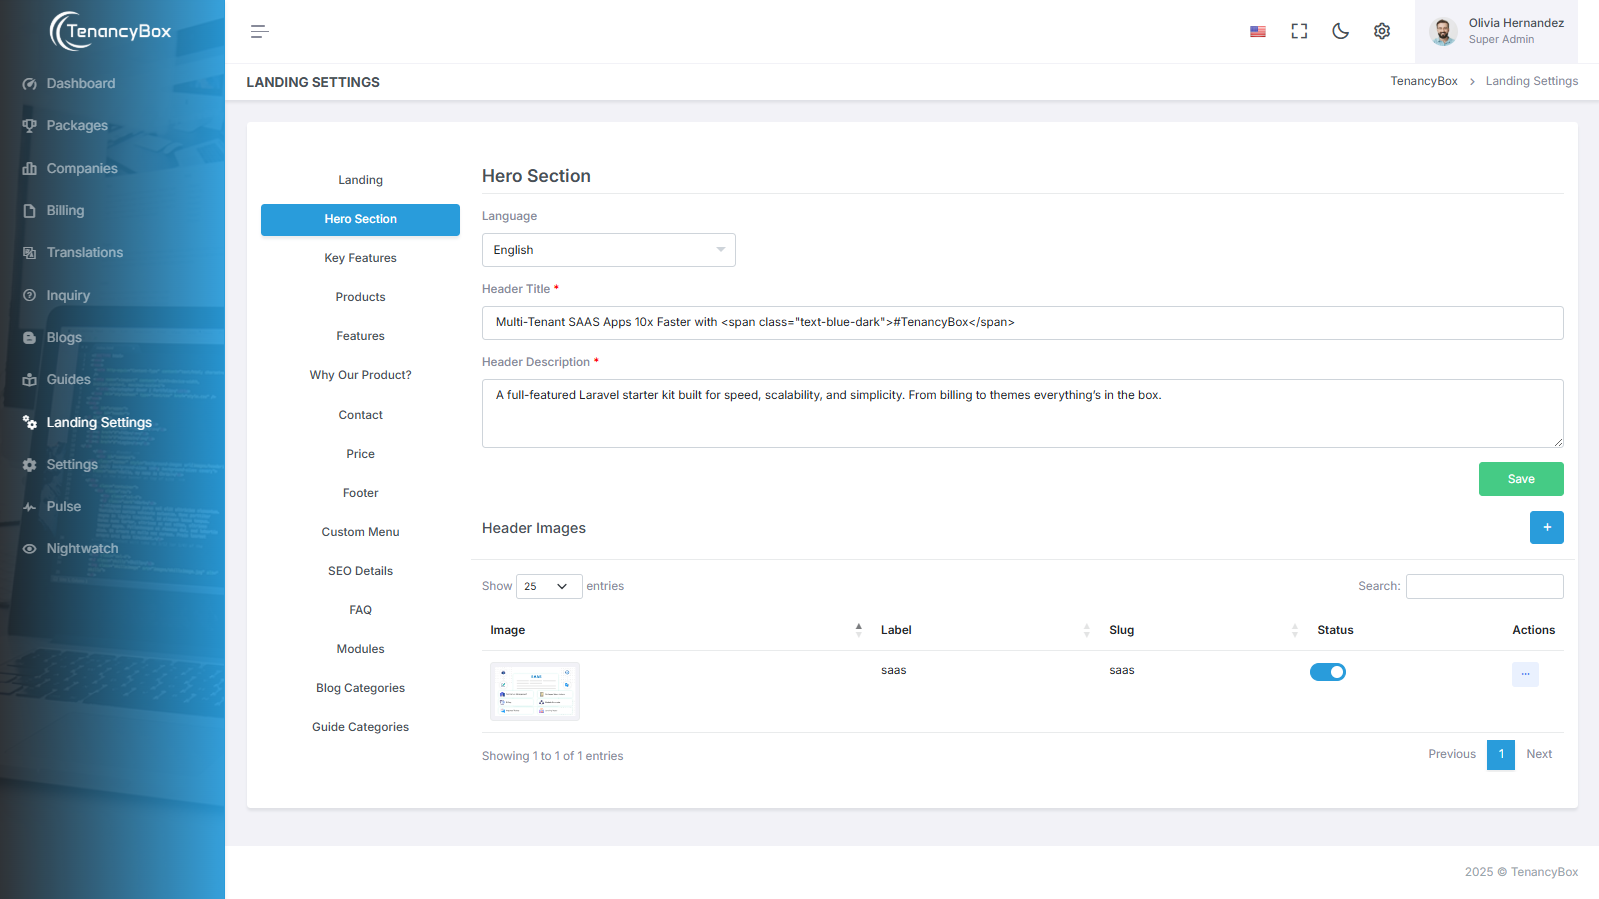
Hero Section
- First, select your language, set up your header title and description, and upload hero section images.
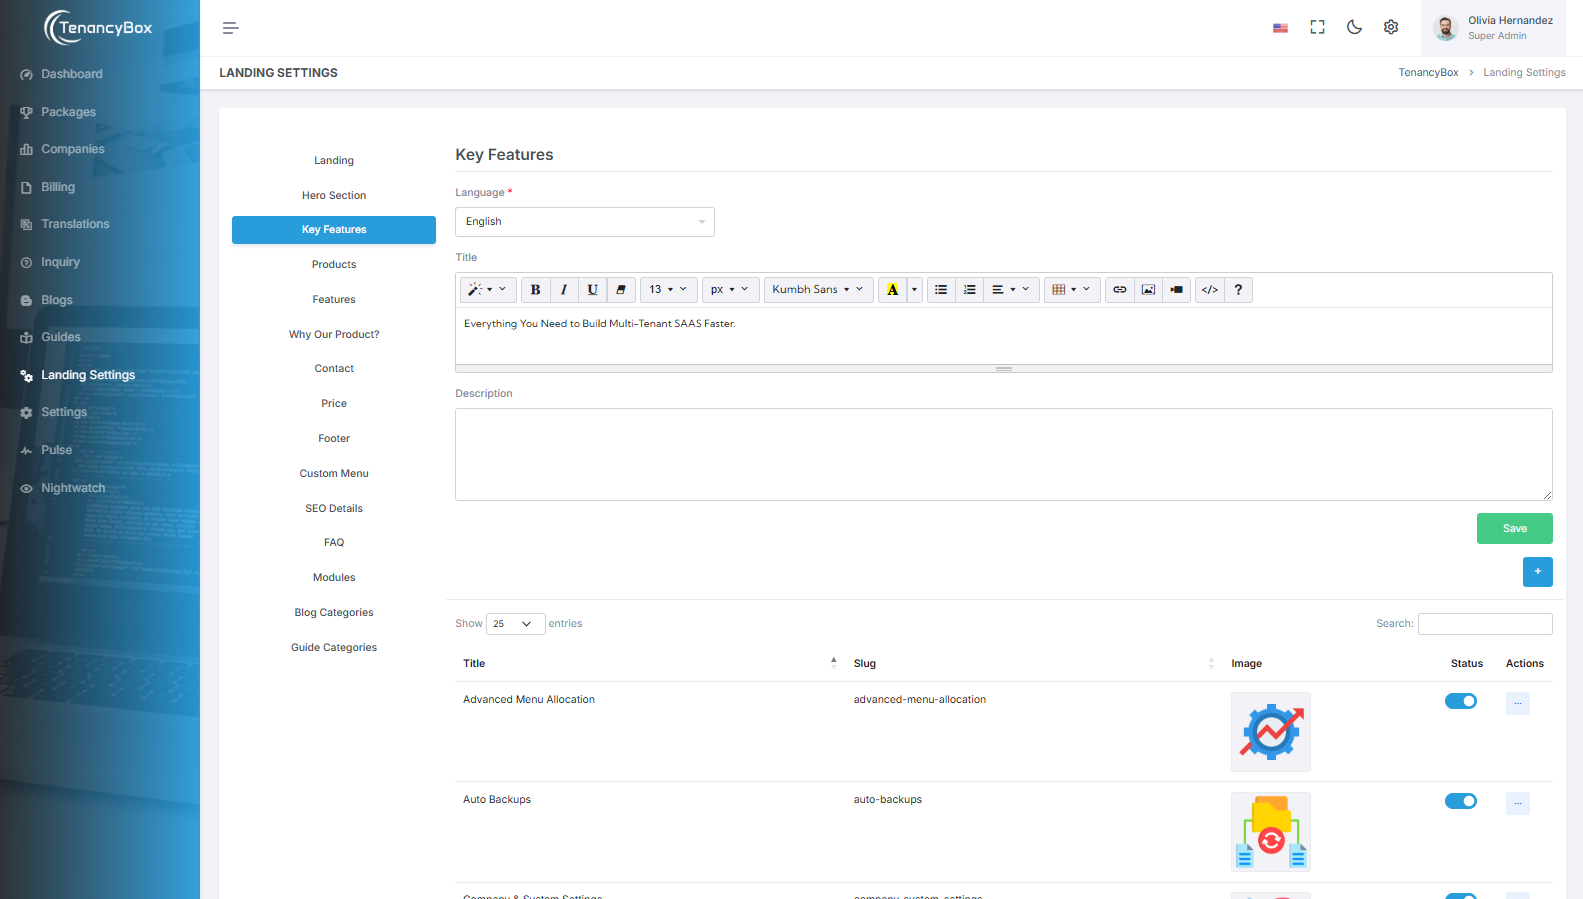
Key Features Settings
- First, select your language and set up your key feature title and description.
- You can create, modify, and delete key features with their images, titles, and descriptions.
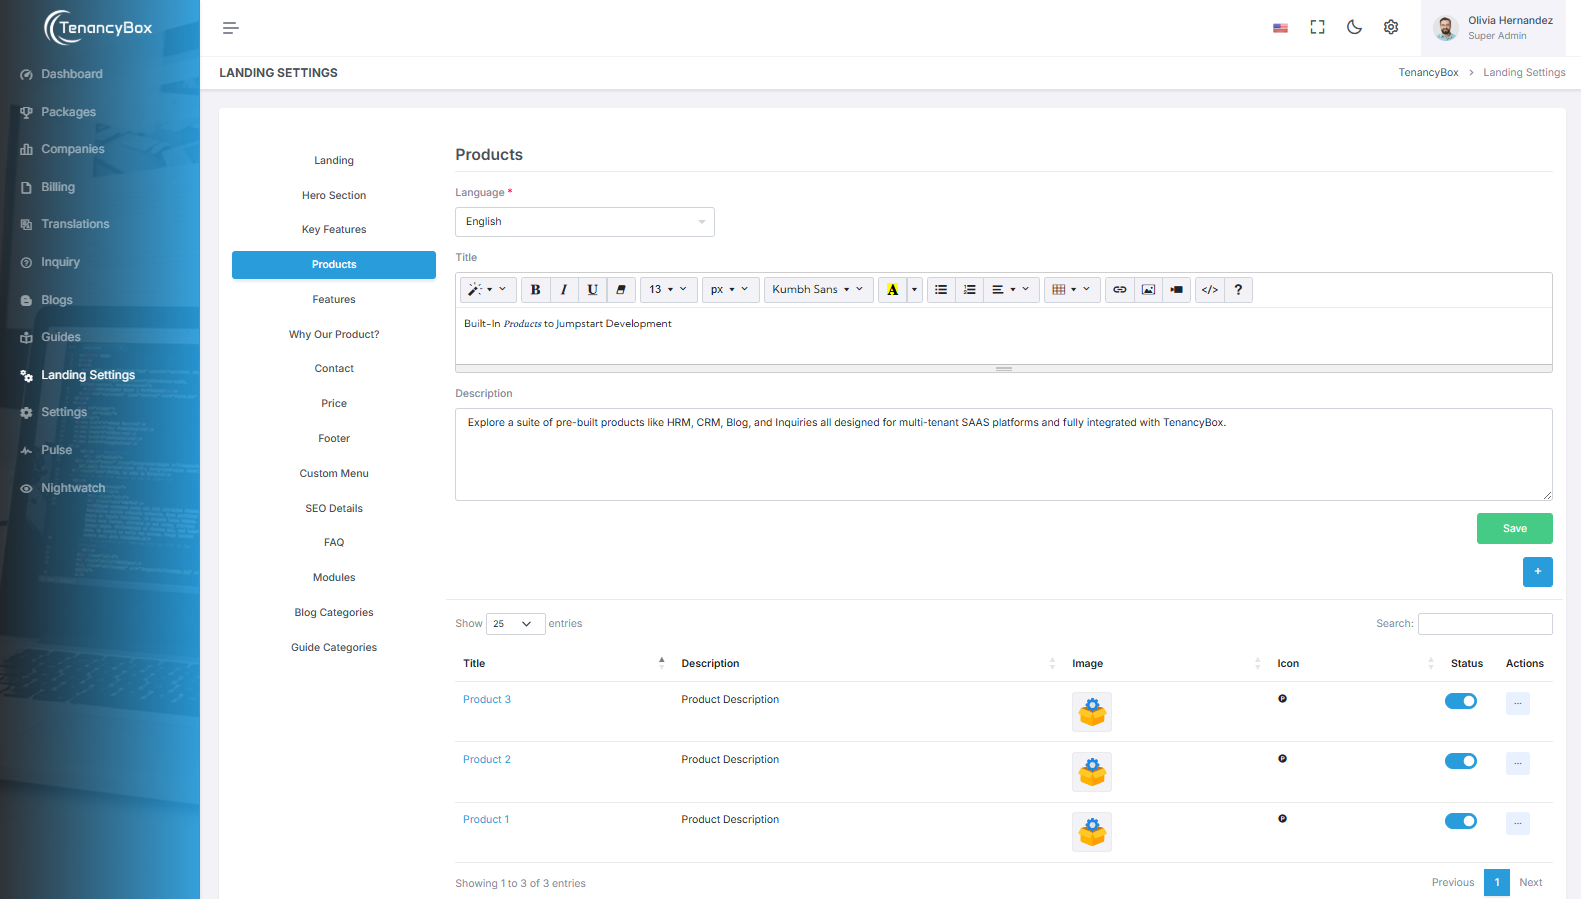
Products Settings
- The Product Module is used to display and manage various features and tools offered by the software, providing users with detailed descriptions and benefits of each product to enhance their project management and operational efficiency.
- The Products Module showcases various tools within TenancyBox's Project Management software, integrating features like Users, Roles, and Billing to enhance efficiency and team coordination.
- It provides a centralized platform for managing tasks, clients, and workforce processes effectively.
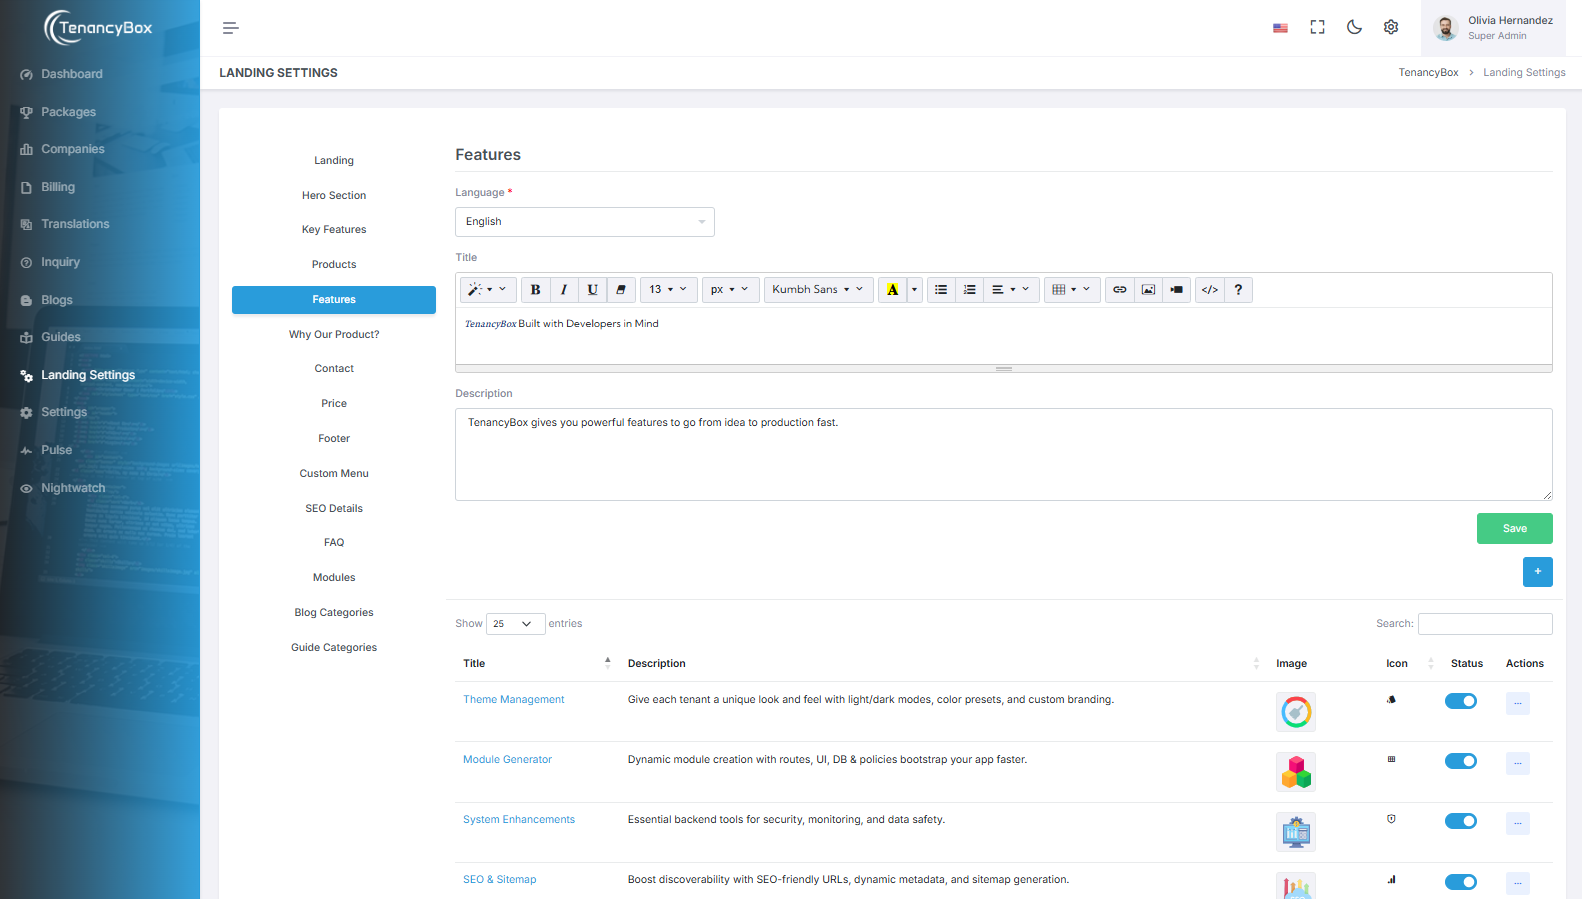
Features Settings
- Set up your feature title and description in your language.
- View a list of all default features with their title, description, and image. You can create multiple new features by clicking the plus button on the right side and update or delete them from the actions as needed.
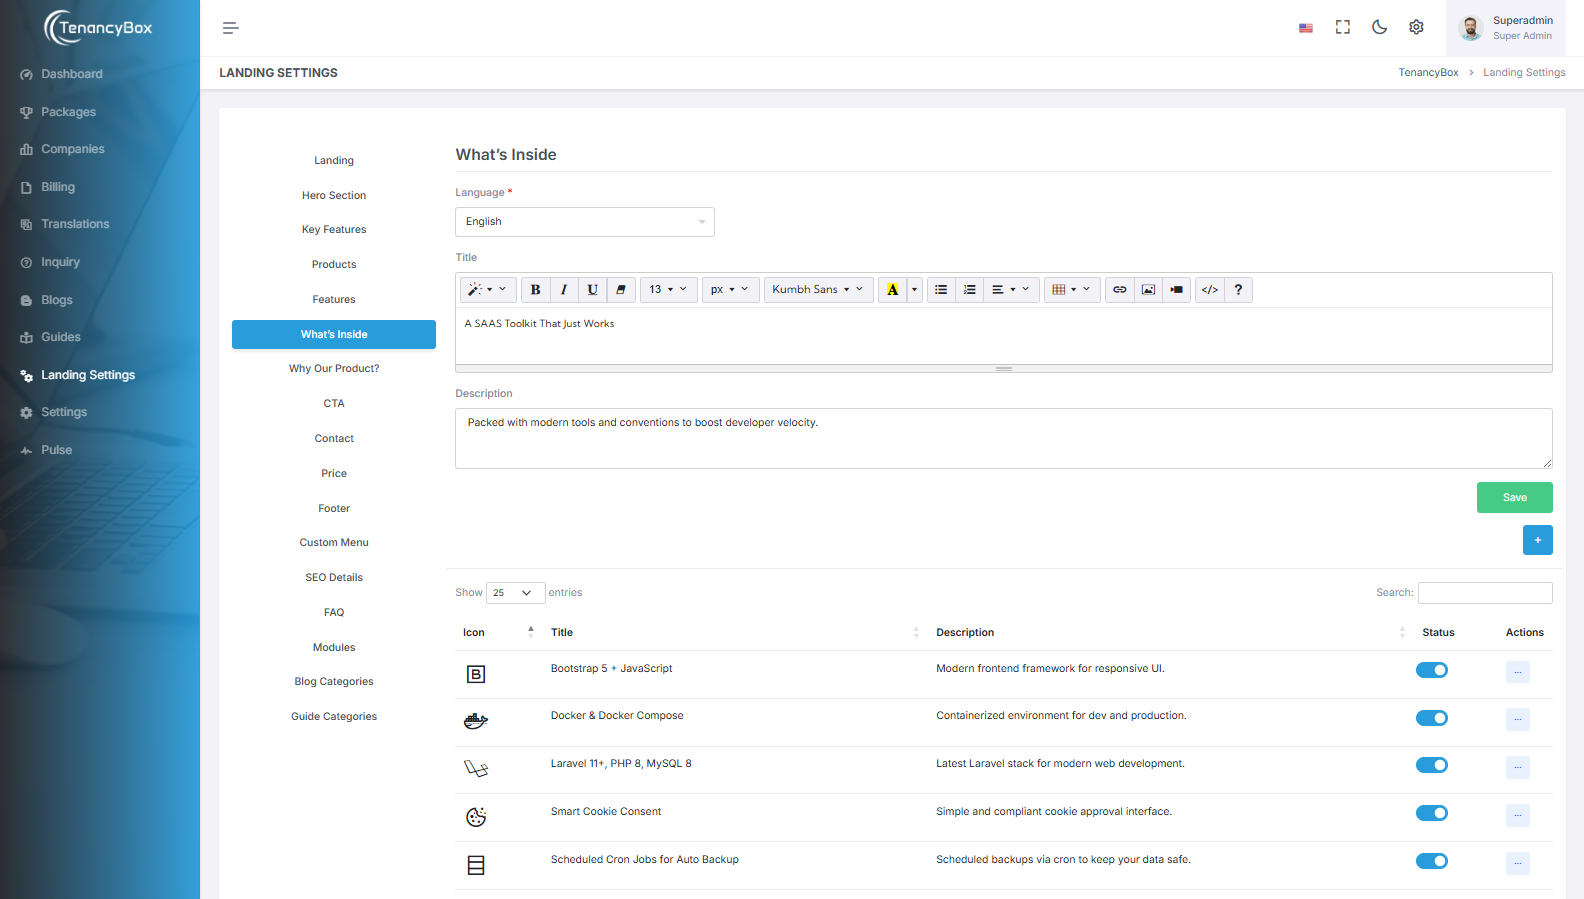
What's Inside
- Set up your "What's Inside" title, description, and choose the language for display.
- Explore a detailed list of all key features that come pre-integrated with the platform - each item includes its icon, title, and description.
- Add new features by clicking the plus button on the right side. You can also edit existing entries or delete them as needed.
- This section helps you highlight all core technologies and tools included in your SaaS starter kit, such as Laravel, Docker, OpenAI, and more.
- Keep your landing page content fresh and informative by updating features as your product evolves.
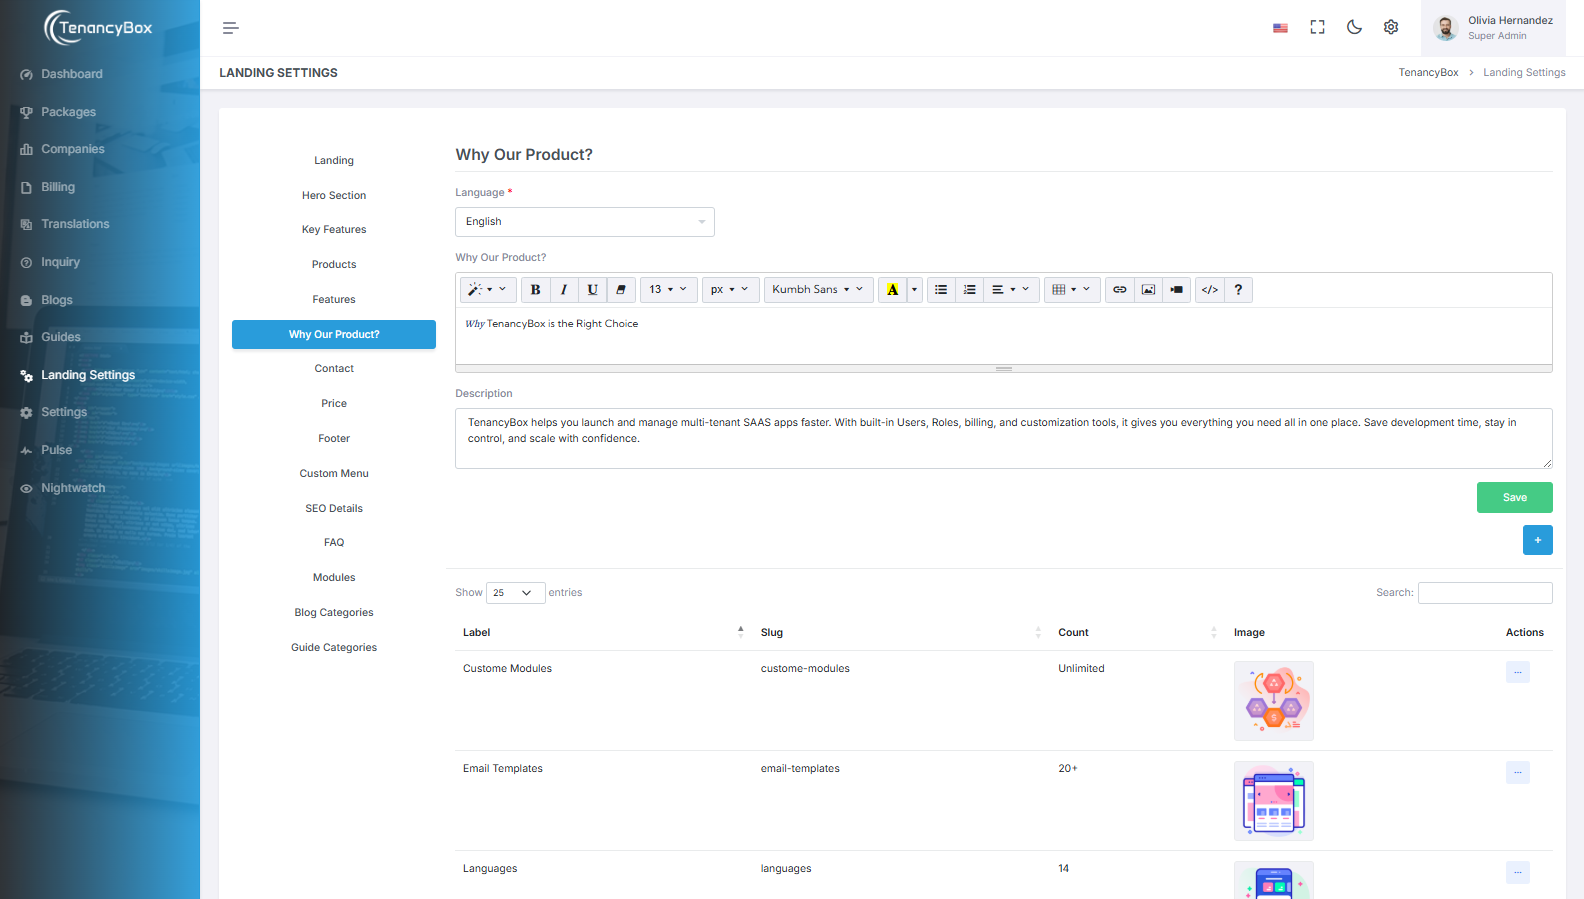
Why Our Product? Settings
- Set up your "Why" title, description, and upload an image in your language.
- View a list of all default widget counts with their label, count, and image. You can create multiple new widget counts by clicking the plus button on the right side and update or delete them from the actions as needed.
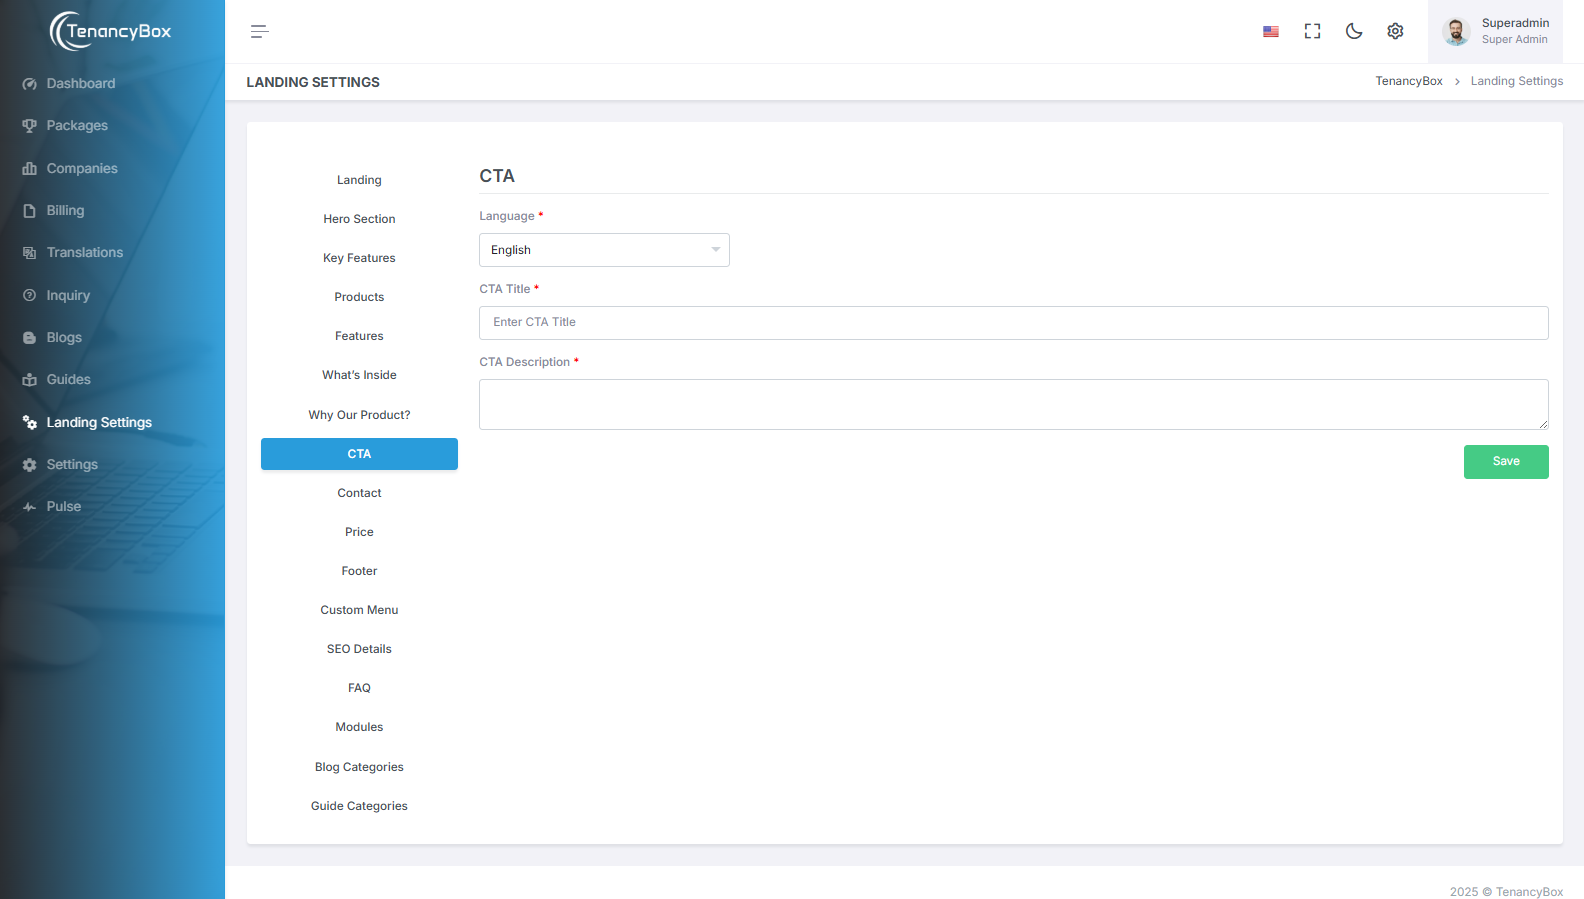
CTA
- Set your CTA title and description for each language.
- This section manages the main call-to-action area on your landing page.
- Use a clear, action-focused message to encourage users to get started.
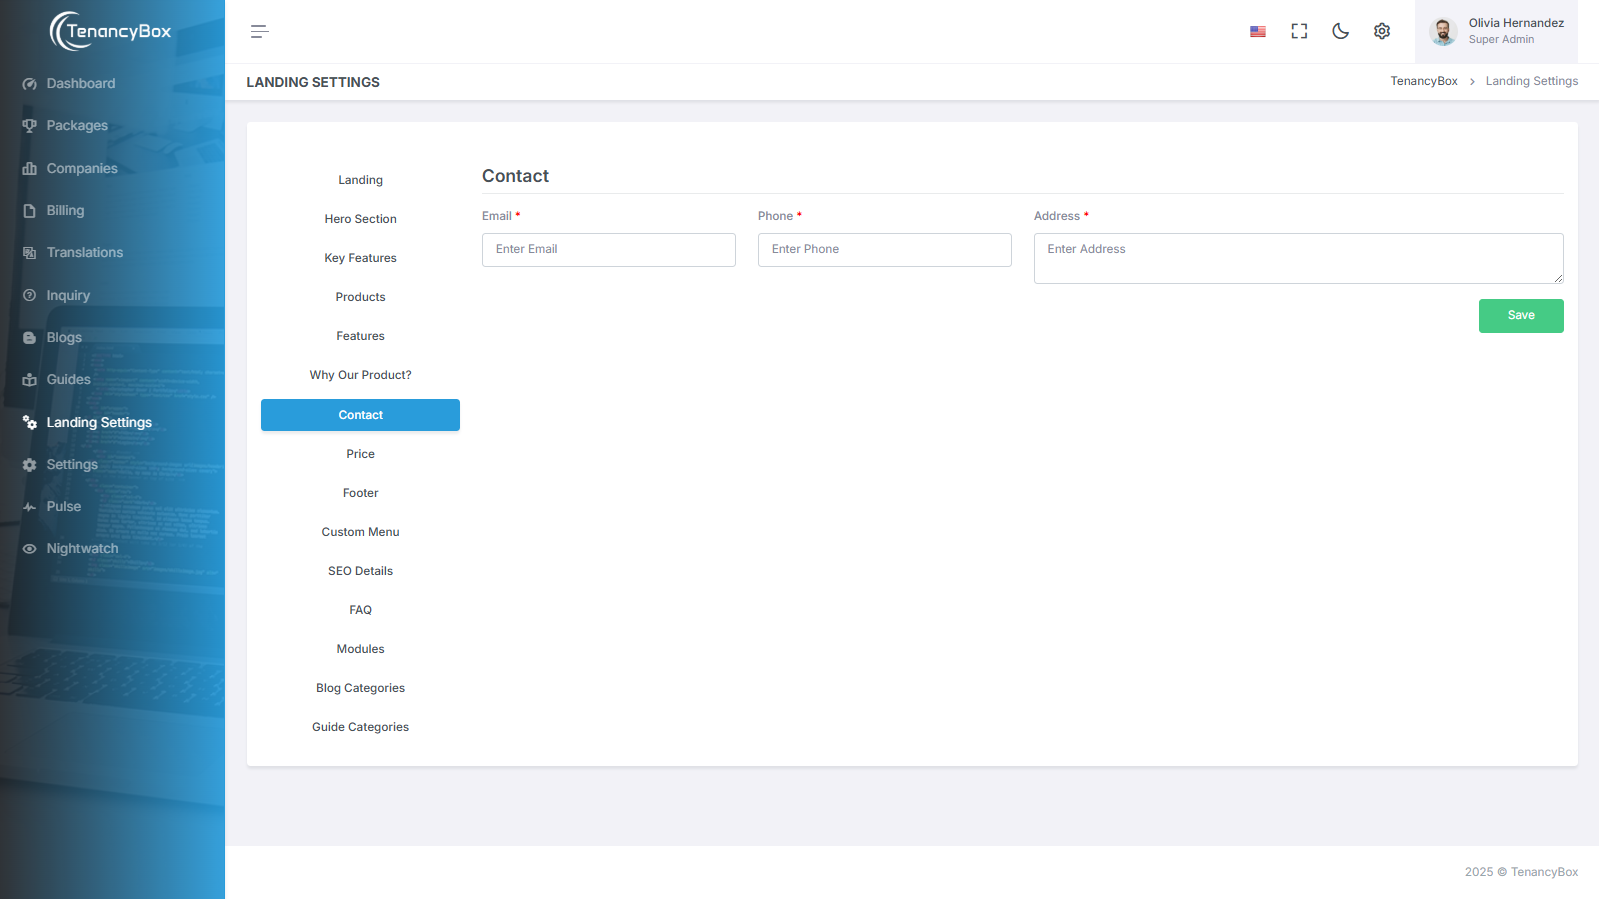
Contact Settings
- Update your contact details, such as email, phone number, and address.
Price Settings
- Set up the title and description of your Plans and Pricing section in your language.

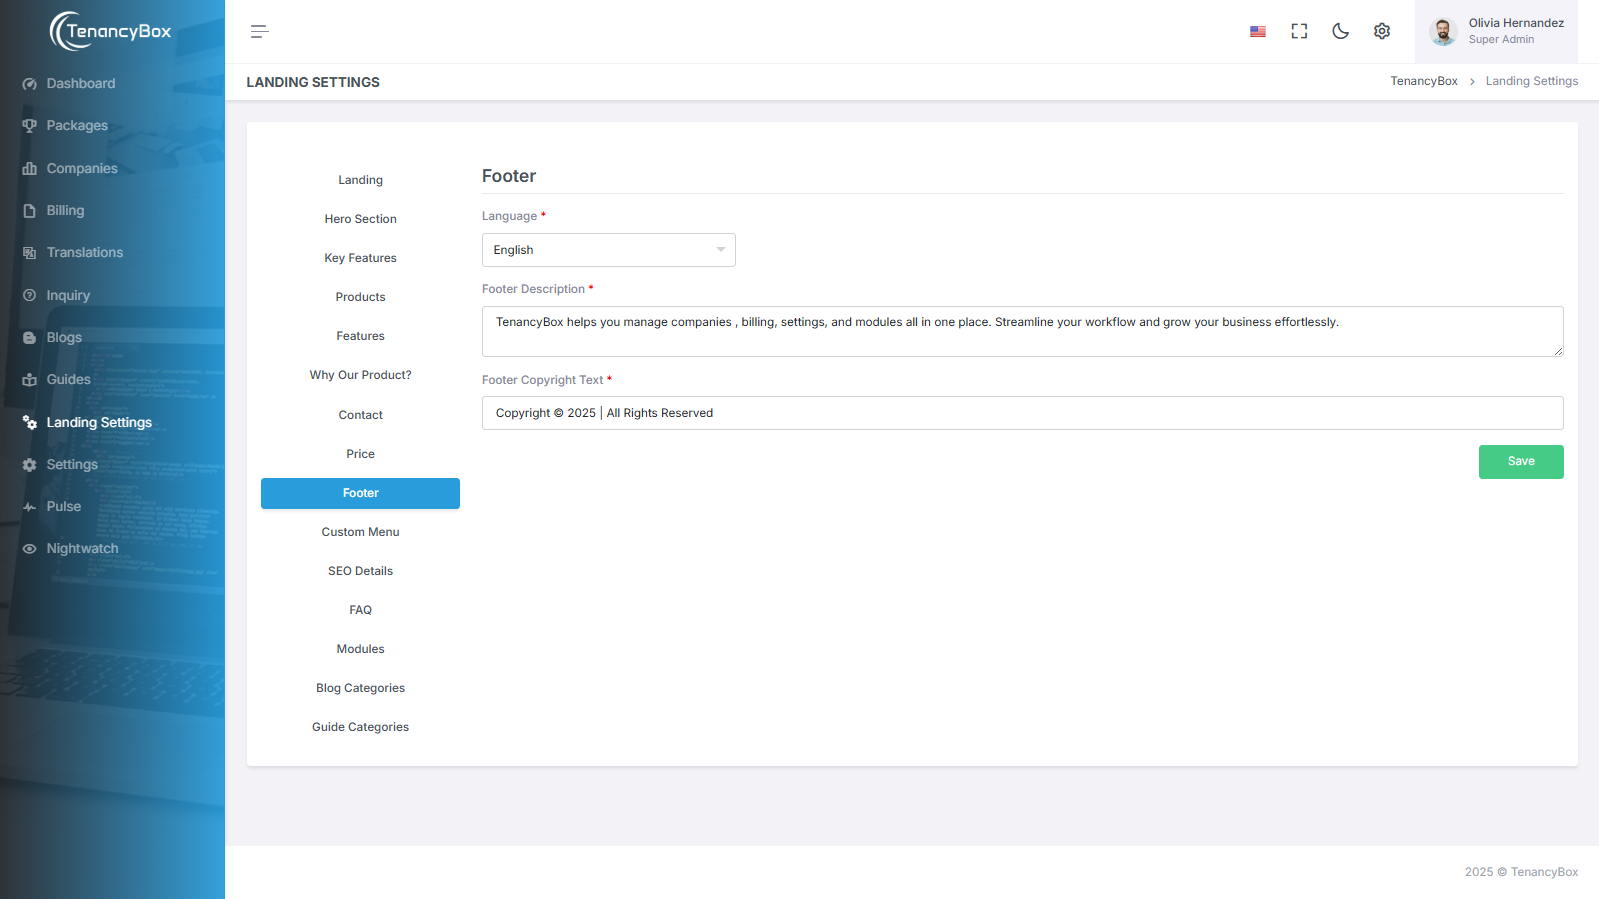
Footer Settings
- Update the footer copyright text for the entire system.
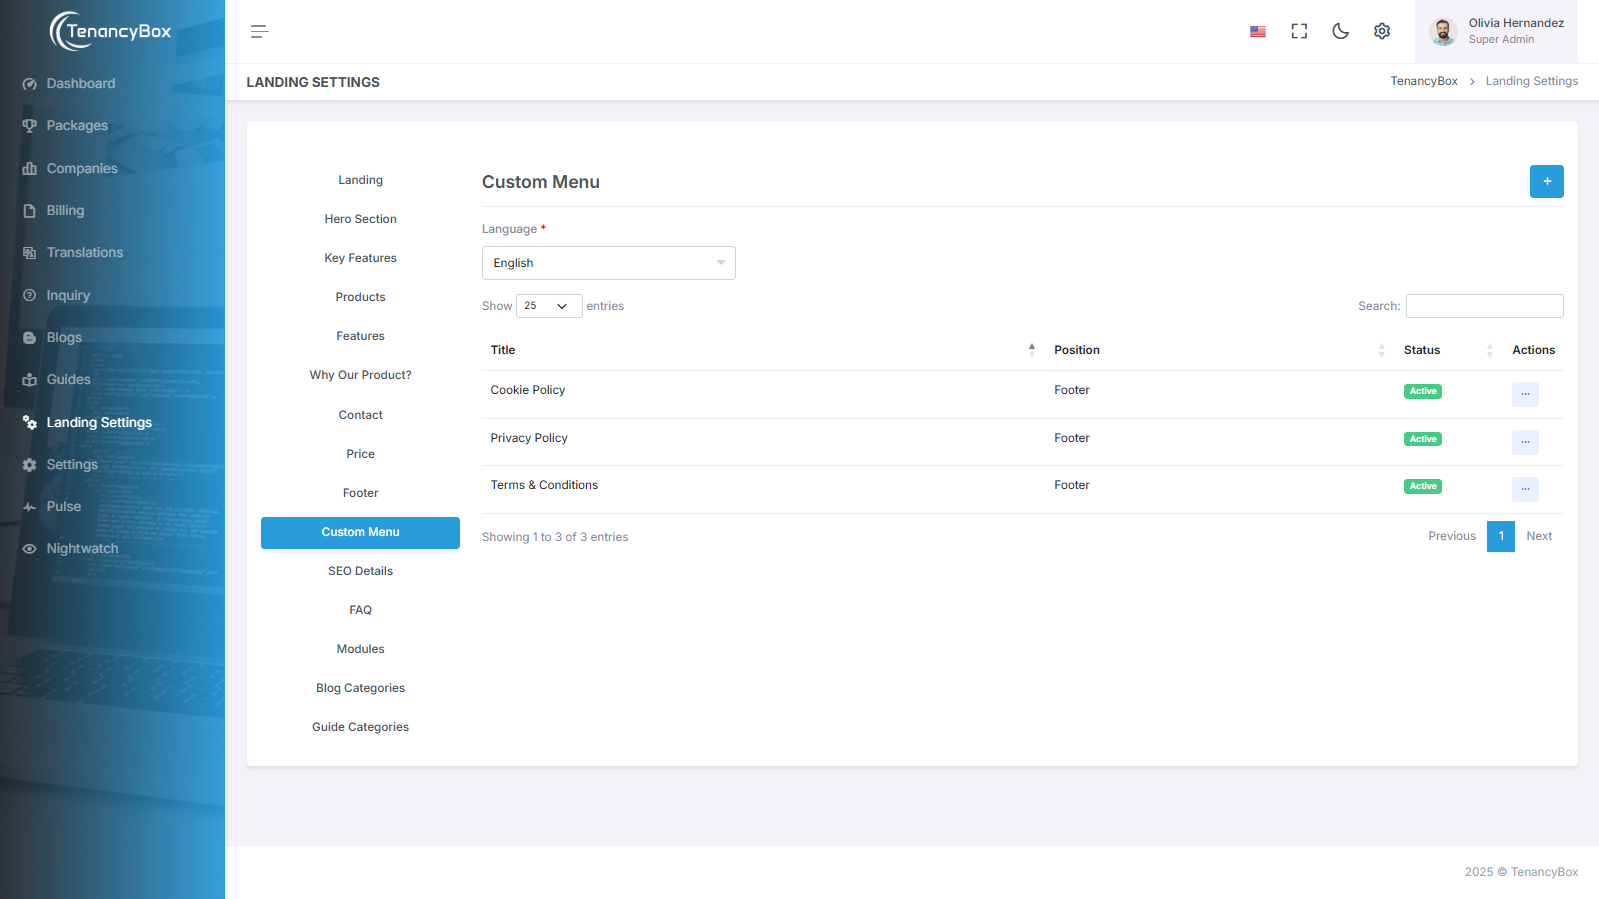
Custom Menu
- You can create custom pages in multiple languages according to your needs. There are options to choose where a custom menu link should be displayed: in the header, footer, or both.
- You can also place an external link.
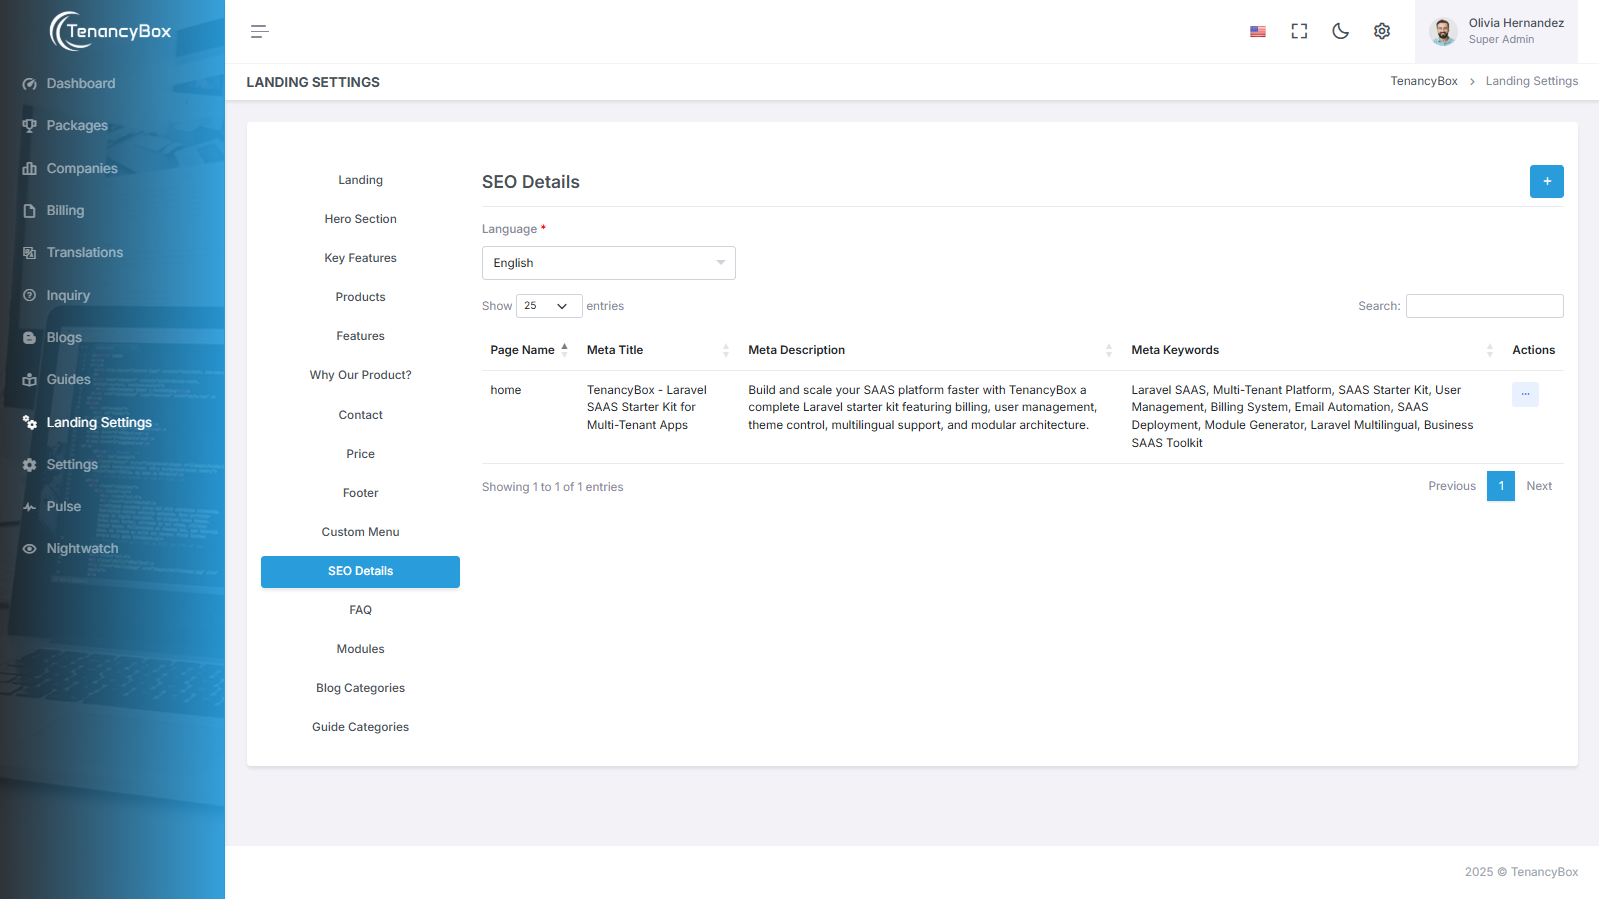
SEO Details
- Update meta details such as author, title, description, and meta keywords for all pages by clicking the edit button in the actions.
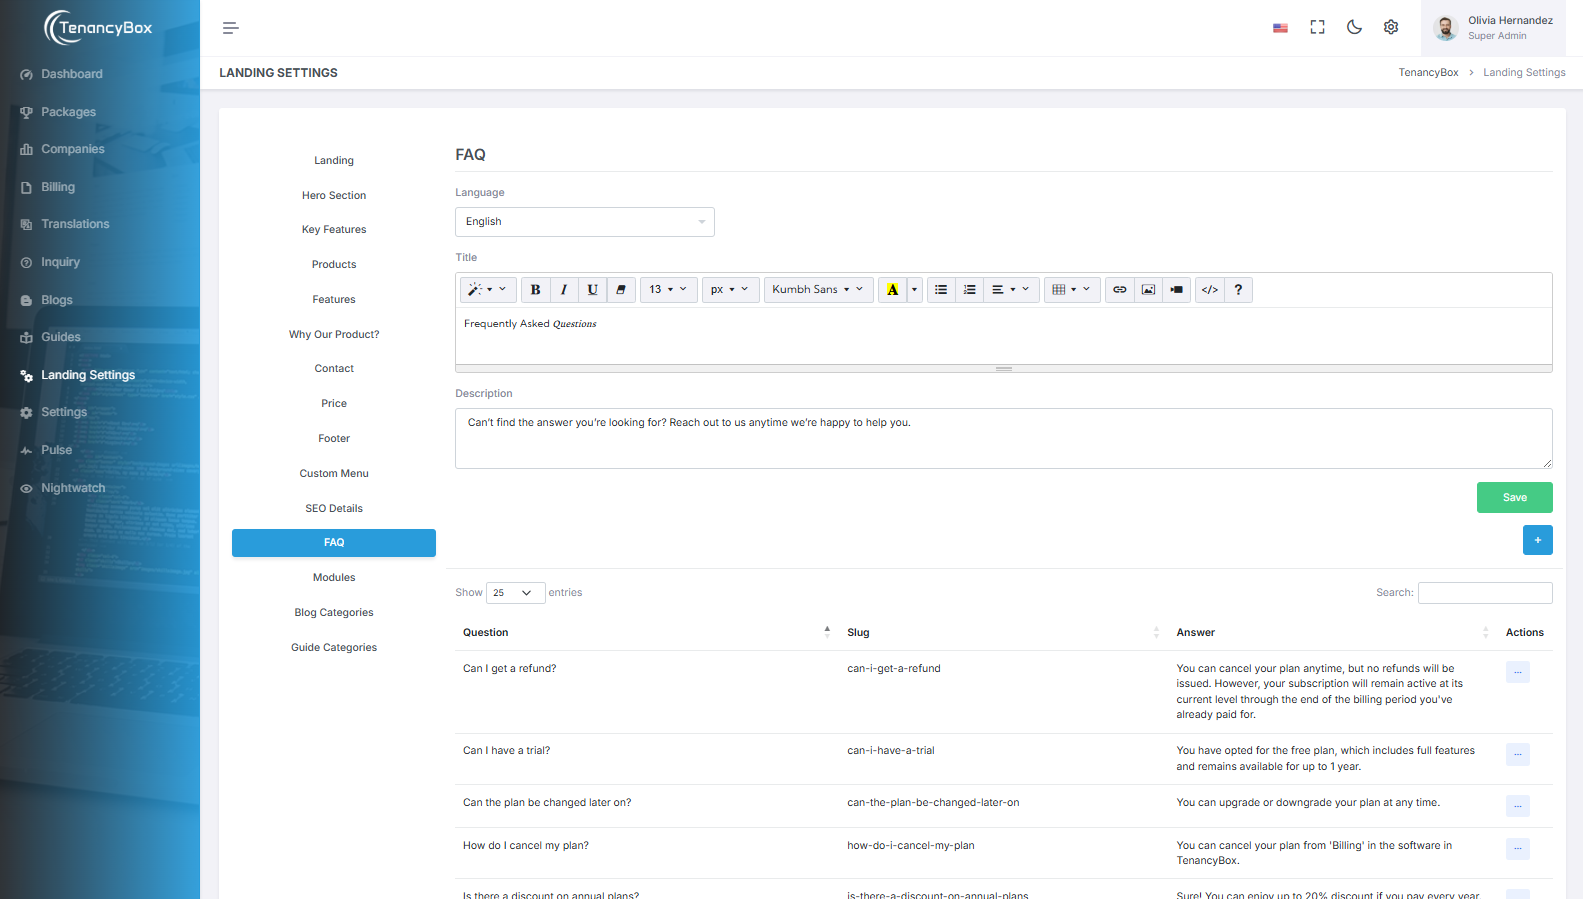
FAQ
- Here, you can create or update FAQs (Frequently Asked Questions).
- The purpose of an FAQ is to provide information on common questions or concerns, offering quick answers to users' inquiries on a website.

Modules
- Update module details such as name and image by clicking the edit button in the actions.
- The purpose of a module is to showcase your project's premium modules that are available to users.
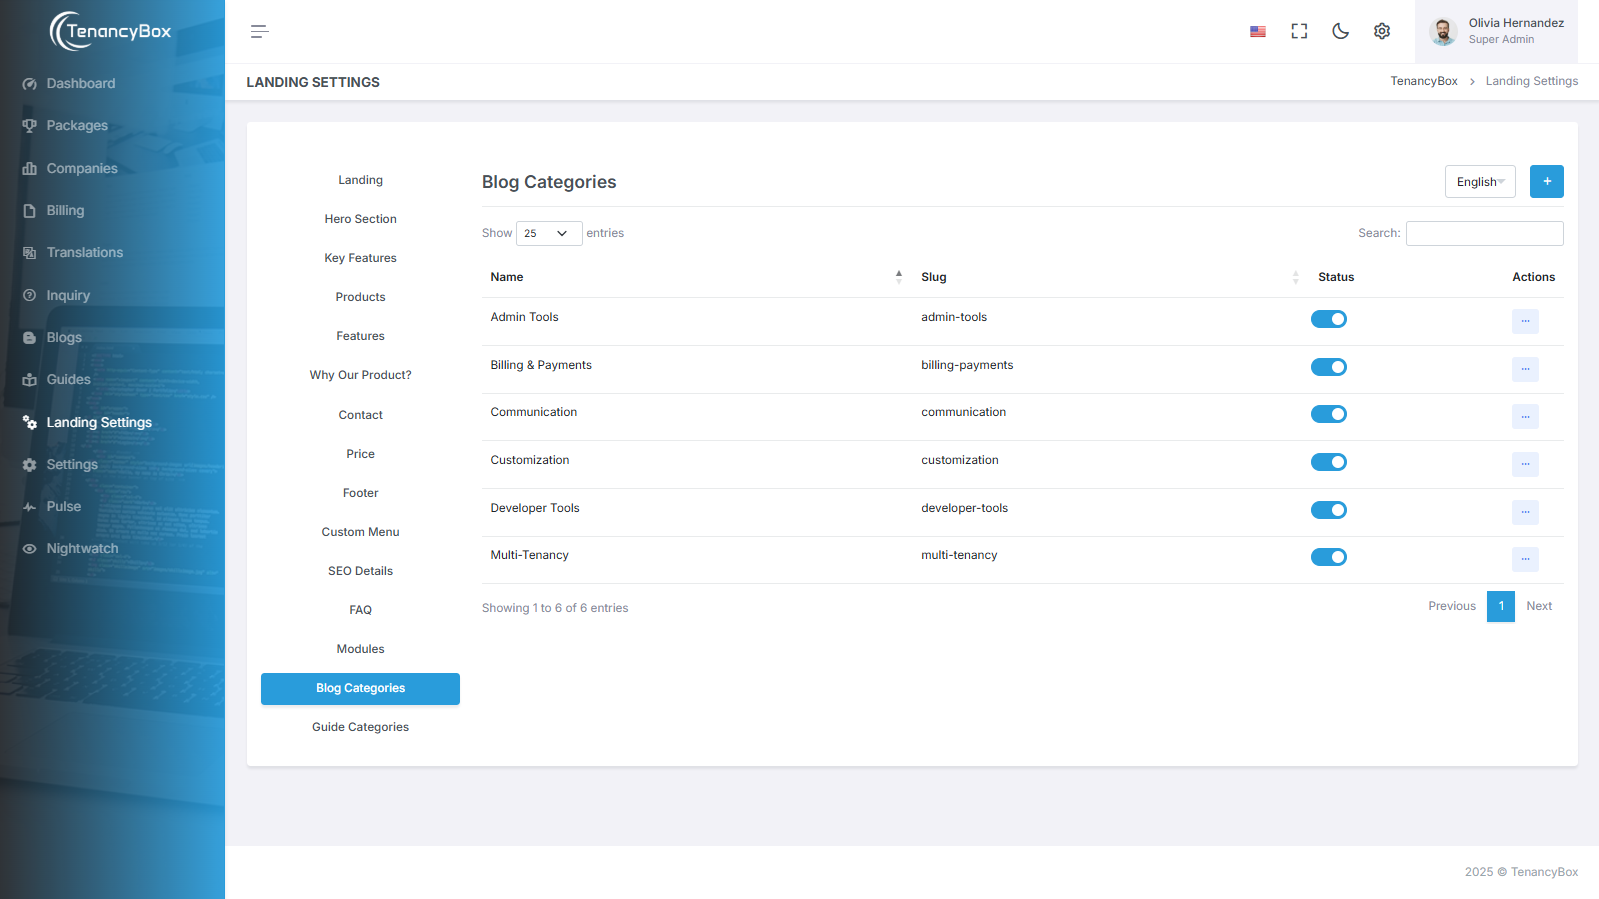
Blog Categories
- The Blog Categories module allows you to organize and manage blog content into specific categories, making it easier for users to navigate and find relevant information.
- The Blog Category module organizes blog posts into thematic categories for streamlined navigation and enhanced user engagement.
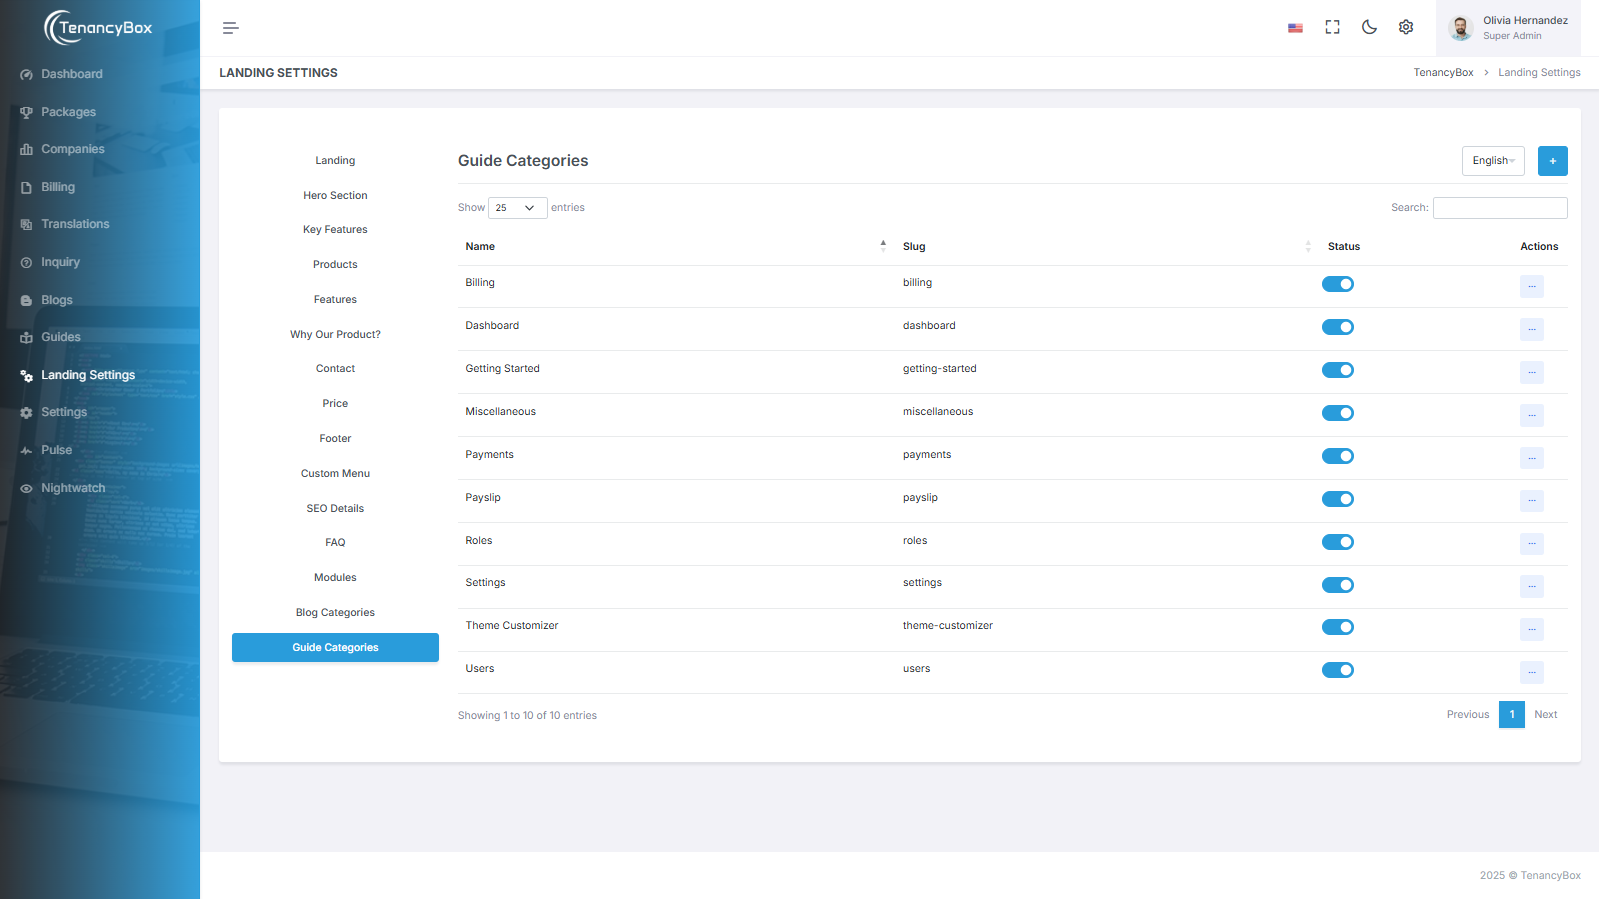
Guide Categories
- The Guide Categories section facilitates the classification and accessibility of instructional content, helping users quickly locate relevant guides.
- The Guide Category module categorizes instructional content for easy navigation and efficient learning within distinct thematic sections.
8 Super Admin Settings
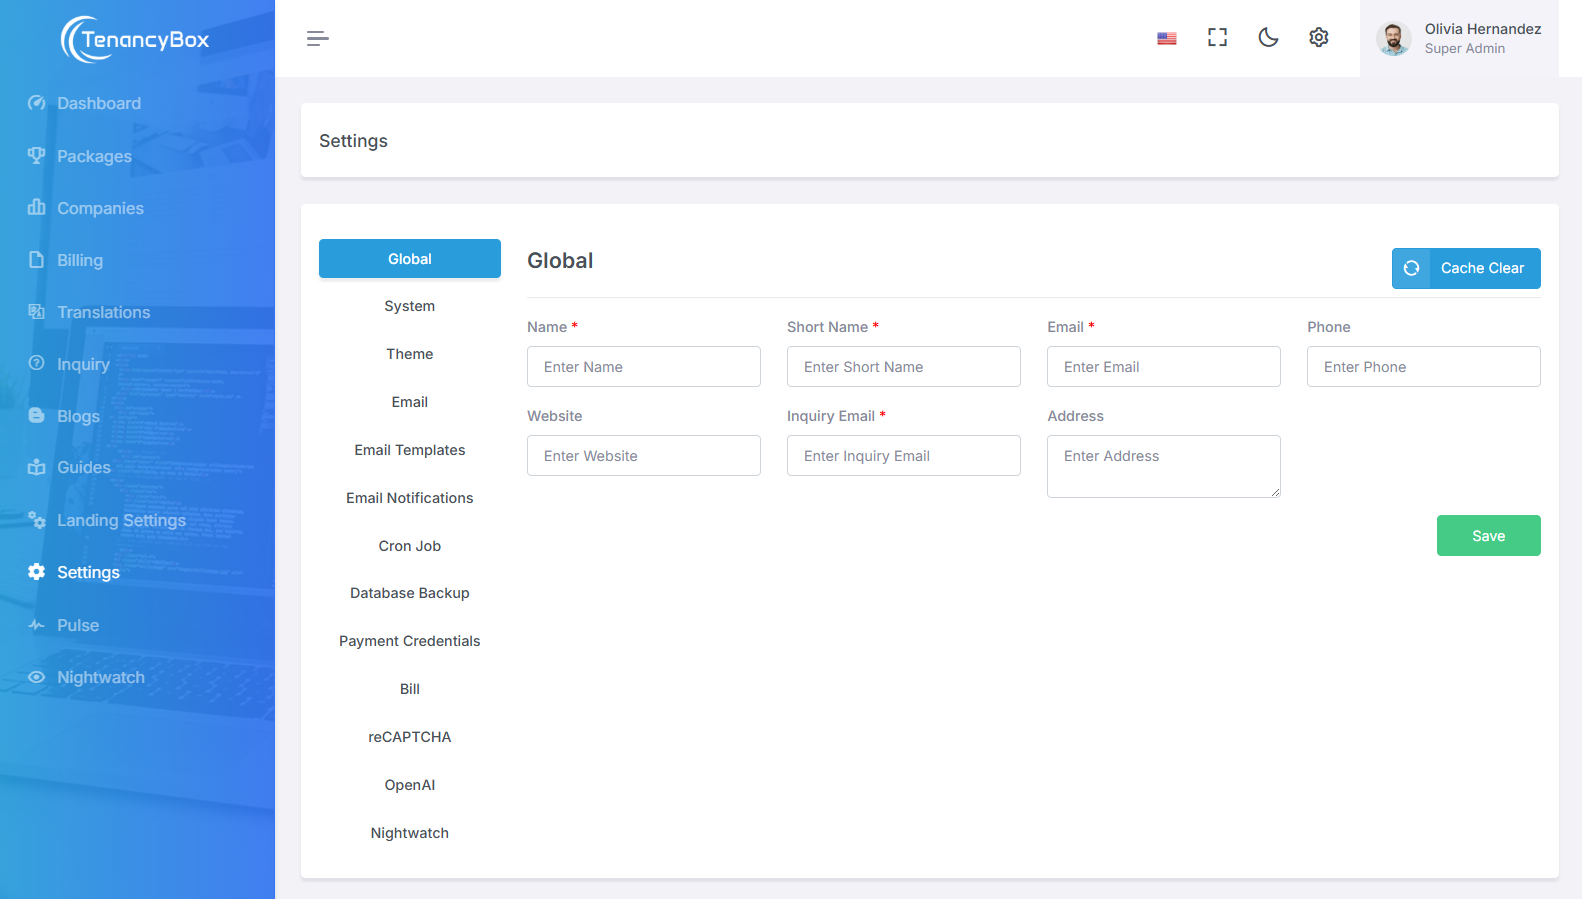
Global Settings
- Update your company name, short name, email, phone number, website, address, and more.
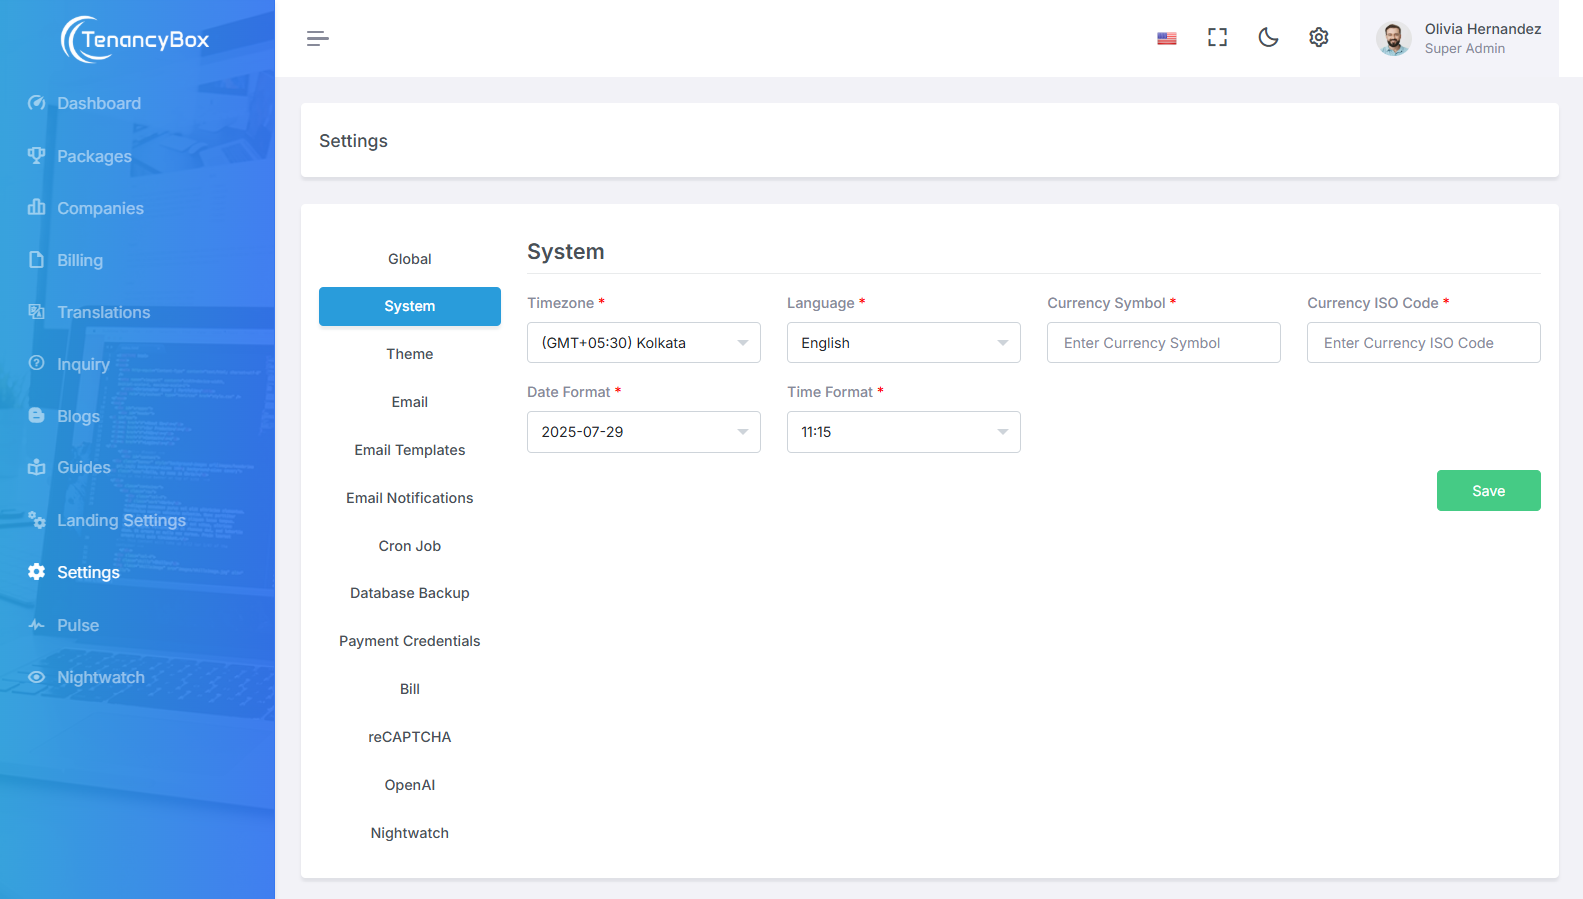
System Settings
- Update the timezone, language, currency, date, and time formats.
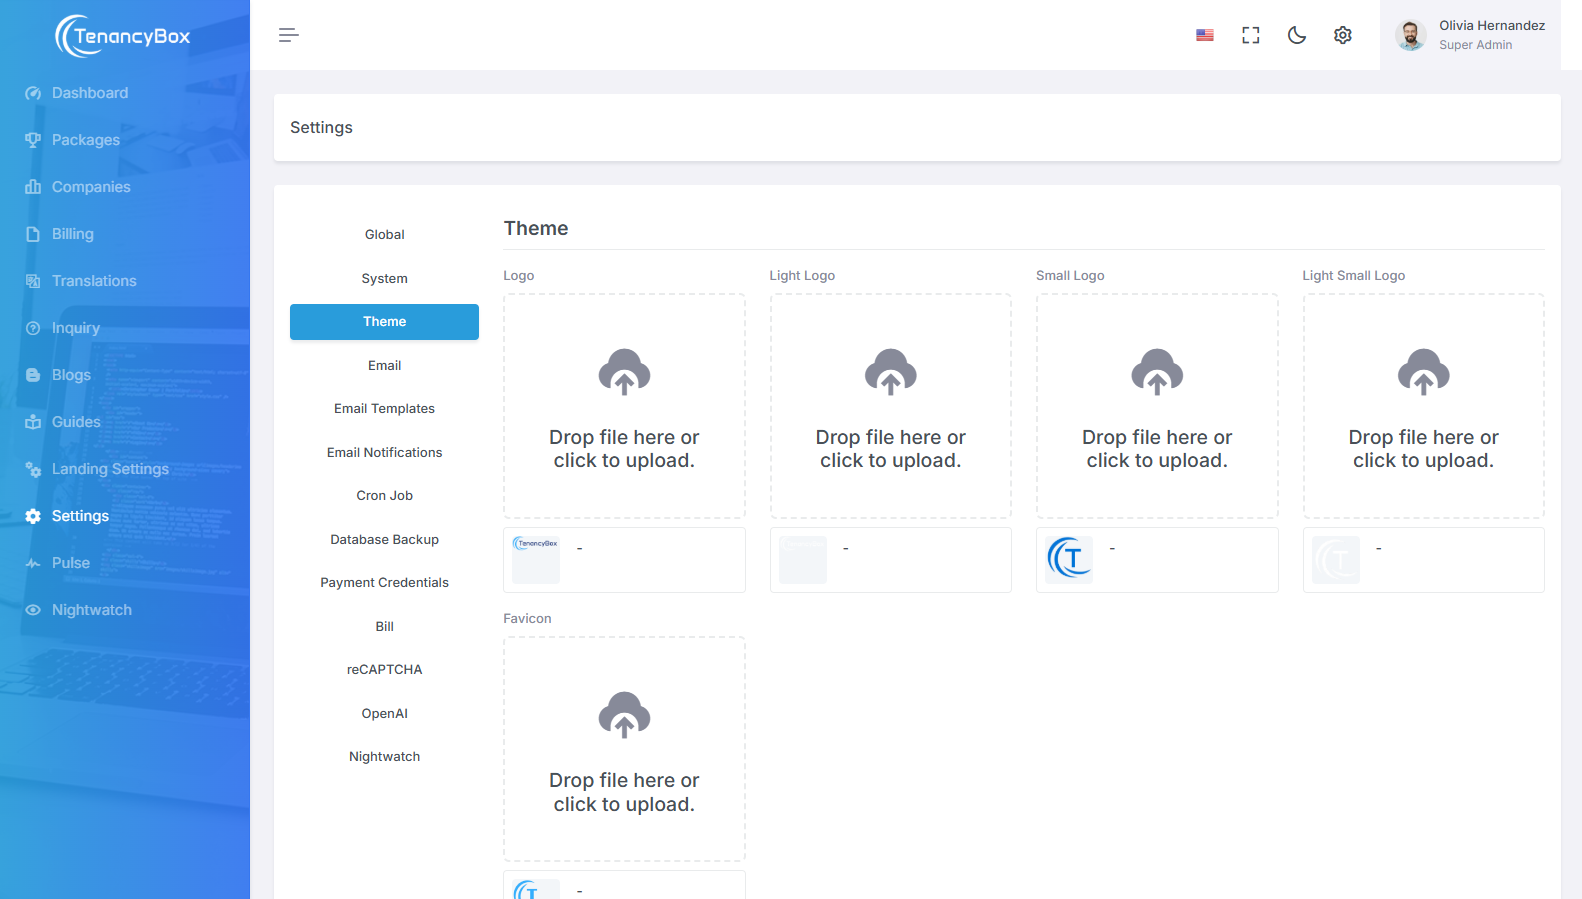
Theme Settings
- Change your company logo, sidebar logo, and favicon image. They will be displayed on authentication pages (login, register, forgot password, and reset password).
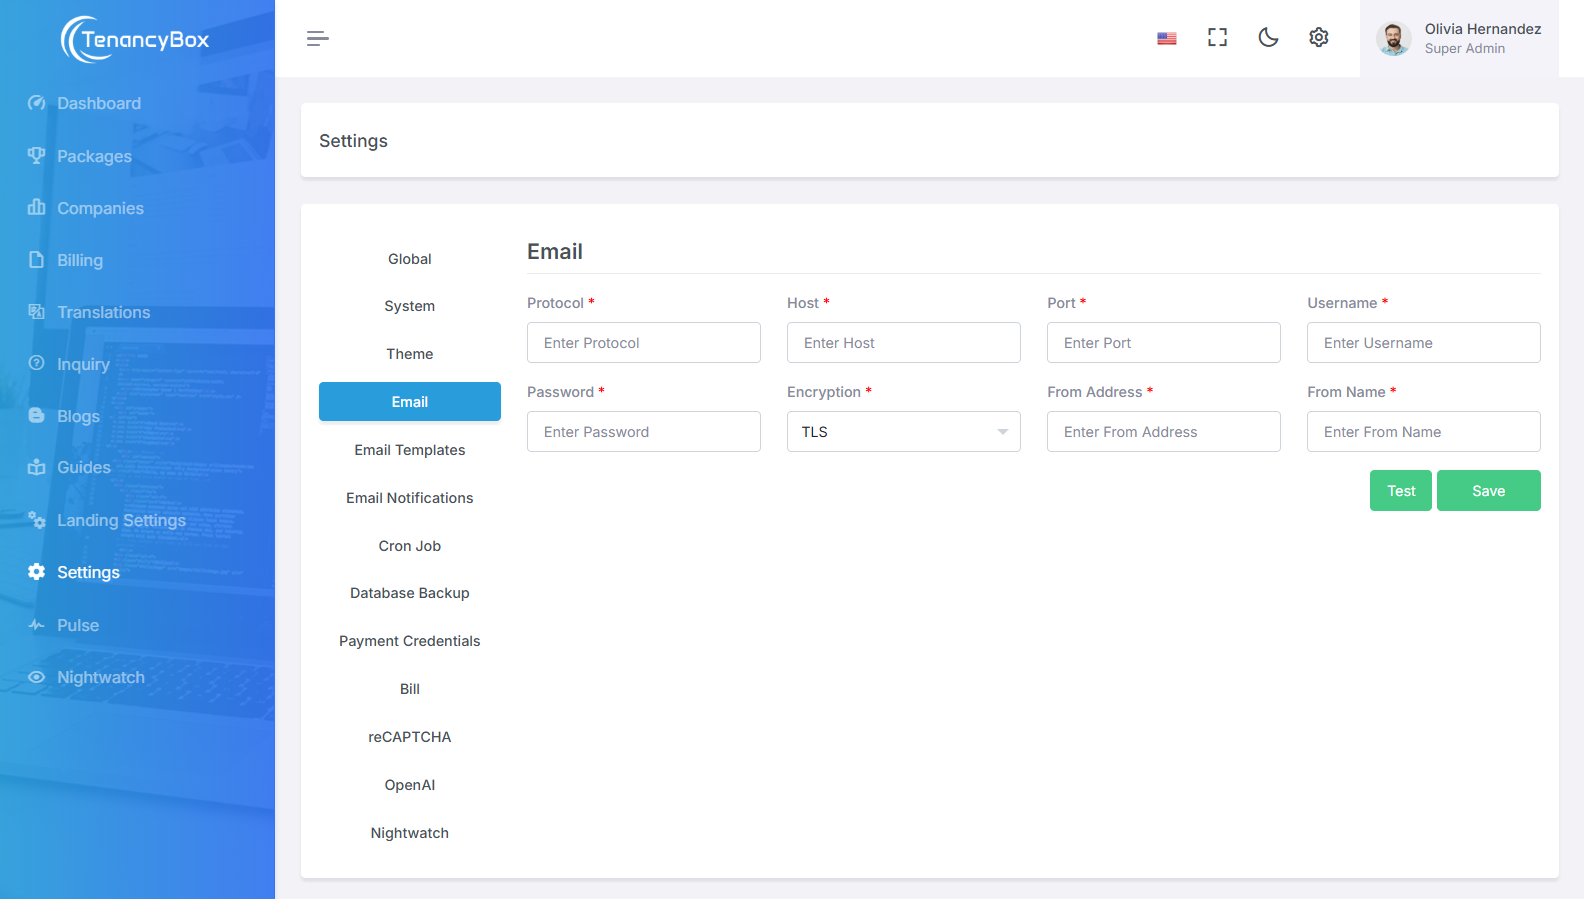
Email Settings
- Change your mail settings for outgoing mail from the tool.
- Mail Driver: SMTP.
- Mail Host: Your SMTP mail server host.
- Mail Port: The outgoing mail port.
- Mail Username: Your outgoing mail address.
- Mail Password: Your outgoing mail password.
- Mail Encryption: It should be either TLS or SSL.
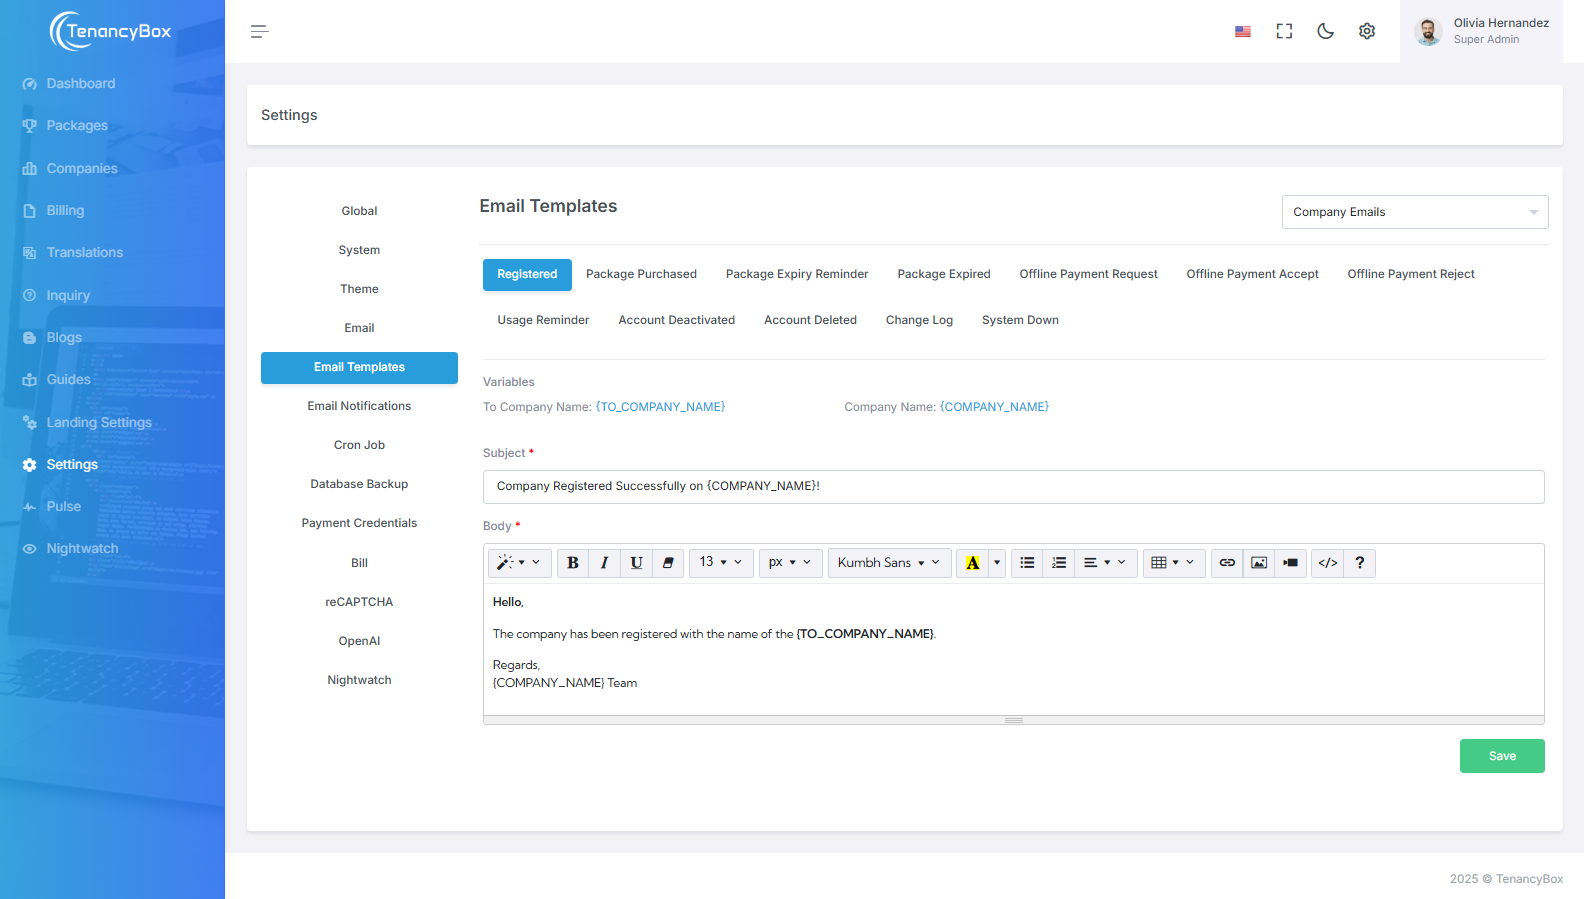
Email Templates Settings
- You can change the content of email templates and bind variables for dynamic values in
the subject and message.
For example:
{USERNAME} - The updated email template is used for new company email template seeding, after which the company can modify it from the settings.
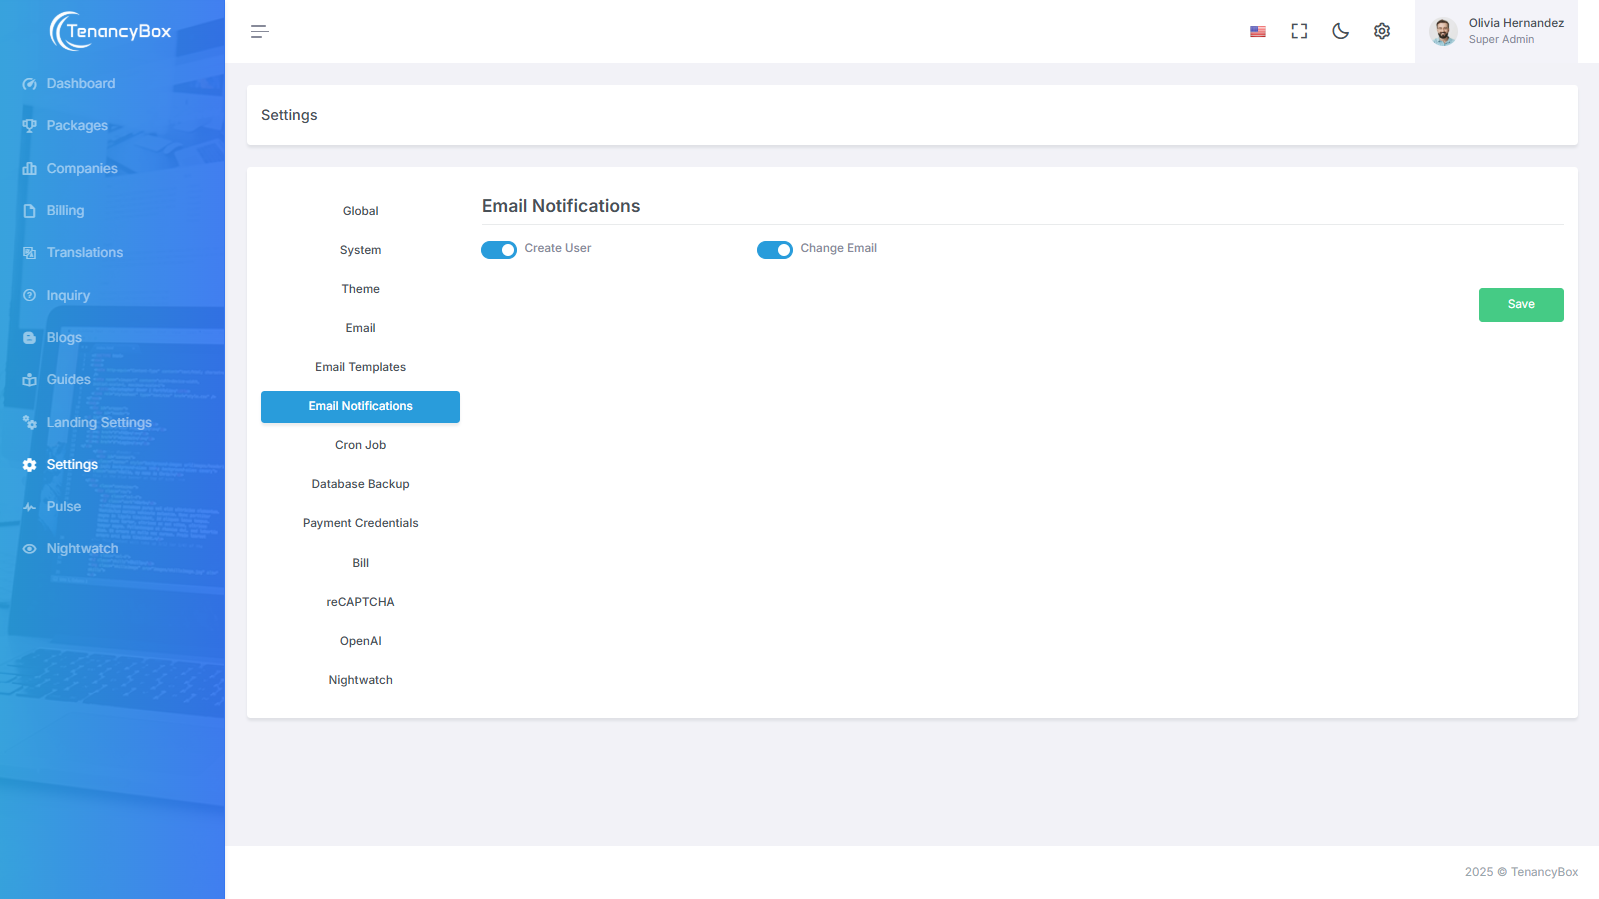
Email Notifications Settings
- Turn email notifications on or off for a particular module based on your requirements.
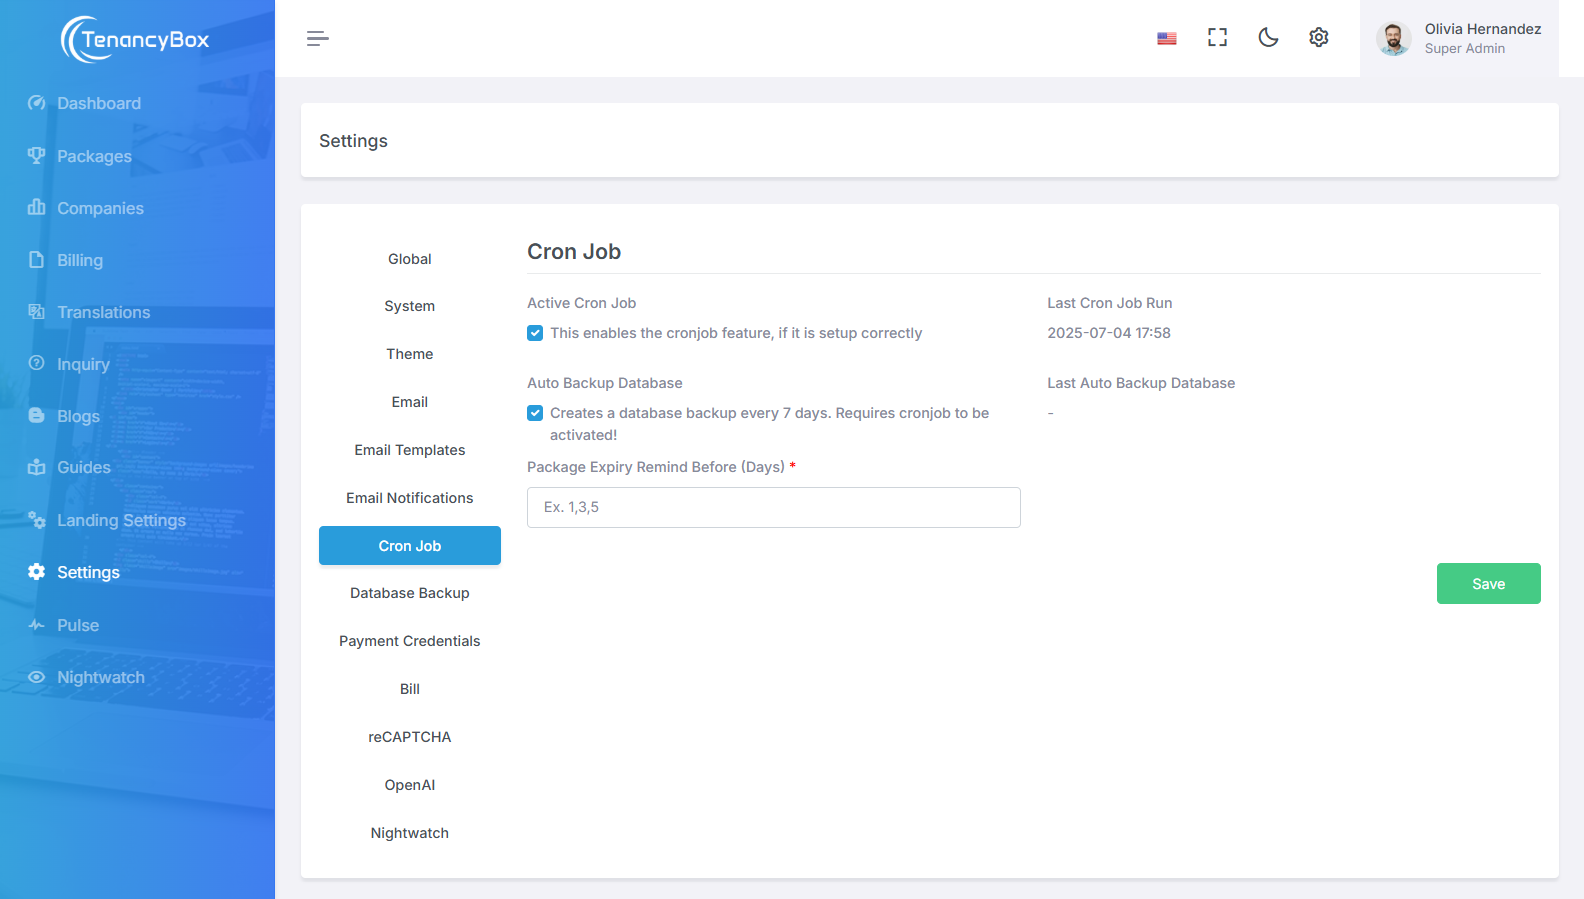
Cron Job Settings
- Enable cron job for email queue, weekly database backups, and daily timesheet report emails to users.
- Set the number of days to receive an email notification for package expiration reminders.
- You must manually create a cron job on your server to use these features.
- To use the scheduler, add the following cron entry to your server:
* * * * * cd /path-to-your-project && php artisan schedule:run >> /dev/null 2>&1 - Do not forget to replace
/path/to/artisanwith the full path to the Artisan command of your Laravel application. - This cron job will call the Laravel command scheduler every minute. When the
schedule:runcommand is executed, Laravel will evaluate your scheduled tasks and run those that are due. - For more information, read the following documentation:
Task Scheduling - If you are having trouble creating the cron job, contact your hosting provider for support.
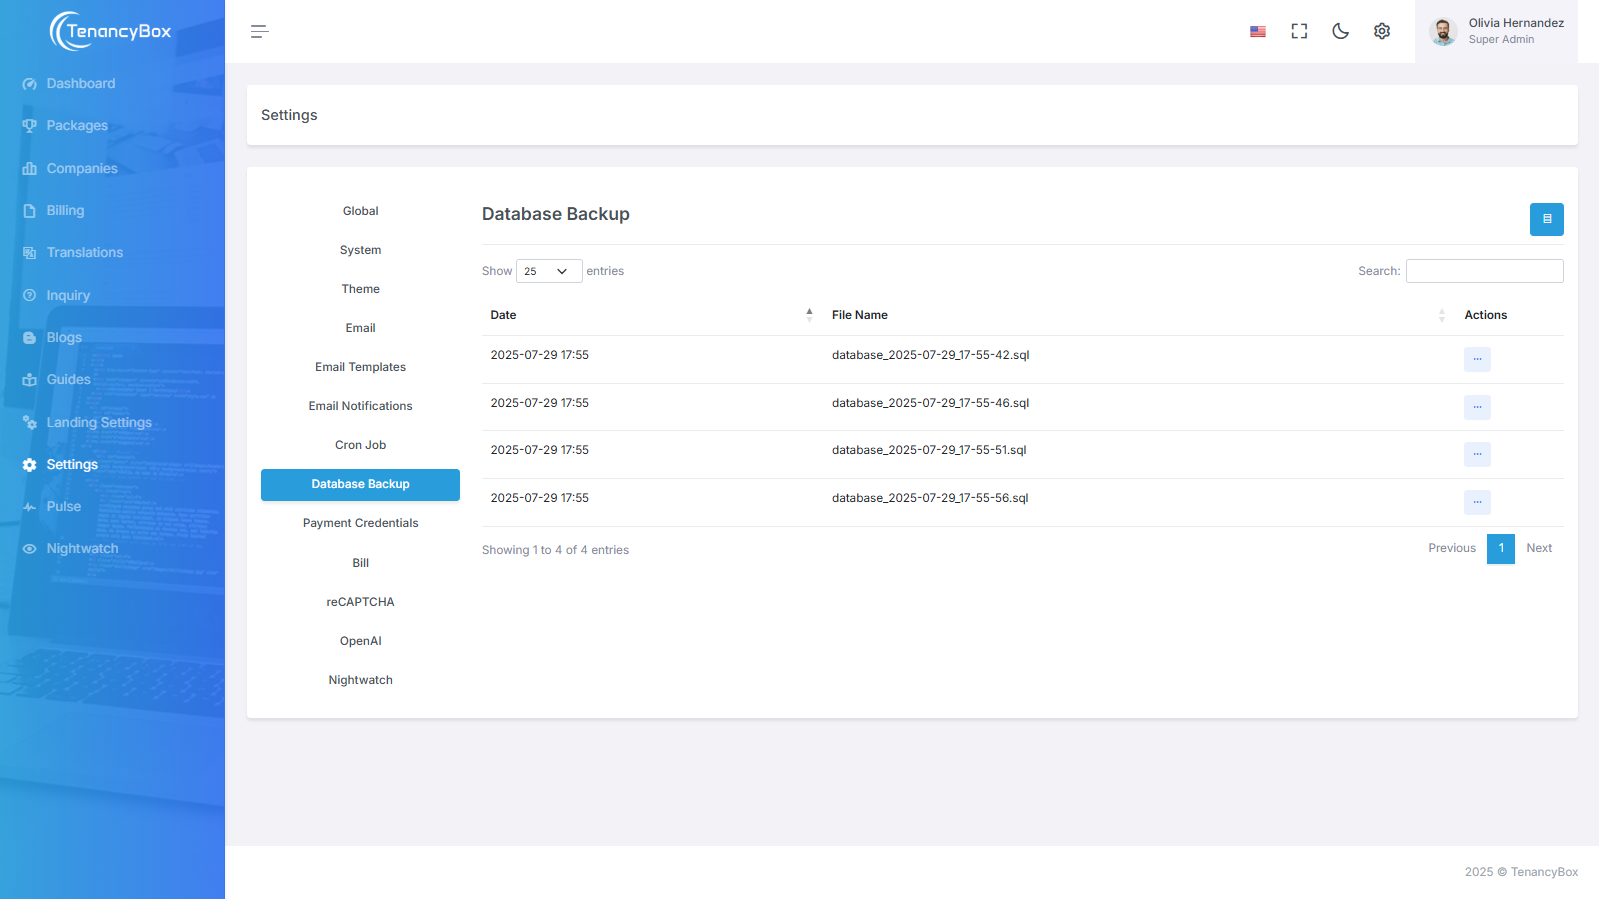
Database Backup
- Backup, restore, and download the database.
- You can also delete a backup of the database.
- To back up the database, run the Laravel scheduler using cron or execute the command:
php artisan db:backup-custom.
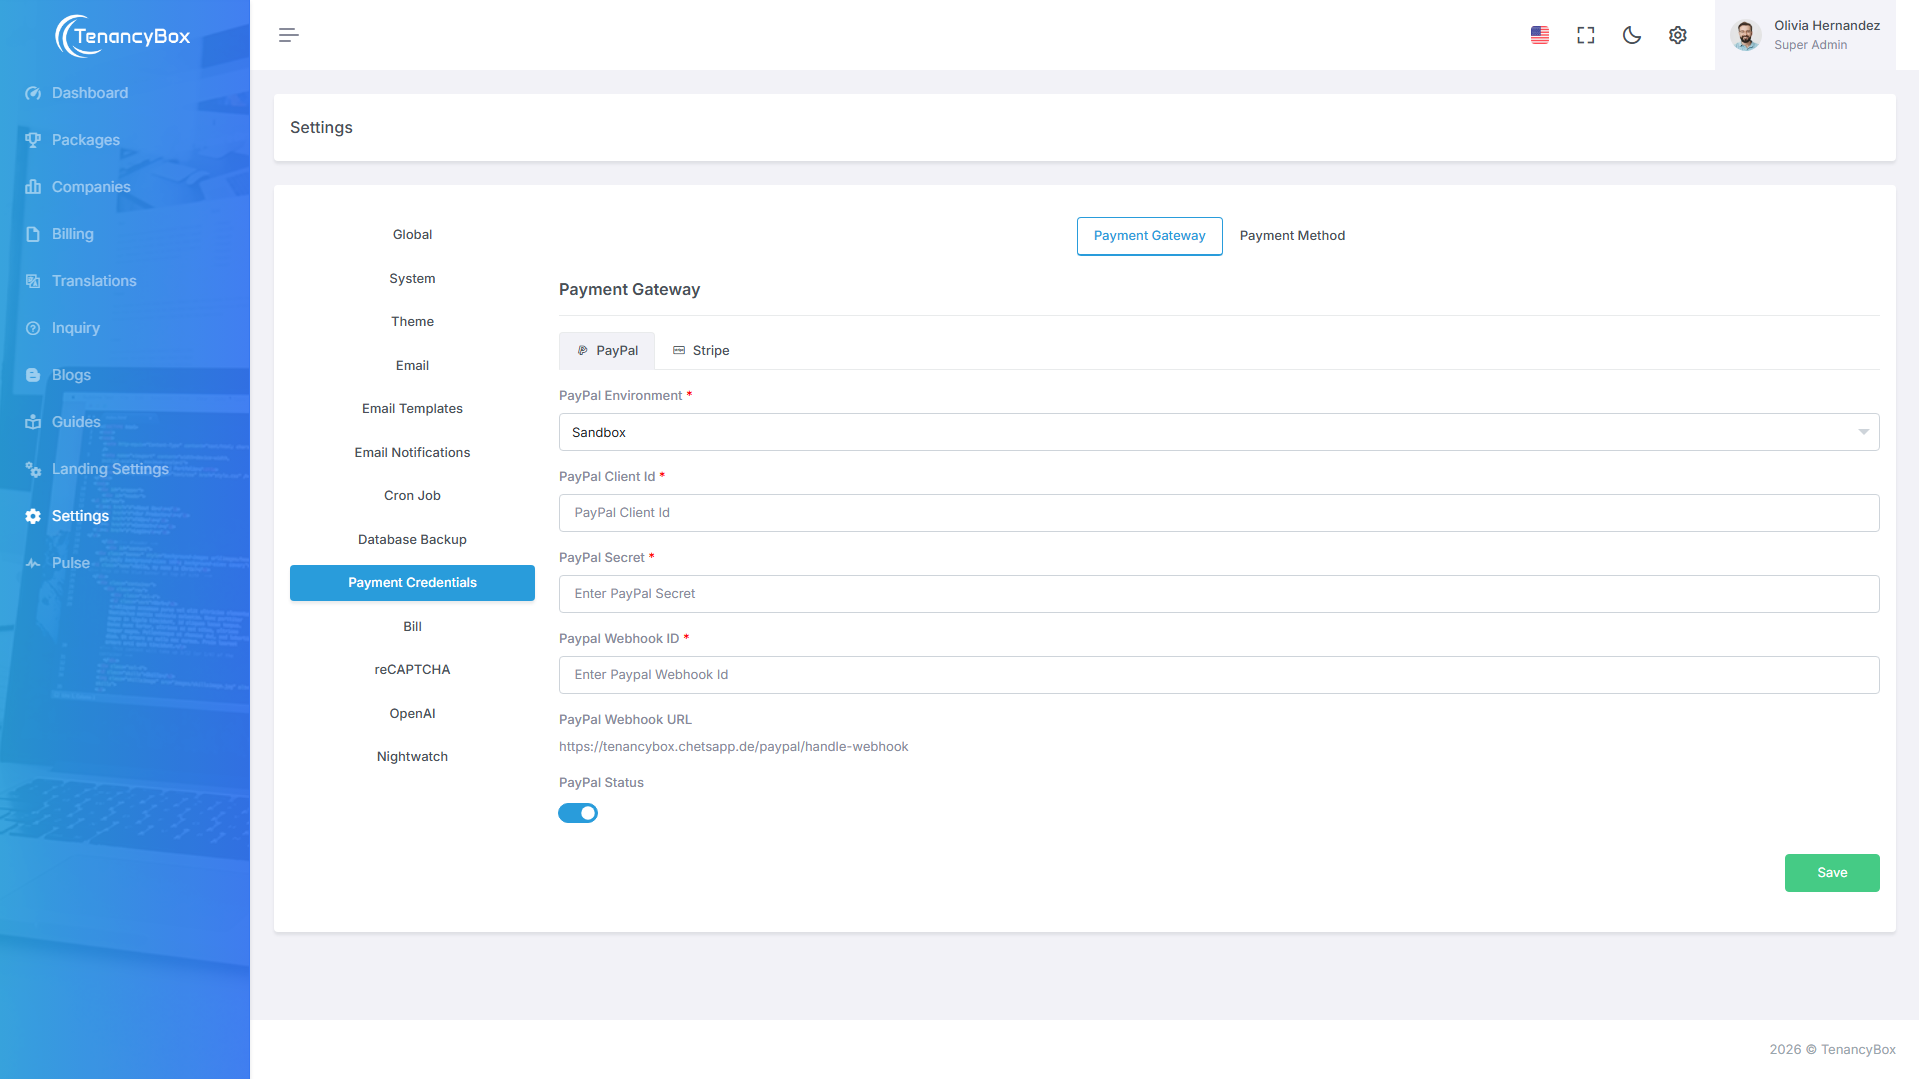
Payment Credentials
- Update payment gateway credentials for PayPal and Stripe.
- For offline payment methods, you can add new methods or update existing ones from here.
- To integrate the payment gateway, follow the steps below...
PayPal
- Create a PayPal account and log in.
-
Create sandbox test accounts or live accounts.
- For testing, you need to create one merchant and one personal account.
- Use personal account credentials when making payments via the tool.
-
After creating a sandbox account, Go to Dashboard > Developer Dashboard > Apps &
Credentials.
- Create an app for sandbox and live accounts.
- PayPal Payment Test.
-
Webhook
- Open PayPal Developer Dashboard
- Open Apps & Credentials
- Open a specific app and click on Add Webhook
- Copy Webhook URL from Settings > Payment Credentials > Payment Gateway > PayPal
-
Event Traced
- Payment Sale Completed
- Set Webhook Id in Settings > Payment Credentials > Payment Gateway > PayPal
-
Plan Create
- Login using business account
- Click Sales > Subscription
- Click Subscription Plans
- Create subscription products and plans
- Copy plan id and add in package [Packages > Edit > Paypal Plan Id]
Stripe
- Create a Stripe account.
-
After creating a Stripe account, go to your
Stripe Dashboard.
- Find the Publishable Key and Secret Key for Stripe integrations (located in the Developers/API Key section).
-
Once you have the credentials, go to Developers/Webhooks.
- Add an endpoint for Stripe webhooks (copy the STRIPE WEBHOOK URL from TenancyBox Settings > Payment Credentials > Stripe tab).
-
Webhook events:
- payment_intent.created
- payment_intent.canceled
- payment_method.updated
- invoice.payment_action_required
- invoice.payment_failed
- invoice.payment_succeeded
-
Get the Stripe Webhook secret
- Open Stripe Dashboard
- Navigate to Developers > Webhooks section
- Find the Signing Secret (Format:
whsec_·················) - Set this as Stripe Webhook Signing Secret in Settings > Payment Credentials > Payment Gateway > Stripe tab
-
Get your Stripe account ID.
- Open Stripe Account Settings
- Find Account ID.
- Set this as Stripe Account ID in Settings > Payment Credentials > Payment Gateway > Stripe tab
-
Create Subscription
- Go to the Product catalog menu.
- Create a product with required fields such as name and price. The price model should be standard.
- Do the same for creating a package in TenancyBox with the same package name, price, and duration.
- To get the plan ID, go to the Products menu and click on view product.
- In the details section, copy the Price API ID. Use this as the Stripe Plan ID when creating or updating a package.
- Note: Ensure the same package is created in both TenancyBox and Stripe payment sites.
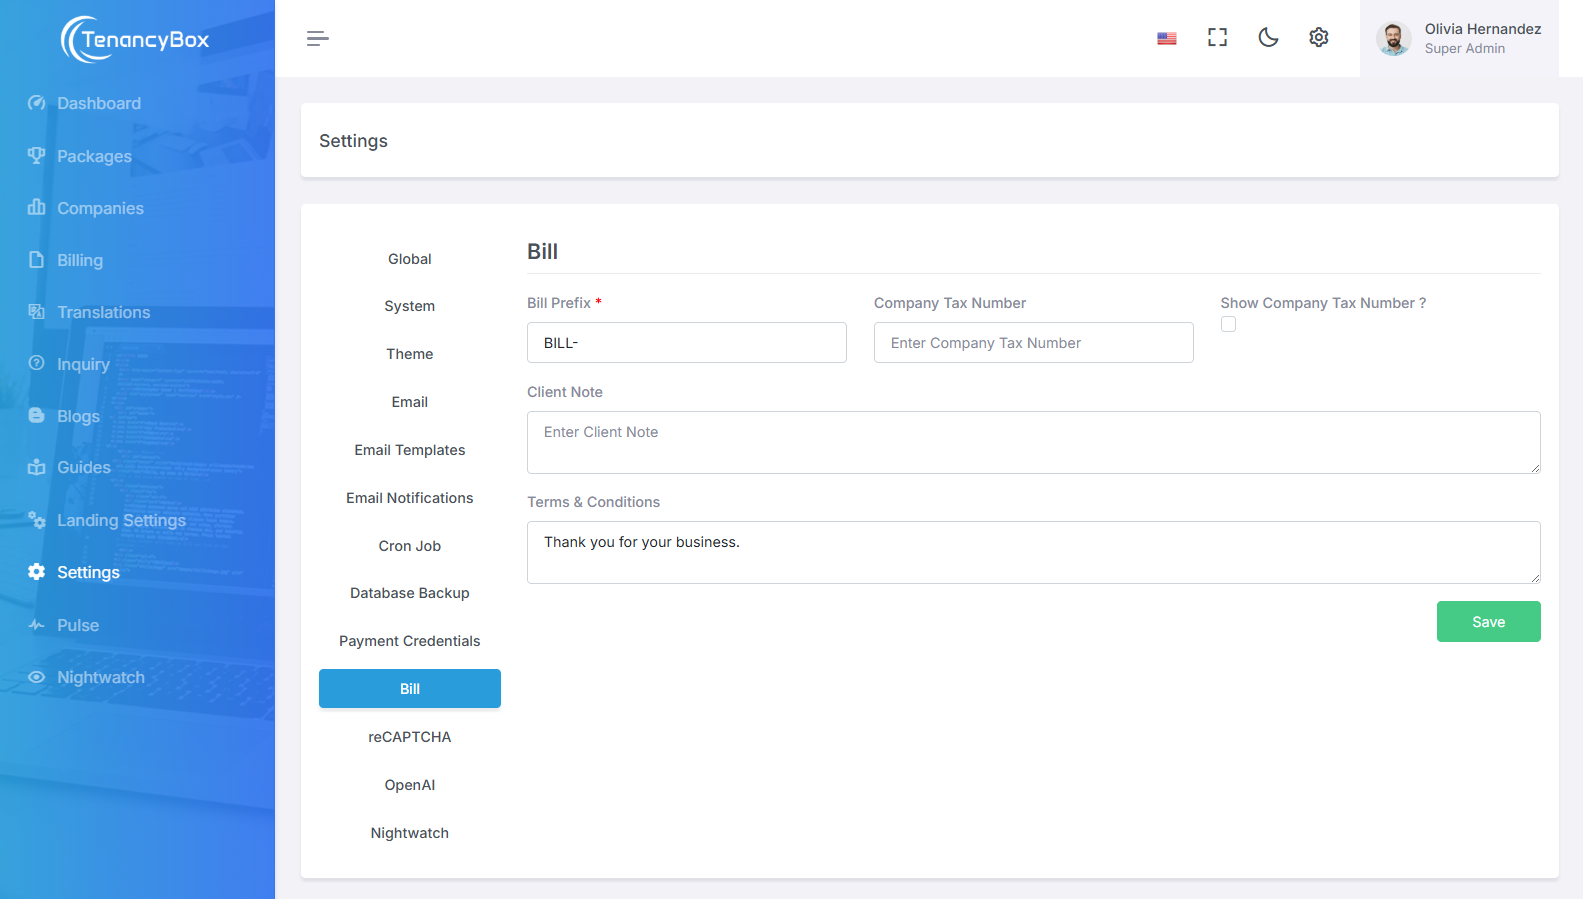
Bill Settings
- Update settings for bill number prefix, company tax number, client note, and terms & conditions that display on system-generated bills.
- Add custom bill prefixes (e.g., "INV-") as needed.
- Enable the display of the company tax number on the bill if desired.
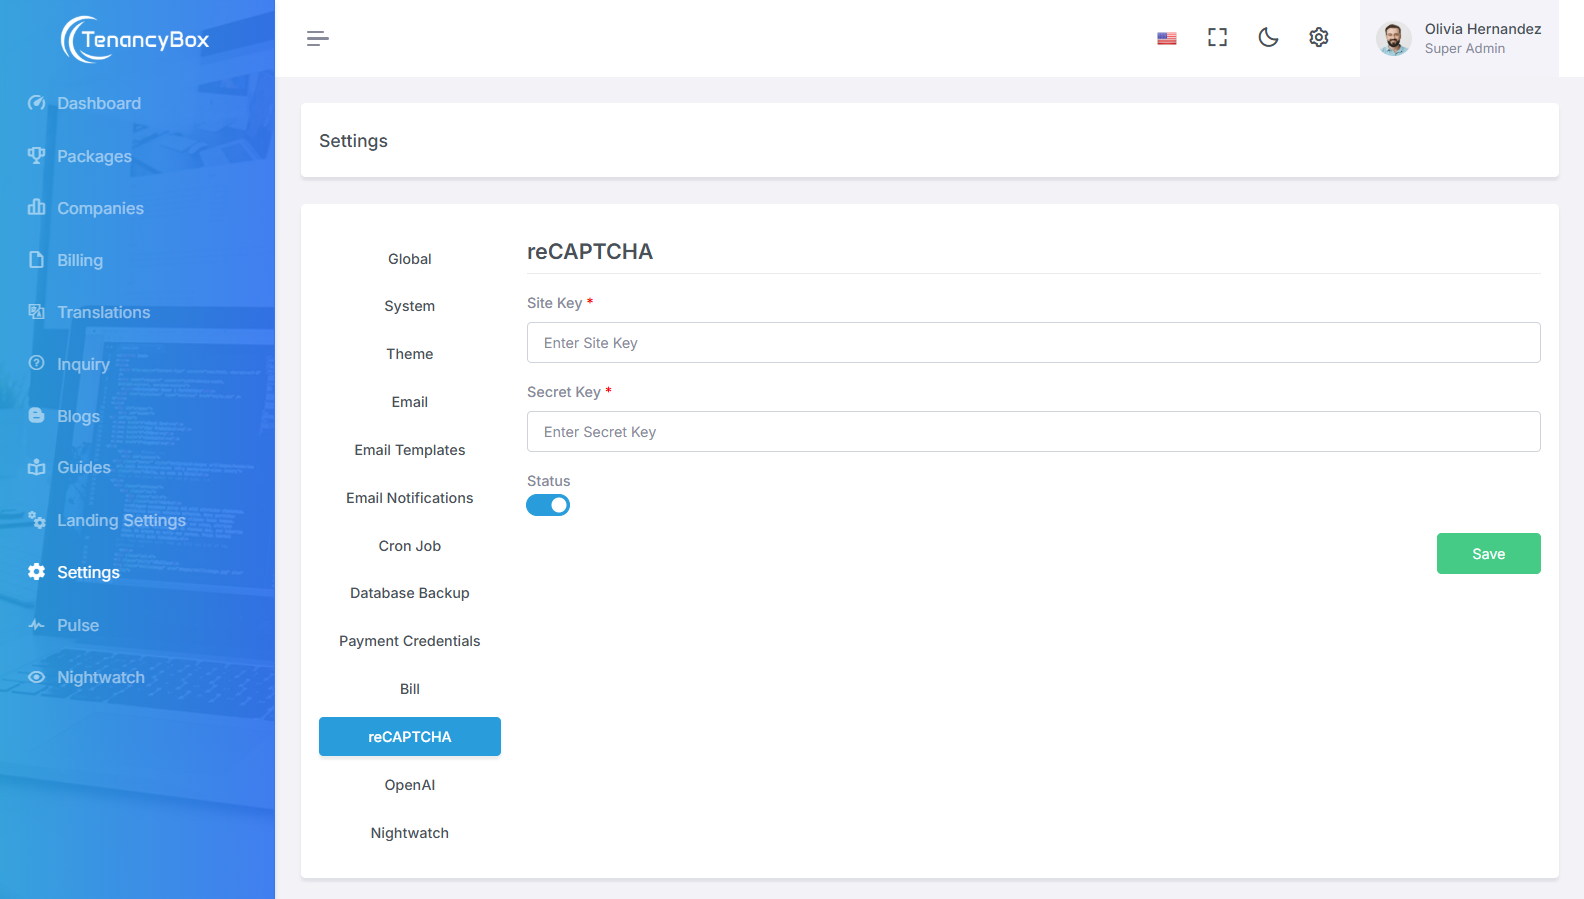
reCAPTCHA
- Integrate reCAPTCHA for enhanced security, using site and secret keys with status monitoring.
- Ensure platform protection by implementing reCAPTCHA with site and secret keys for verification.
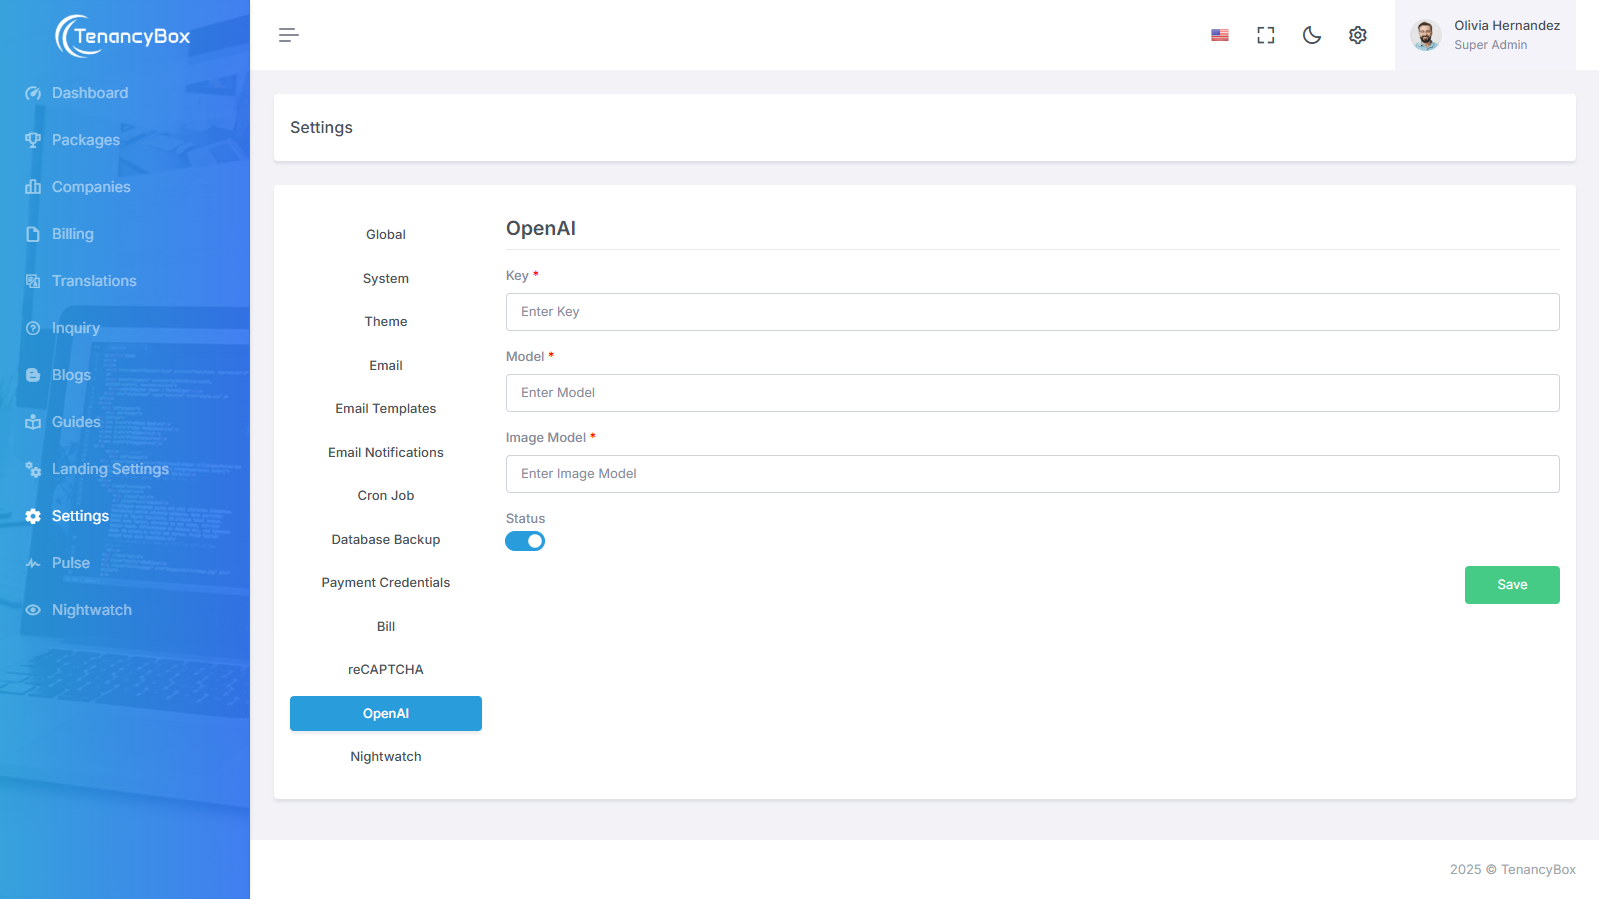
OpenAI
- Integrate OpenAI with your platform using API keys, enabling advanced AI-driven features such as text generation and image creation.
- OpenAI Integration: Utilize OpenAI's powerful AI models by configuring API keys, model selection, and status monitoring for seamless AI-driven functionalities.
- AI-Powered Features: Enable AI capabilities in your system by configuring OpenAI keys, selecting text and image models, and monitoring status for optimized performance.
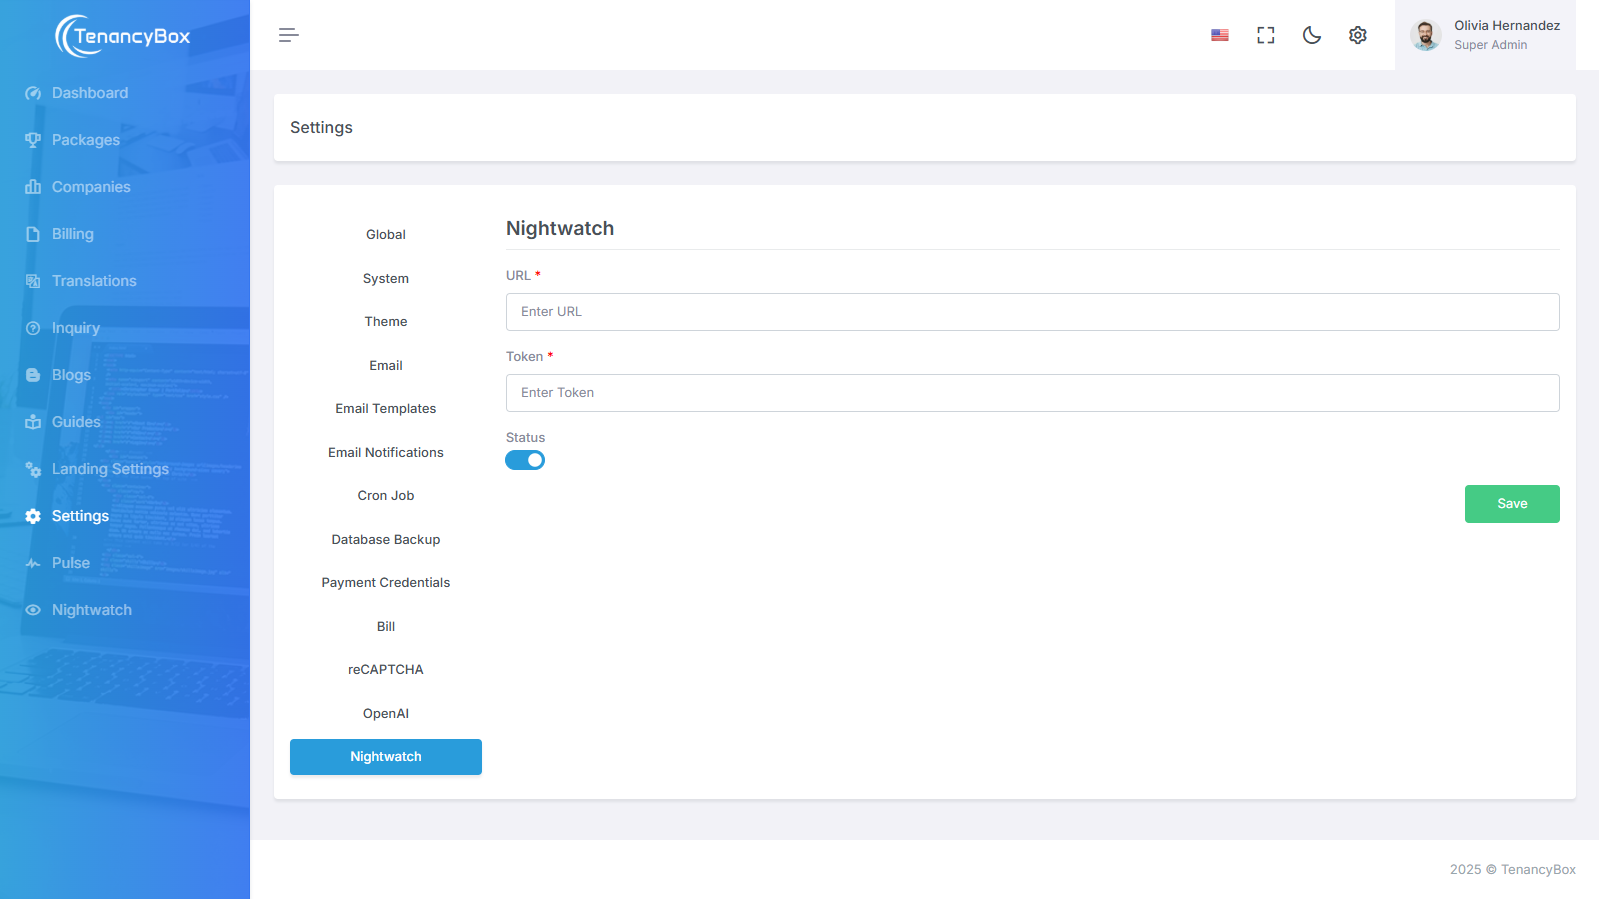
Nightwatch Settings
- Integrate Nightwatch to monitor system exceptions and errors in real-time, using secure token and URL-based configuration.
- Enable centralized error tracking by connecting your application to the Nightwatch monitoring platform, ensuring visibility into system issues and improving debugging efficiency.
- Error Monitoring: Capture and track application exceptions across tenants in real-time.
- Secure Setup: Configure using a unique endpoint URL and secure token for authenticated access.
- Status Control: Toggle integration on/off as needed via the admin panel.
- Improved Debugging: Enhance visibility for developer to identify and resolve issues quickly.
-
Sign Up / Log In to Nightwatch
- Visit nightwatch.laravel.com
- Click Login (top right corner)
- Log in with your Laravel or GitHub account
- On first login, create your organization and project environment
-
Create a New Environment
- Click on Create Environment
-
Enter:
- Environment Name: e.g., TenancyBox Dev
- Framework: Laravel
- Click Create Environment
-
Copy the generated:
- Environment Token (e.g.,
9f592460-...) - Dashboard URL (e.g.,
https://nightwatch.laravel.com/us/environments/...)
- Environment Token (e.g.,
-
Install Nightwatch in Laravel
composer require laravel/nightwatchphp artisan nightwatch:install- This will publish the config file
config/nightwatch.phpand set up basic exception reporting.
-
Add Environment Variables
- Add these to your
.envfile or configure via the SuperAdmin Panel: NIGHTWATCH_ENABLED=trueNIGHTWATCH_URL=https://nightwatch.laravel.com/api/ingestNIGHTWATCH_TOKEN=your_project_token
- Add these to your
-
Configure in SuperAdmin Settings Panel
- Go to Settings > Nightwatch
-
Enter:
- NIGHTWATCH_TOKEN
- NIGHTWATCH_URL (usually
https://nightwatch.laravel.com/api/ingest)
- Enable integration using the Status toggle
- Click Save
- Changes are saved dynamically to the
.envfile
-
Verify Integration
- Trigger an exception manually (e.g., throw an error)
- Visit your Nightwatch dashboard: nightwatch.laravel.com
- Check if logs appear under the correct environment
- You’ll see live metrics like exceptions, slow queries, events, etc.
- You can filter by environments and servers
6 Modules
Dashboard
- Displays recent user activities such as settings updates, user additions, and module creation logs.
- Clean and minimal layout with sidebar logo and user profile information.
- Real-time activity tracking with timestamps and action details.


Billing
- The Billing module tracks package details, payment status, and usage metrics, ensuring transparent financial oversight for company subscriptions.
- Effortlessly manage package subscriptions and payment records with the Billing module, providing detailed insights into usage and payment status.
- The Billing module offers streamlined subscription management, providing clear insights into payment status and usage metrics for efficient financial oversight.
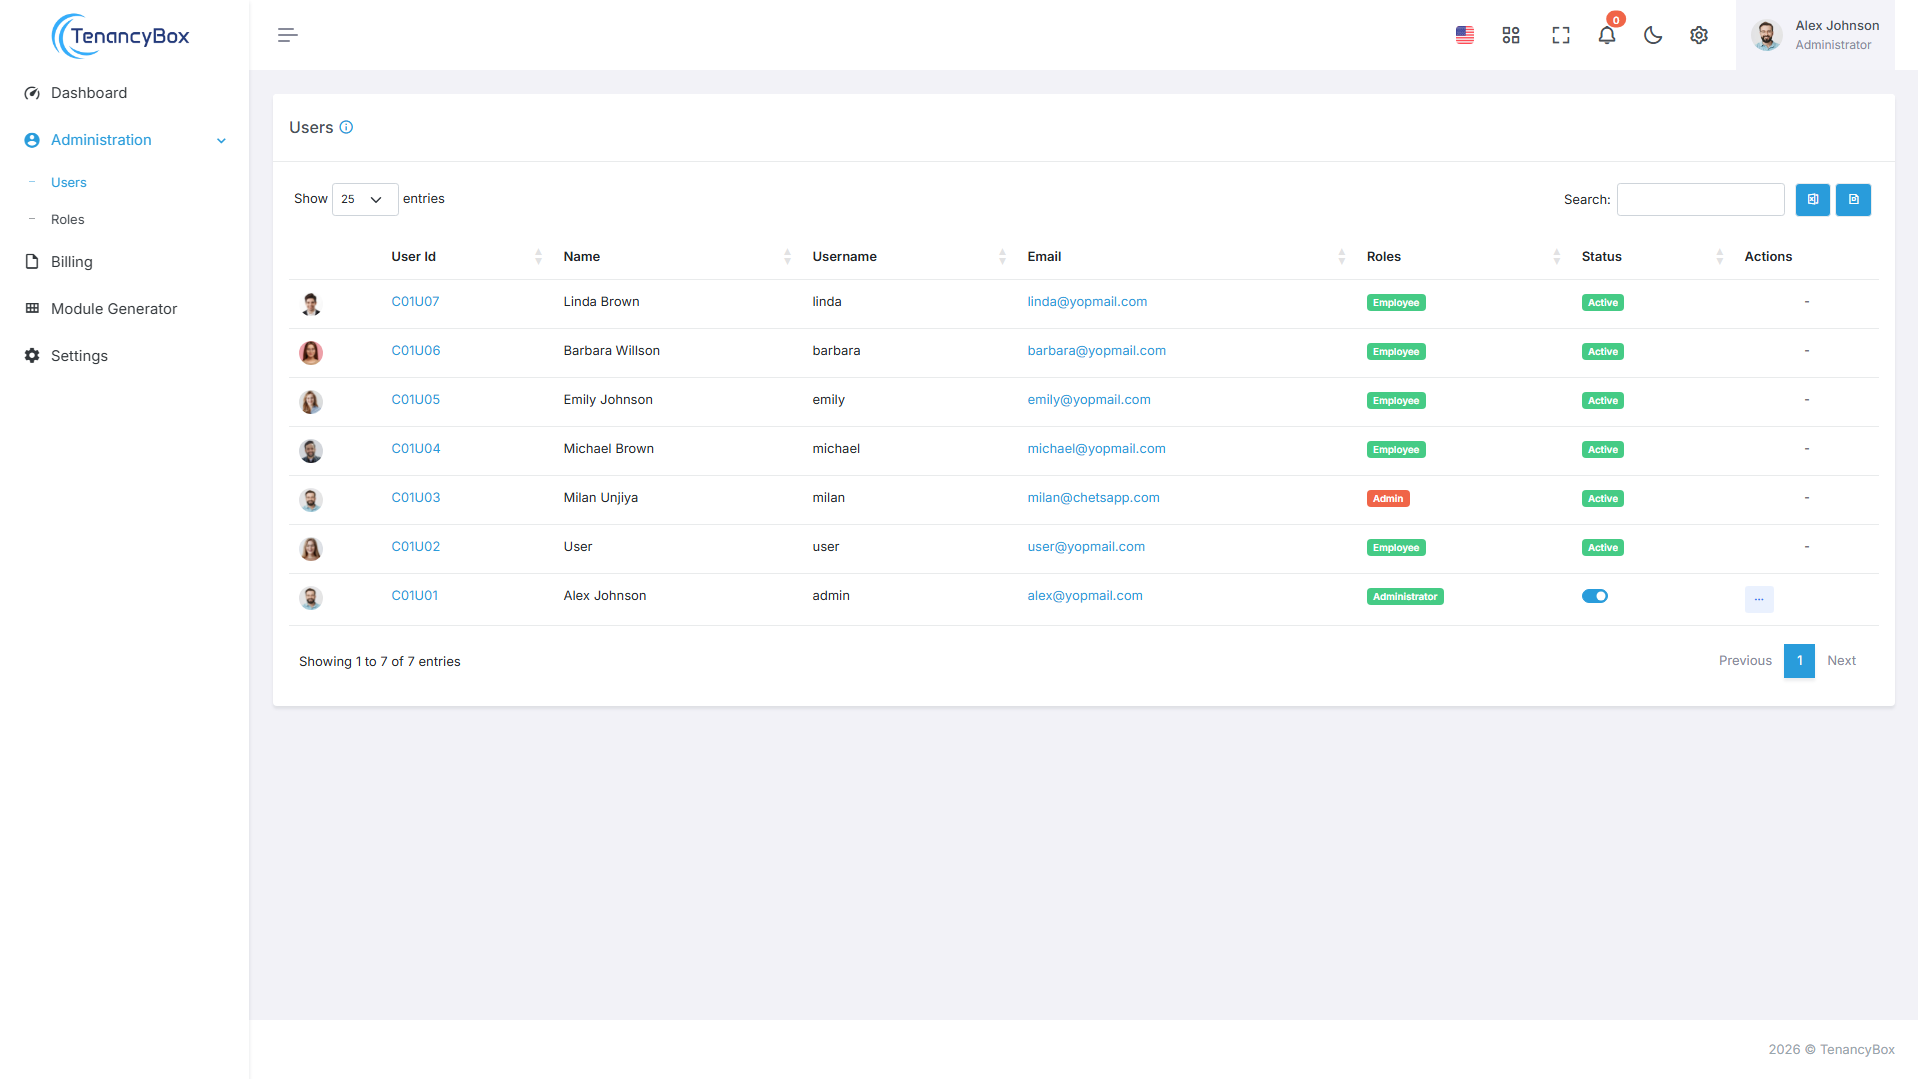
Users
- Manage users by adding, editing, deleting, and changing their status.
- Invite users via email, manage their avatar, and assign them a primary and secondary manager.
- Export all users to Excel and PDF.
- View user profiles by clicking on their User ID.
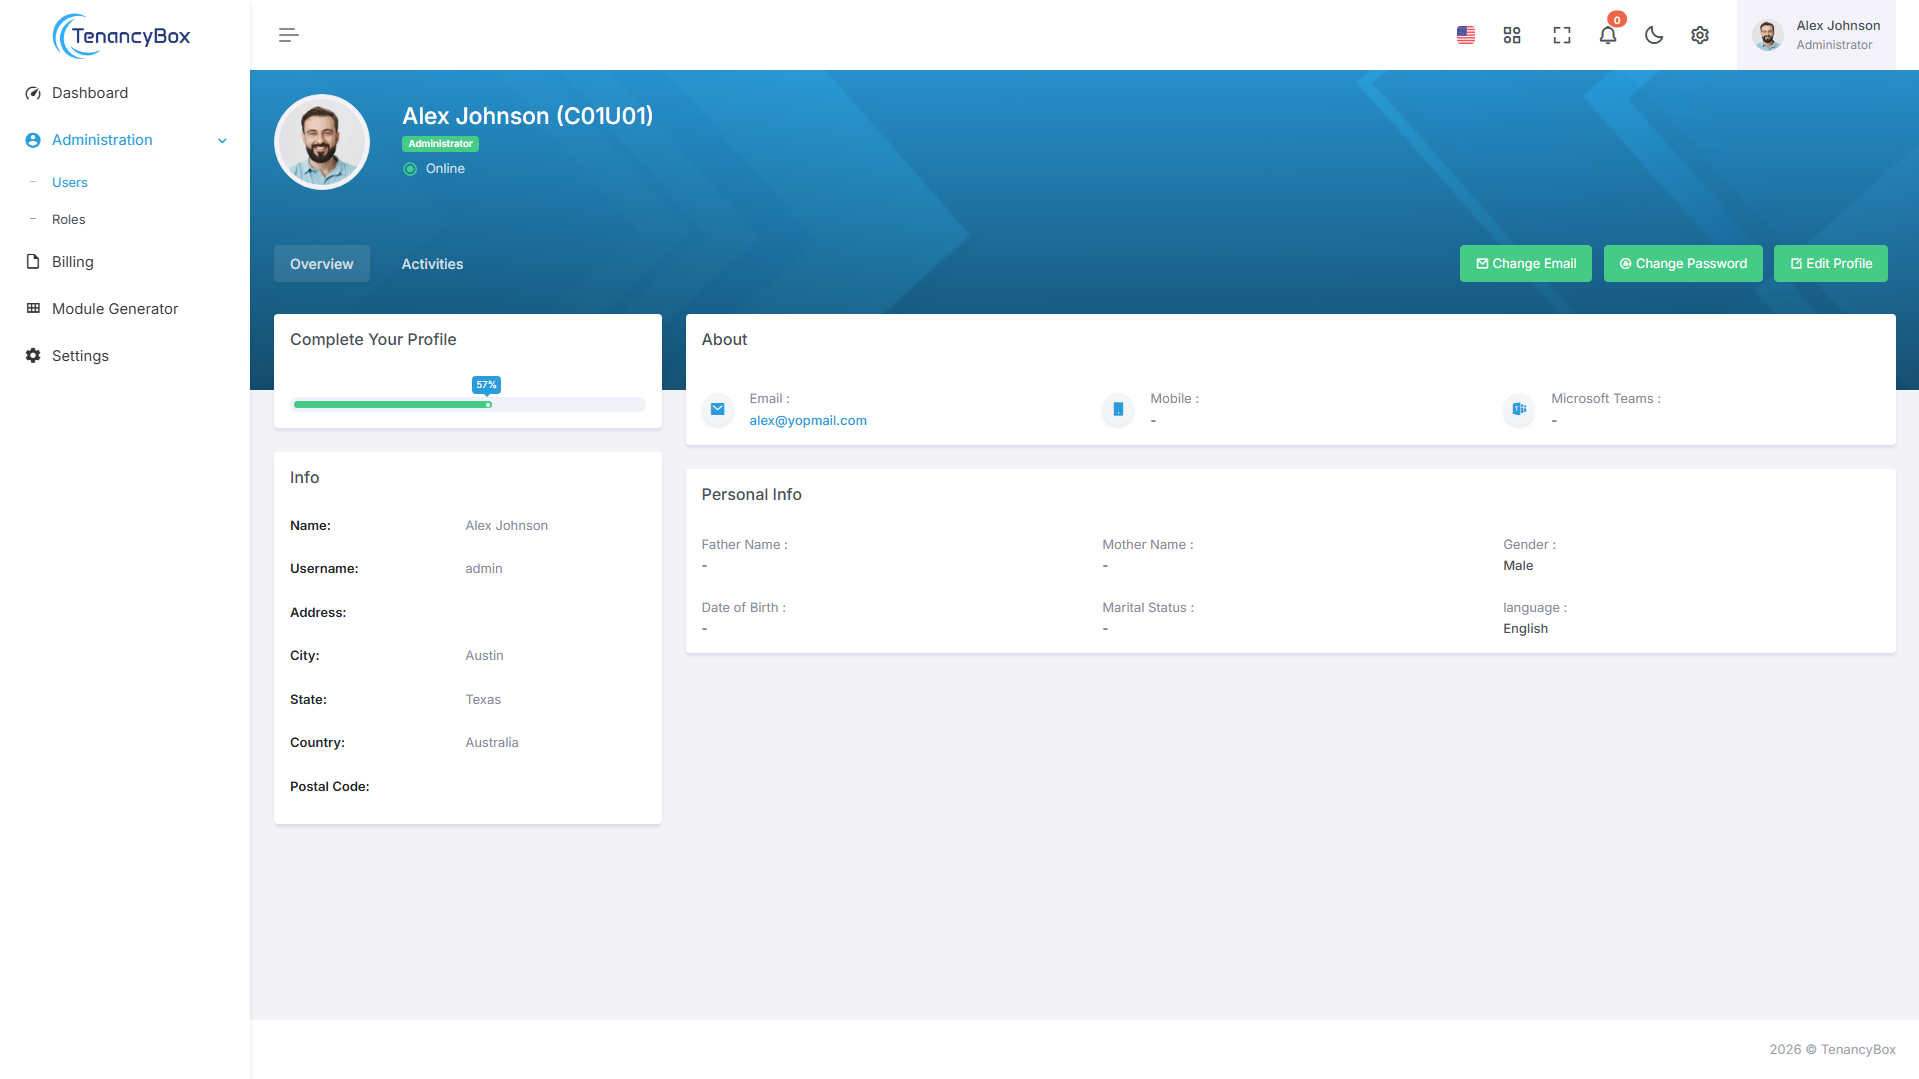
User Profile
- Count user comments, activities, etc.
- Change user avatar, email, and password.
- View user details, and activities.
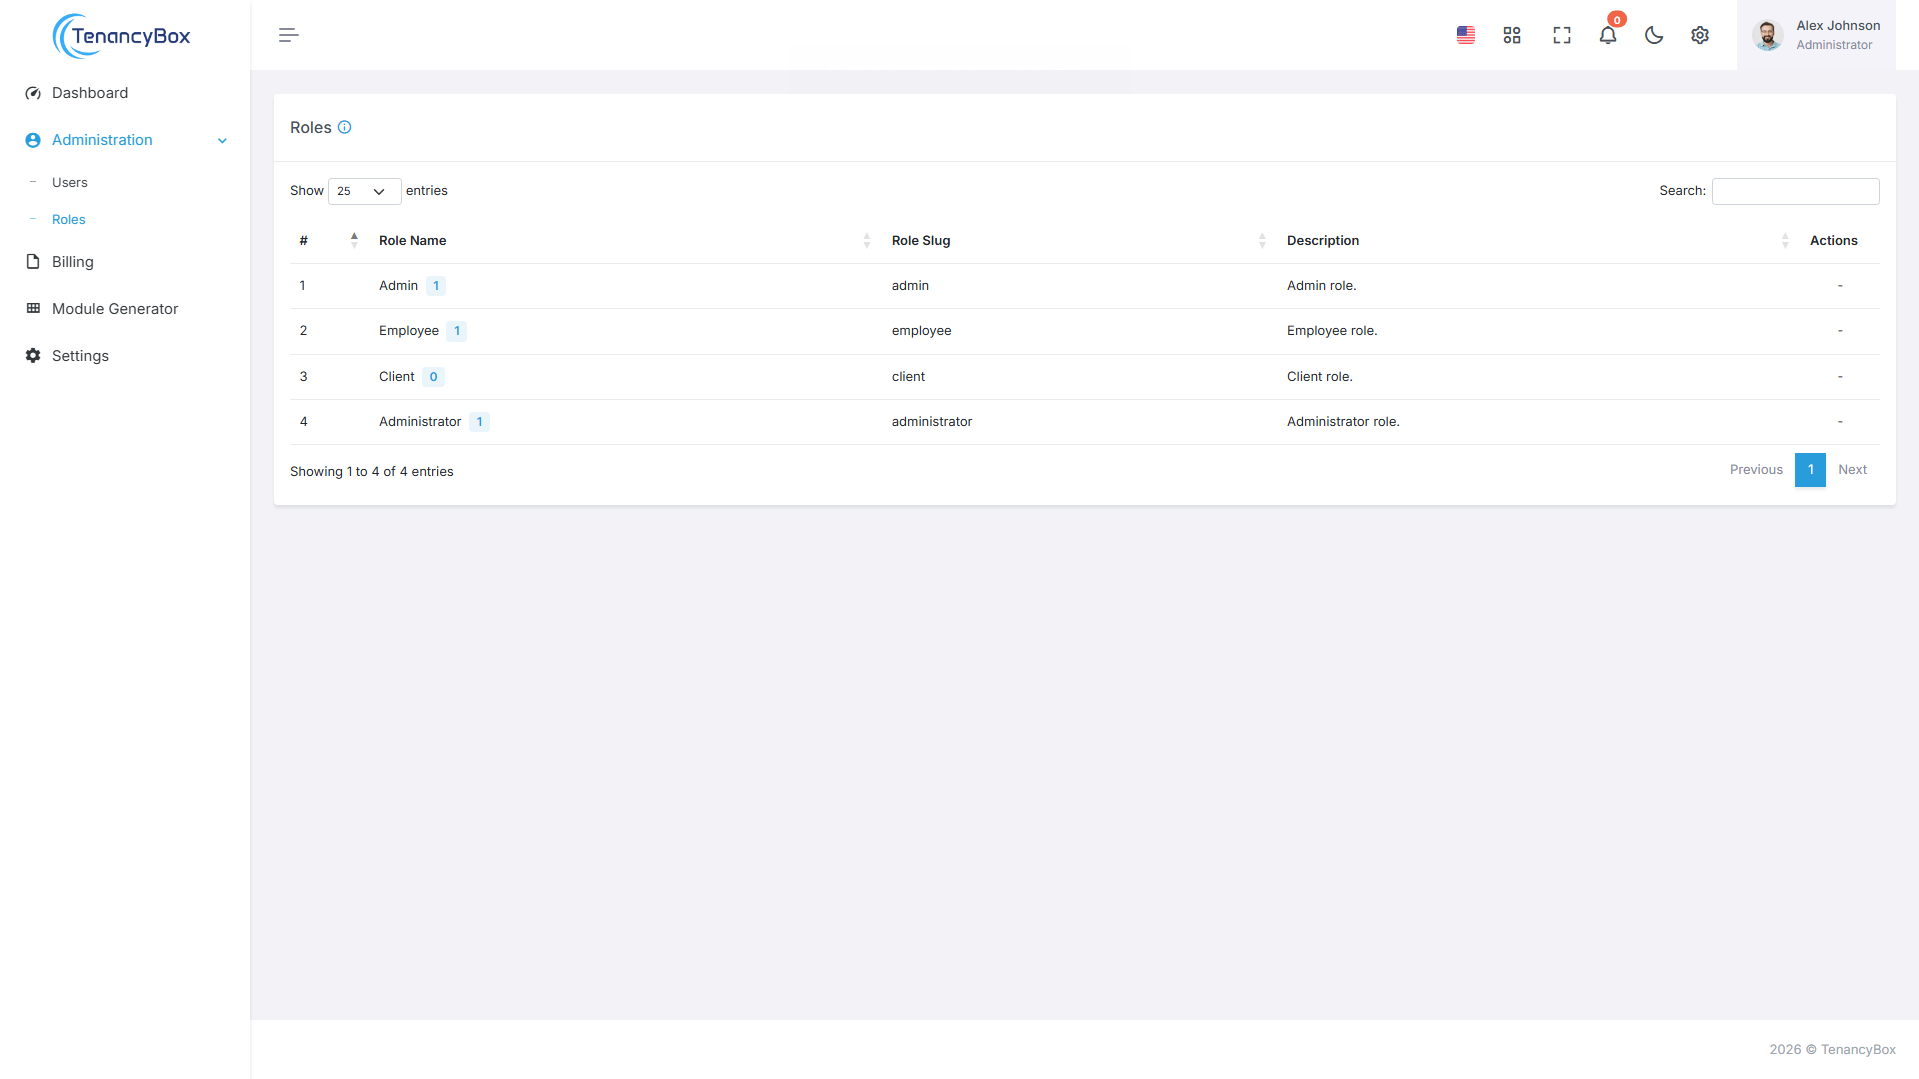
Roles
- Create, edit, and delete roles such as Admin, Employee, Project Manager, and HR Manager.
- Manage roles with flexible permissions for viewing, creating, editing, and deleting rights for each module.
- Two default roles are included: Admin and Employee.
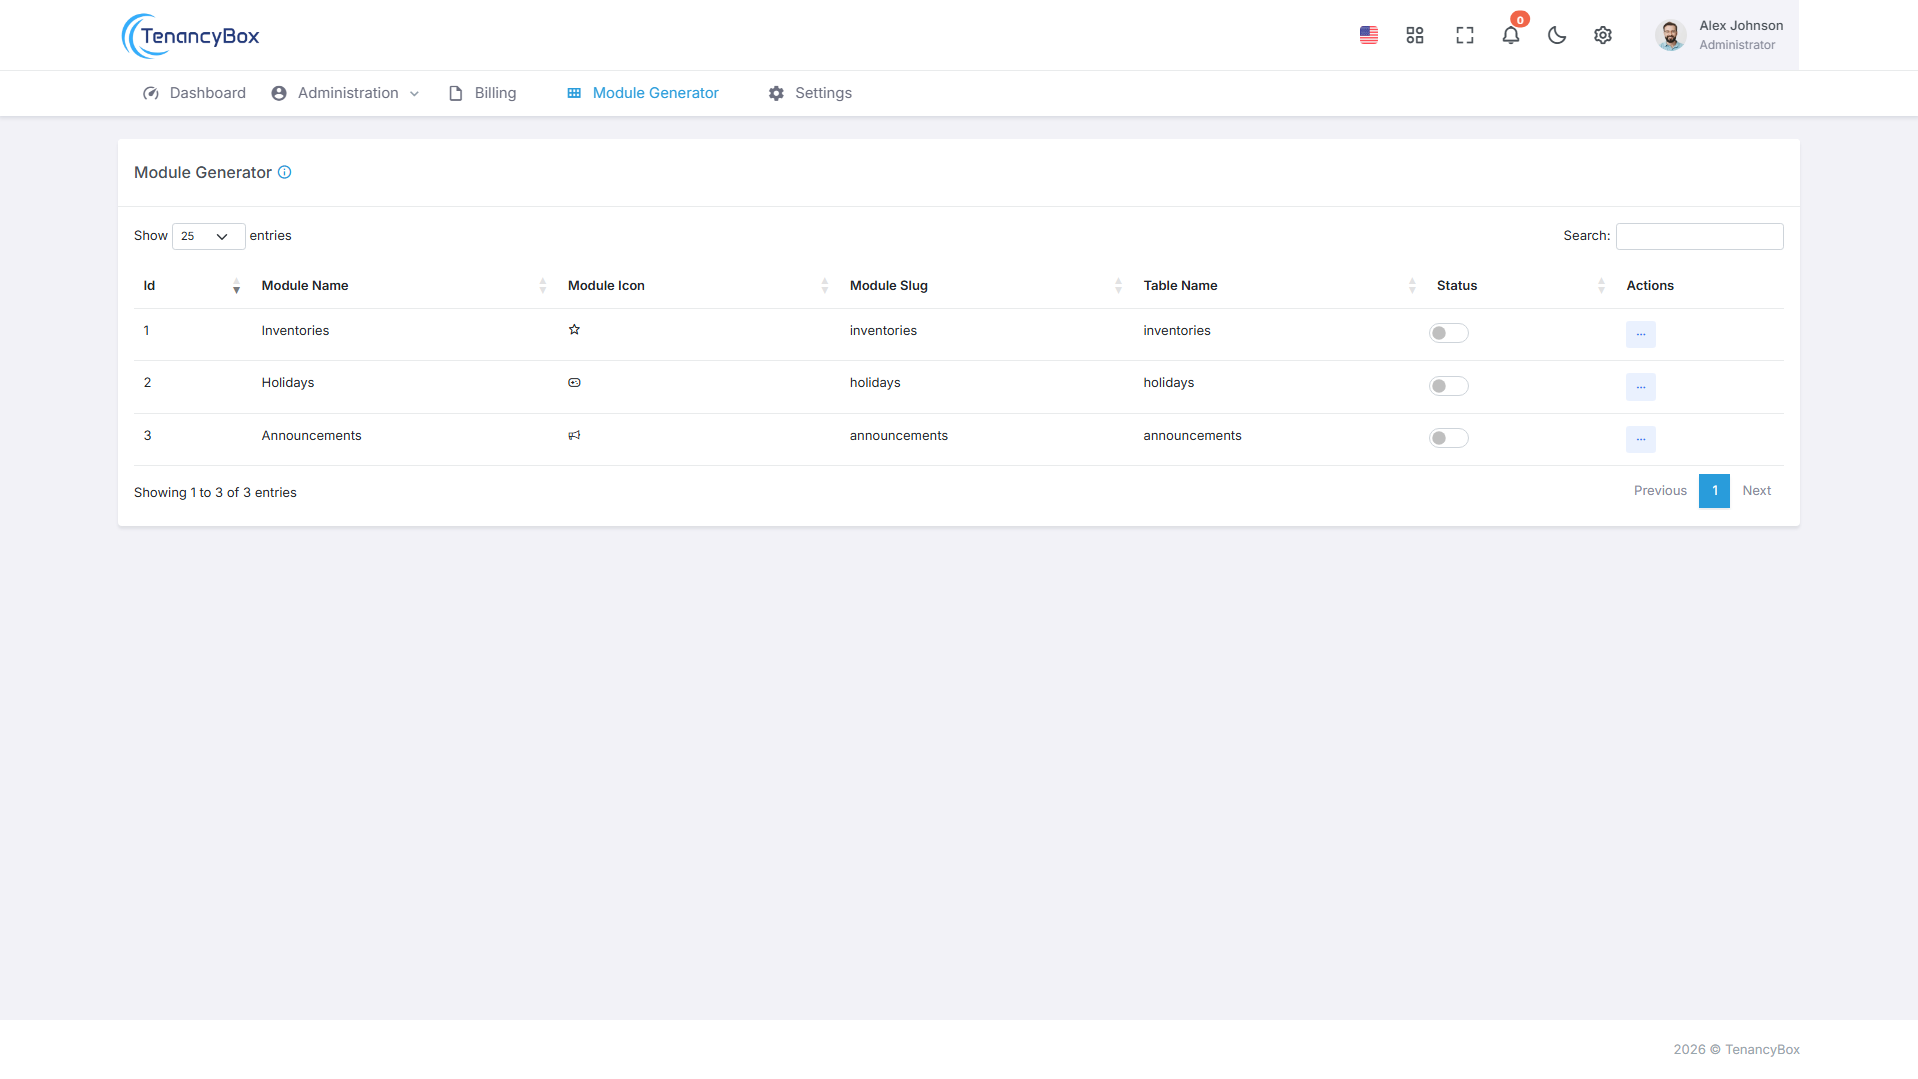
Module Generator
- You can create a custom module using the table name, column names, type, input type, and default value.
- Add multiple dynamic rows using the plus icon in the top right corner and remove them via the actions menu.
- You can update a module by changing its fields, validation rules, and field types, as well as setting access rights such as view, add, edit, and delete.
- Activate or deactivate a module by changing its status.
7 Settings
Here, you will find a complete guide on how to configure the settings of the TenancyBox tool.
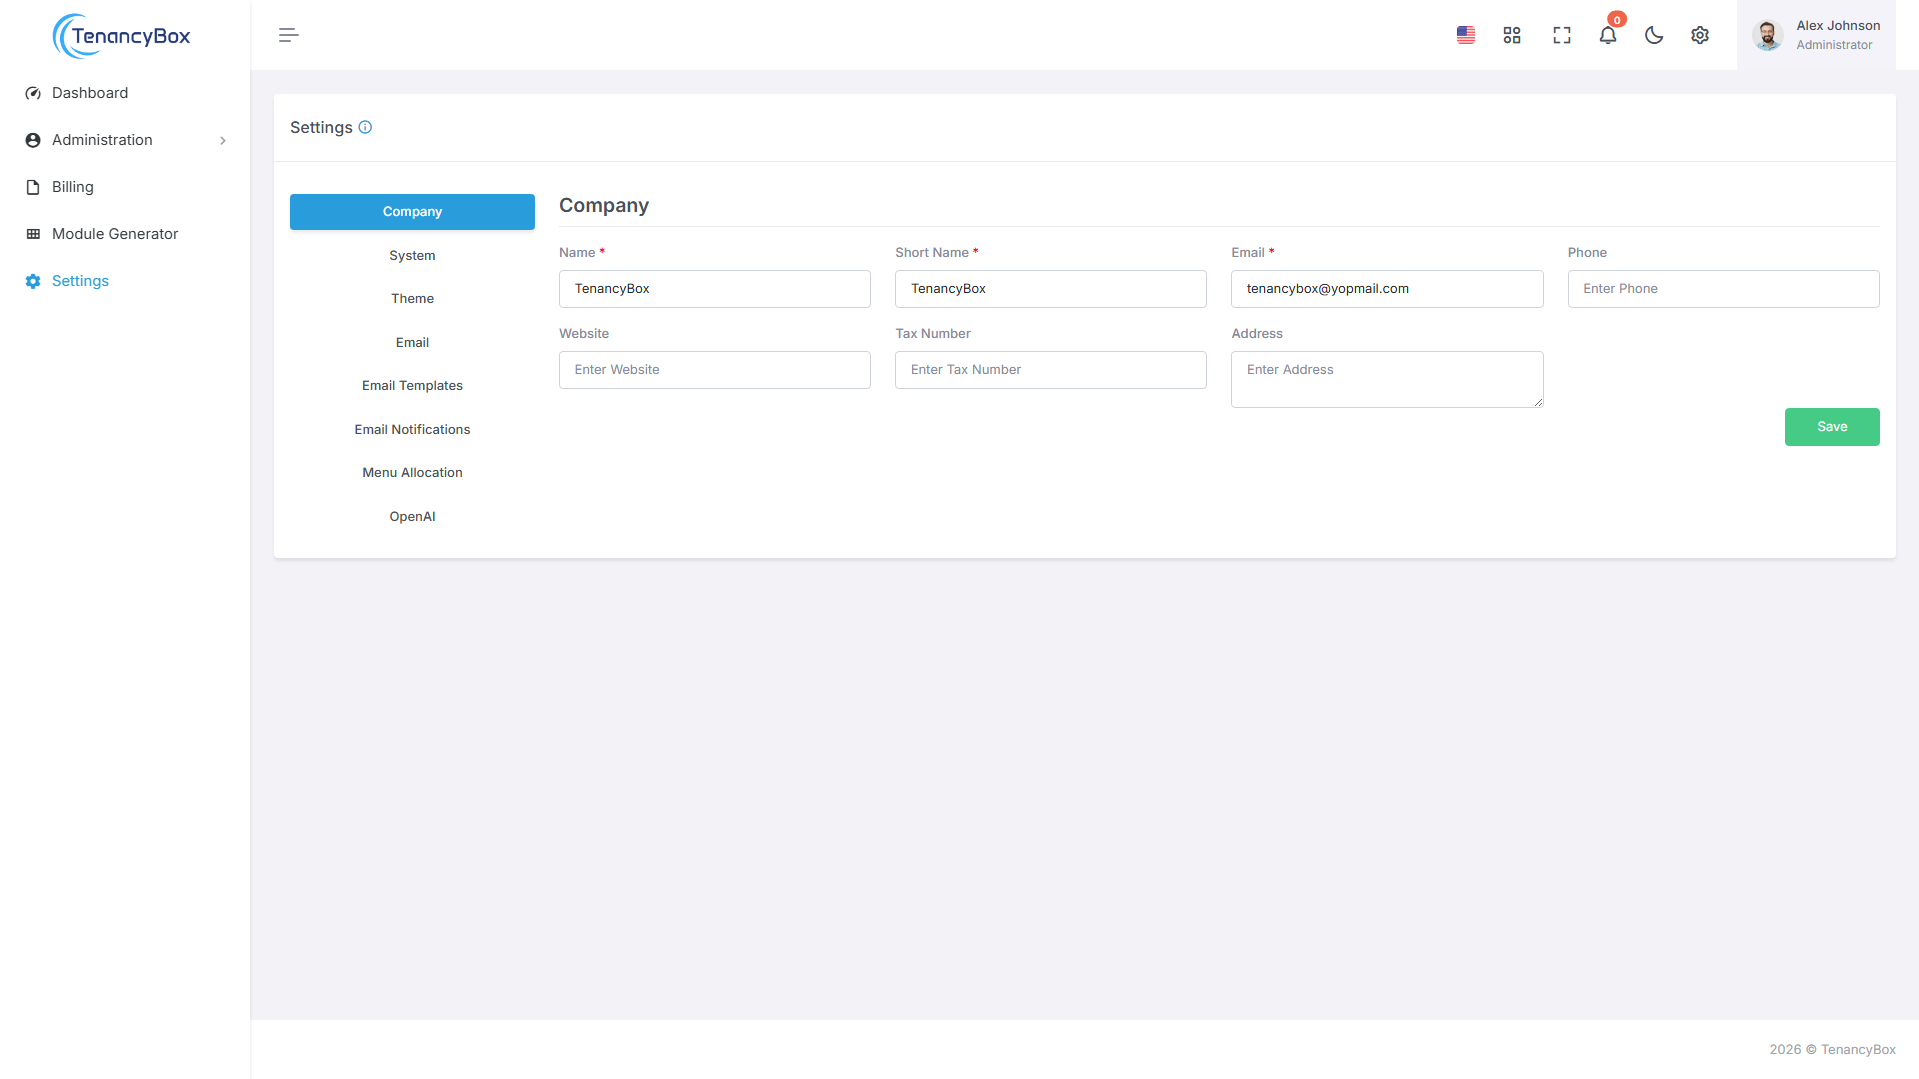
Company Details
- Update your company details, such as name, short name, email, phone, website, tax number, address, etc., easily.
- Add daily work report emails for email notifications of the daily work report.
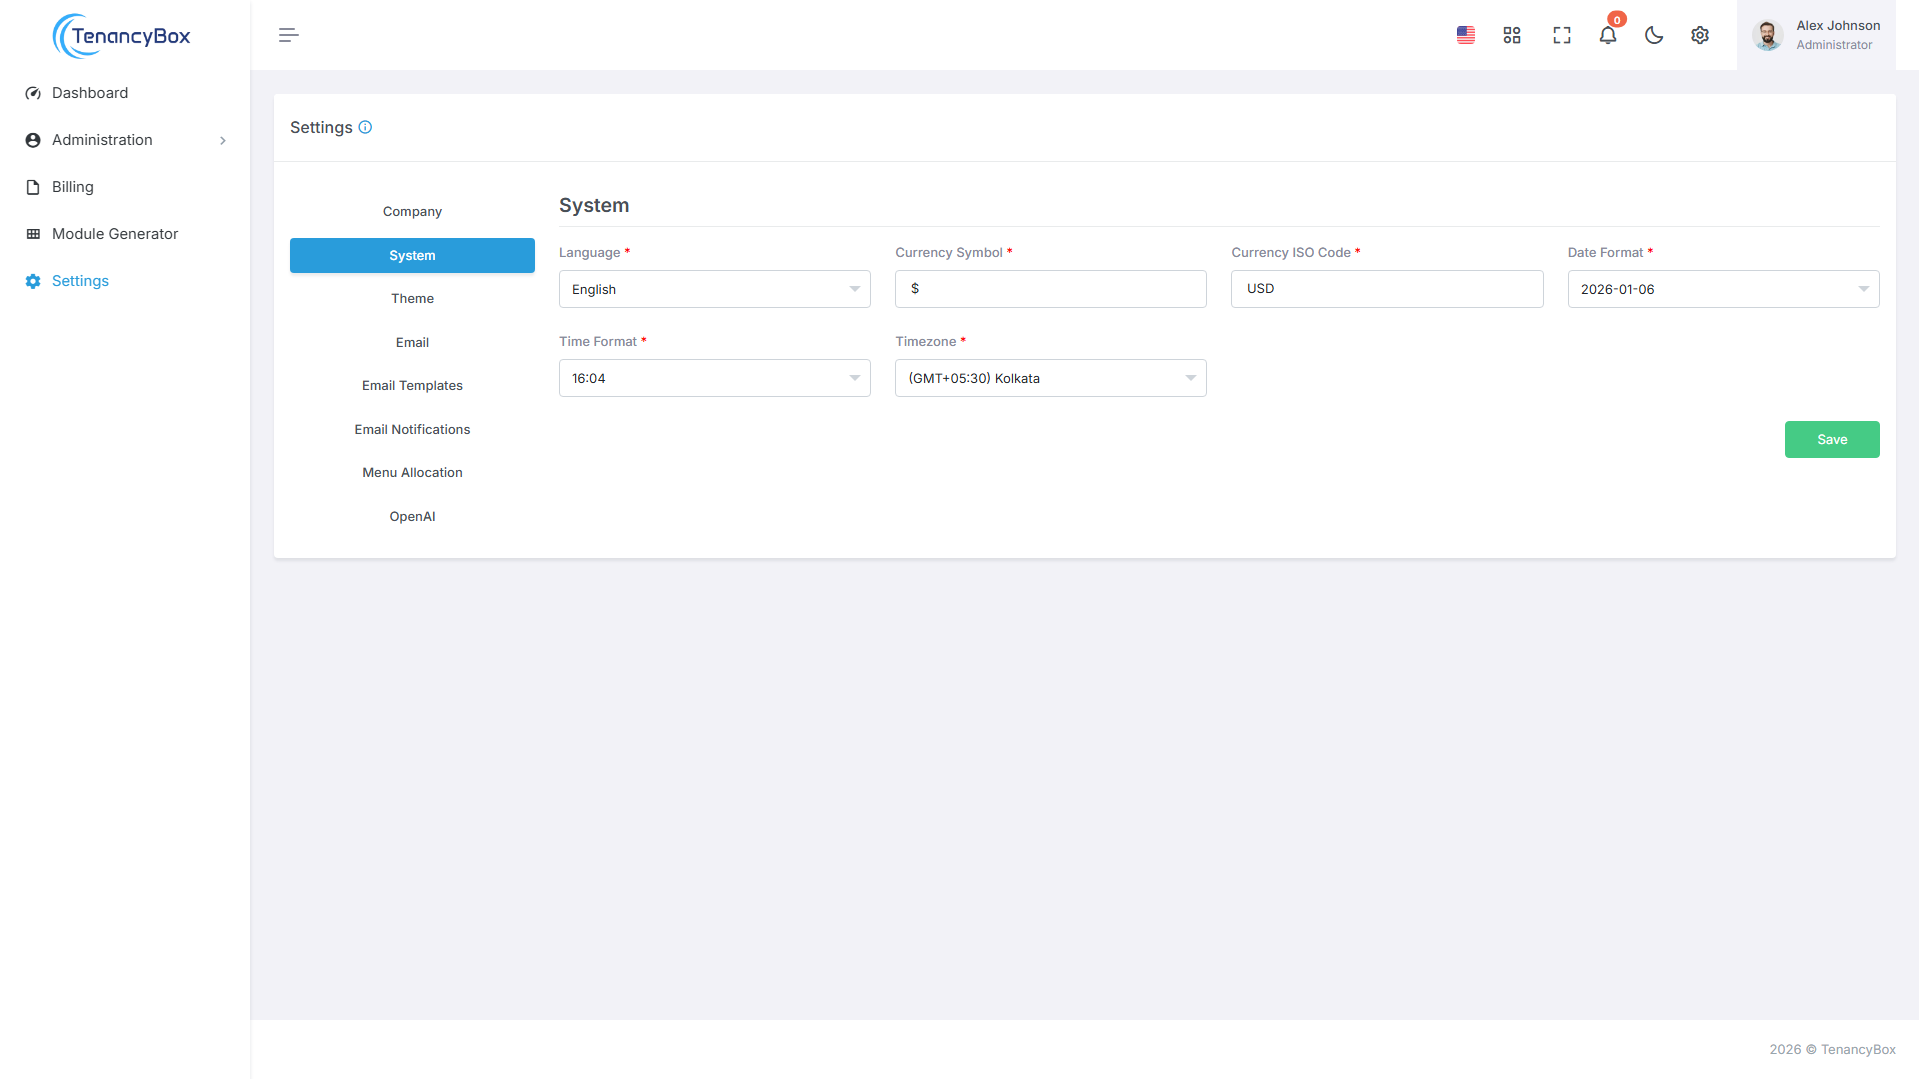
System Settings
- You can update system settings for language, currency, date format, time format, and timezone, which apply throughout the system.
Theme Settings
- Change your company logo, sidebar logo, and favicon icon.
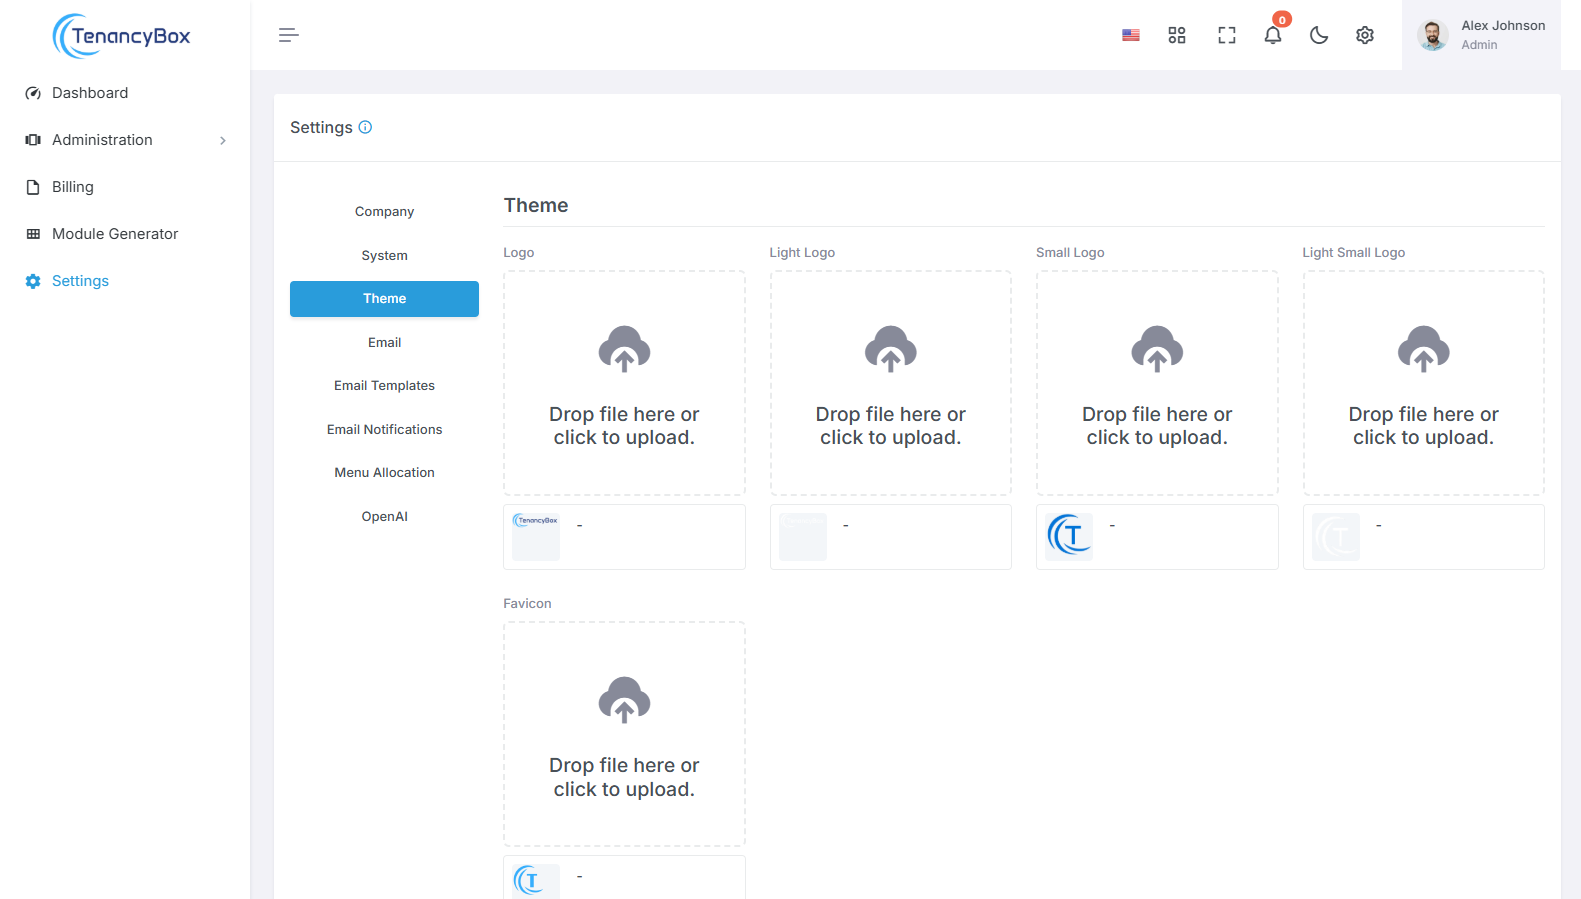
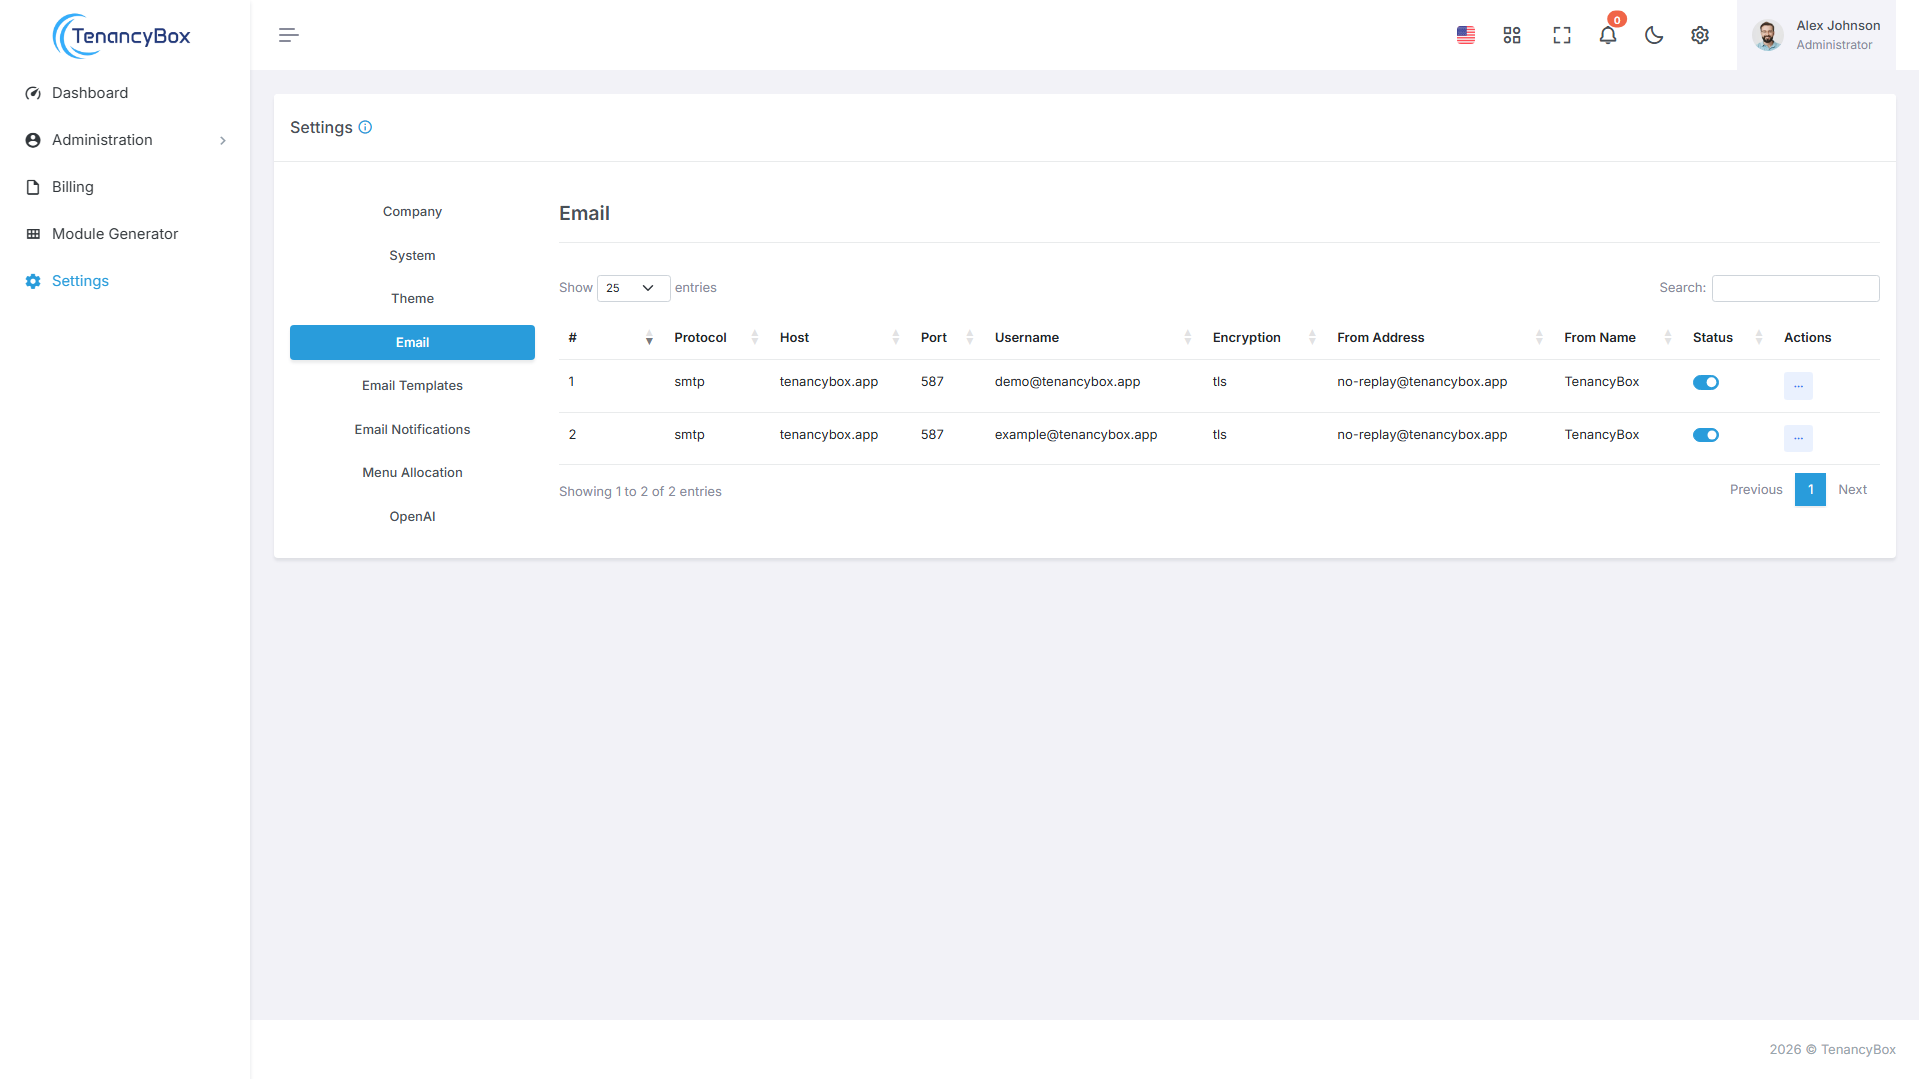
Email Settings
- Change your mail settings for outgoing mail from the tool.
- Mail Protocol: SMTP.
- Mail Host: Your SMTP mail server host.
- Mail Port: The outgoing mail port.
- Mail Username: The outgoing mail address.
- Mail Password: The outgoing mail password.
- Mail Encryption: This should be either TLS or SSL.
- Mail From Address: The sender's email address.
- Mail From Name: The sender's name.
- Limit On Campaign Outgoing Mail: The maximum number of emails that can be sent as part of a campaign per hour.
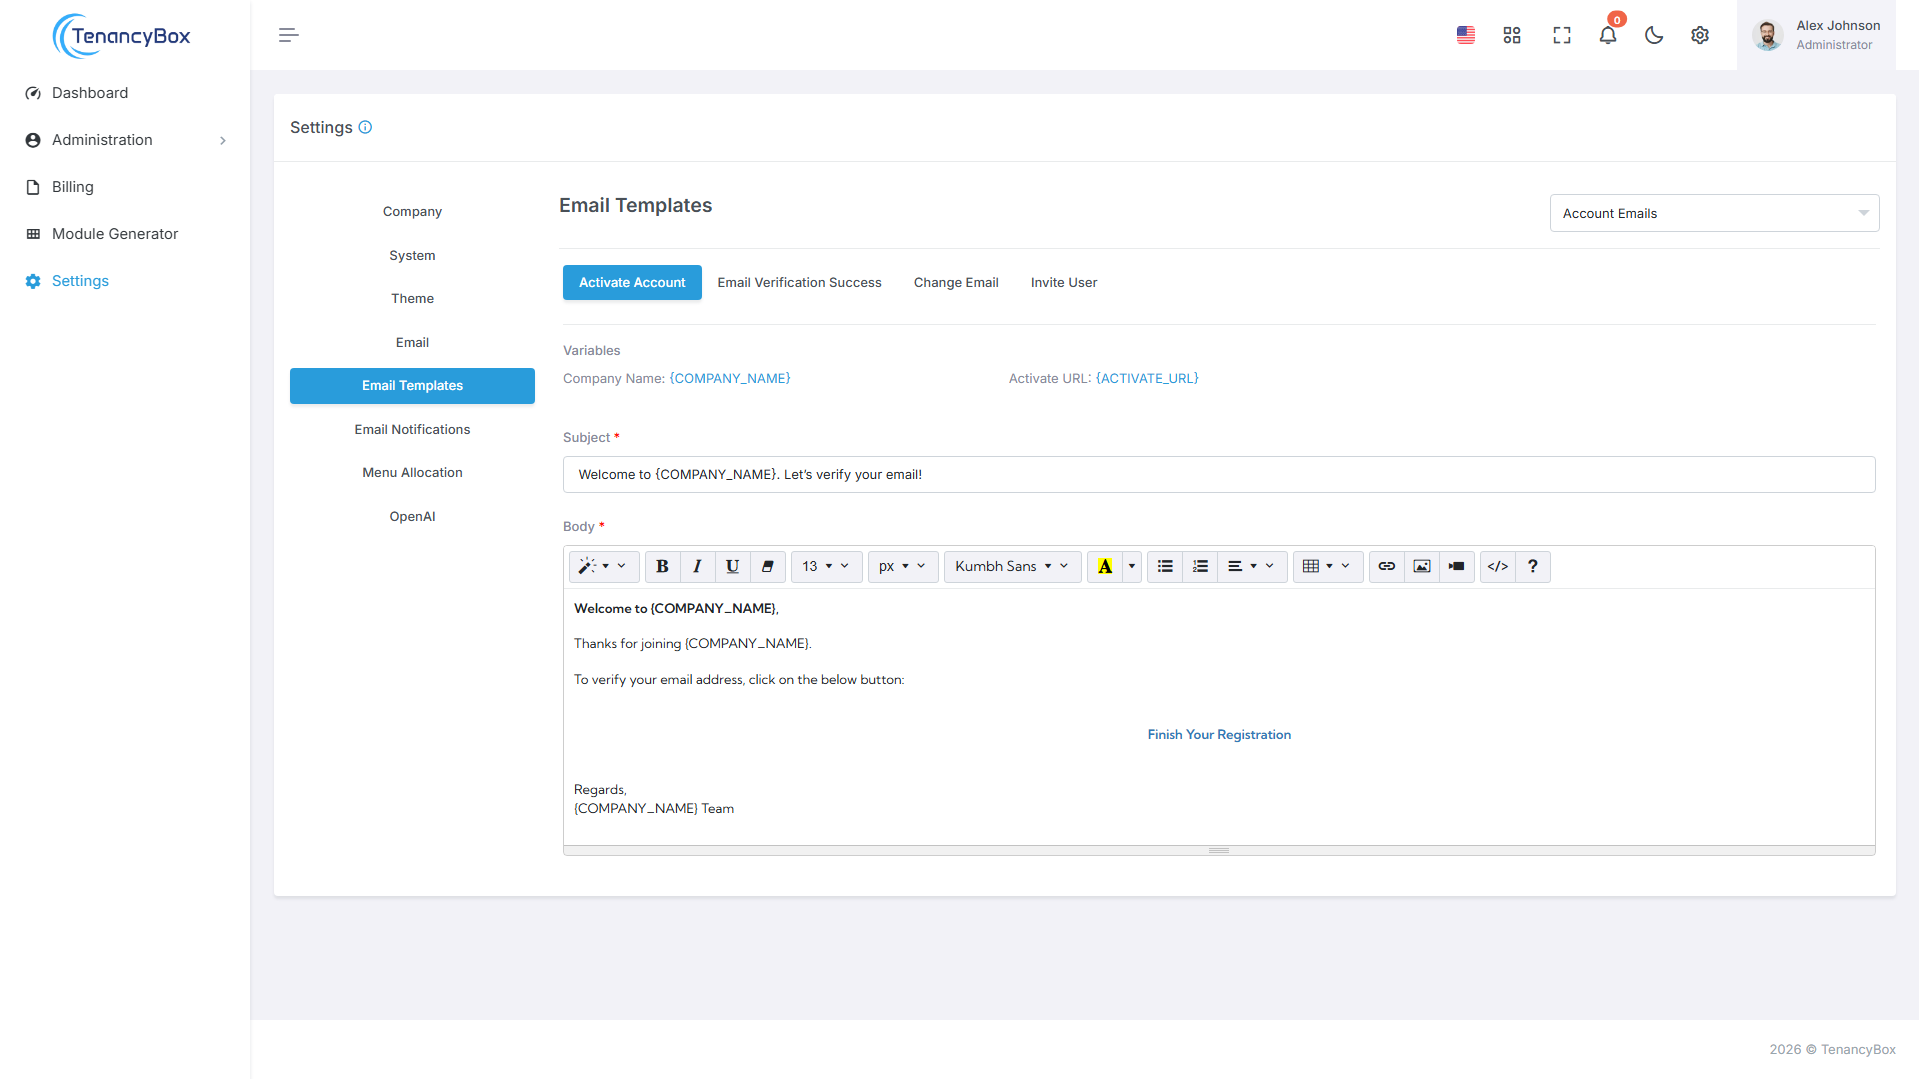
Email Templates
- You can change the content of email templates and bind variables for dynamic values in
the subject and message.
For example:
{USERNAME}
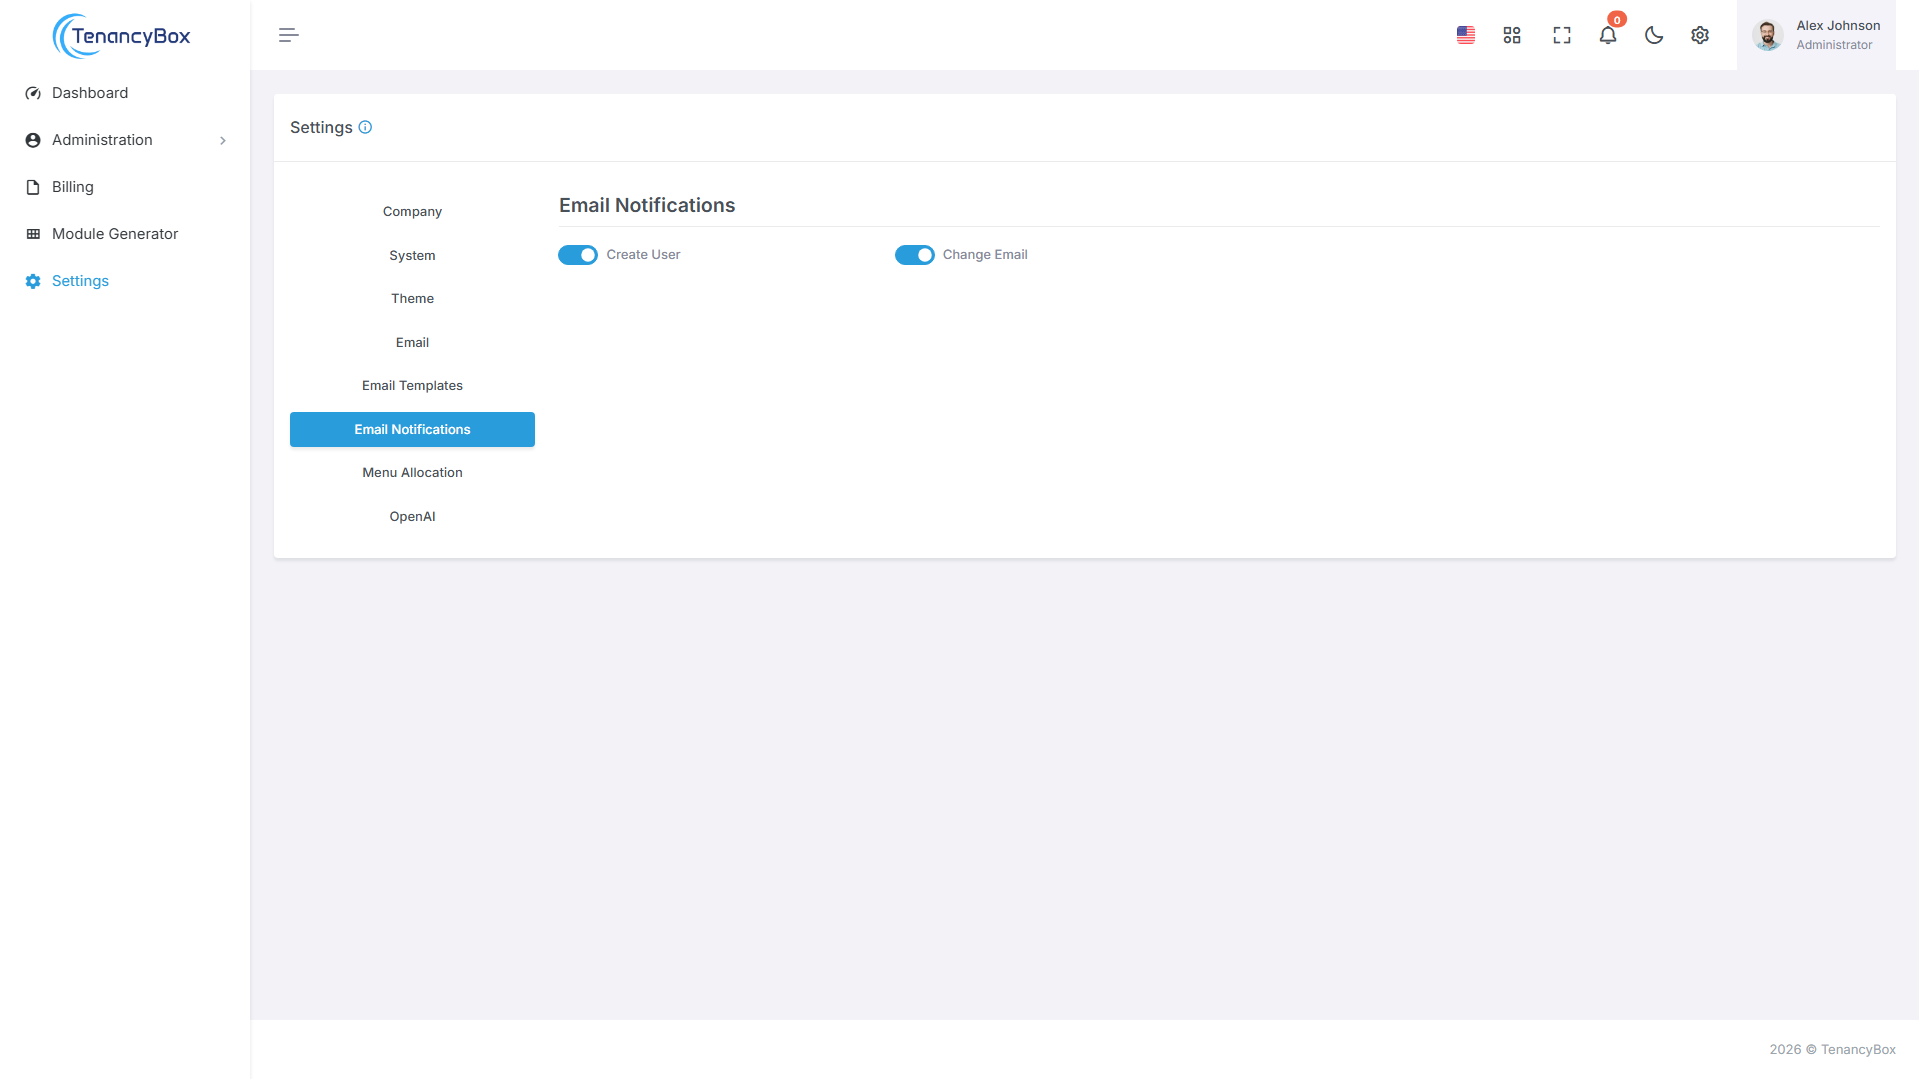
Email Notification
- Enable or disable email notifications for a specific module based on your requirements.
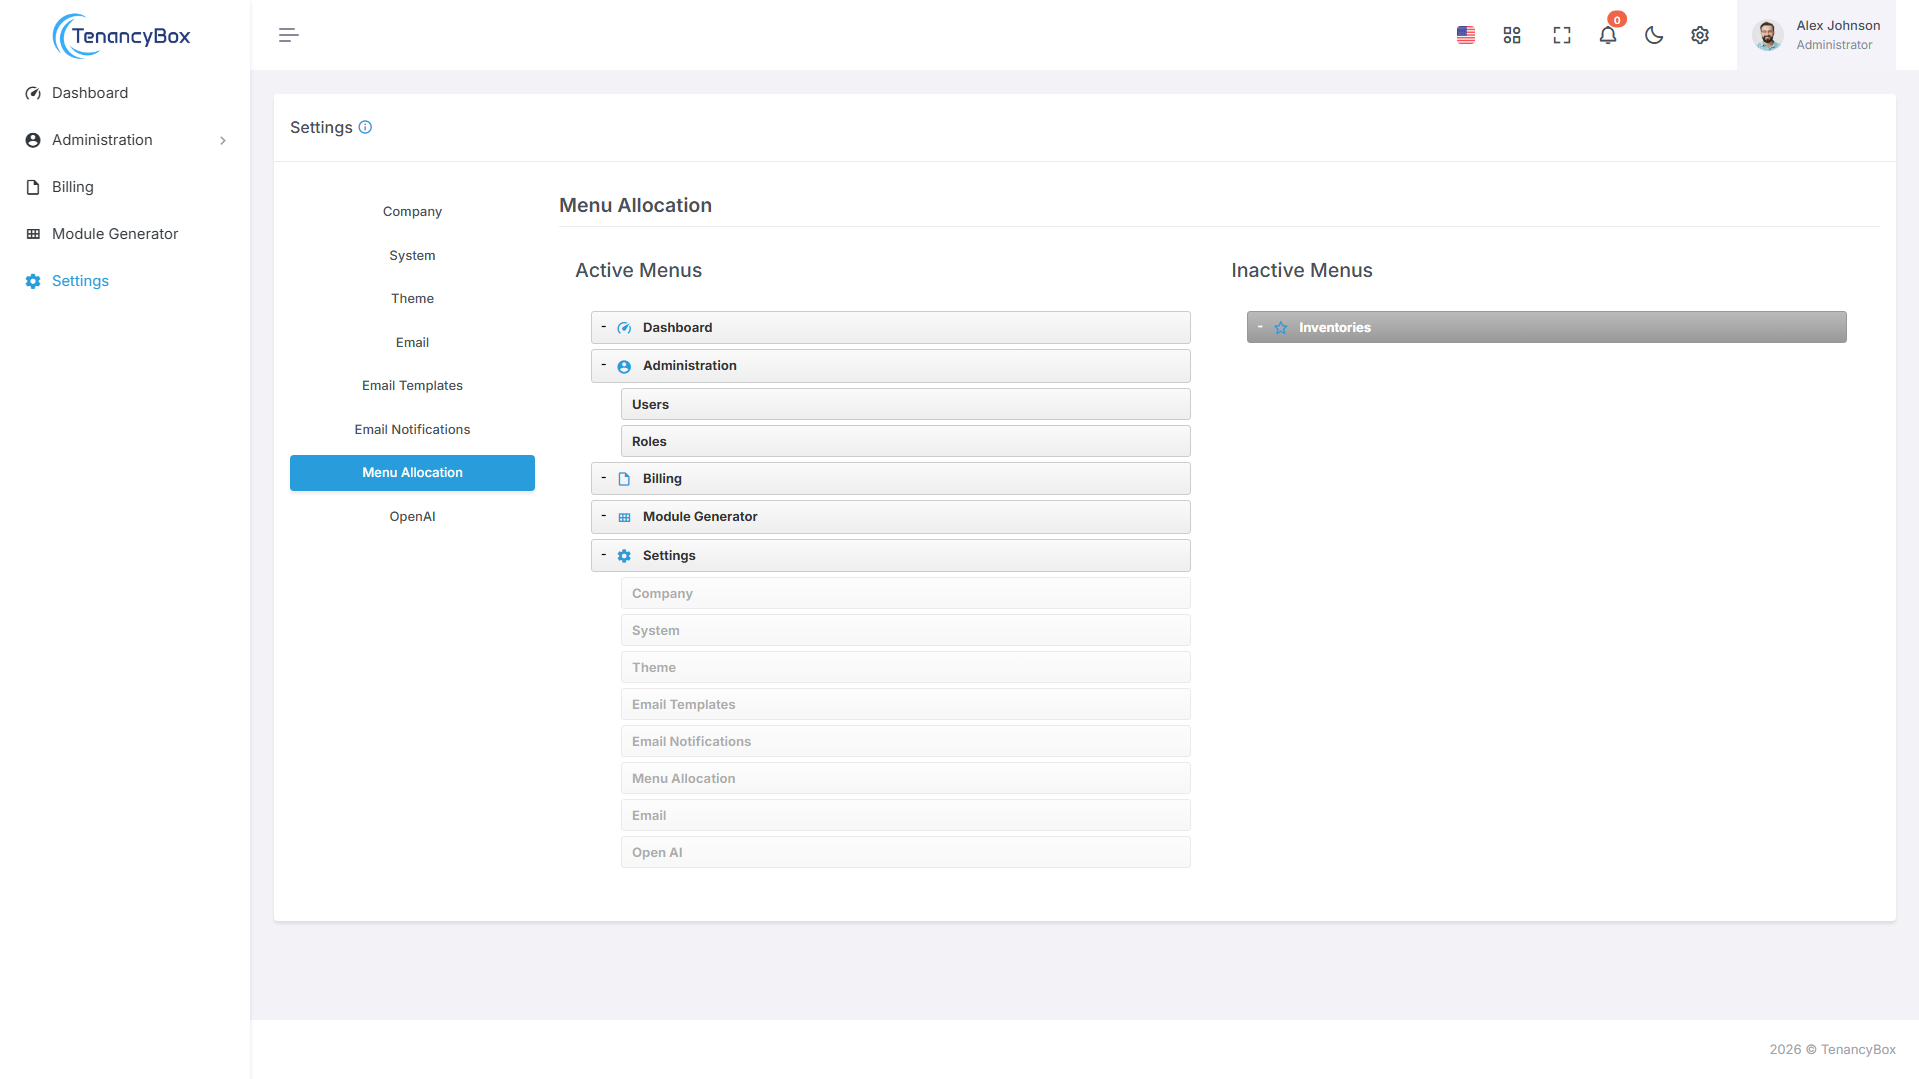
Menu Allocation
- You can customize your sidebar menu to suit your style.
- You can change the menu position by clicking and dragging.
- You can activate/deactivate menus by dragging and dropping.
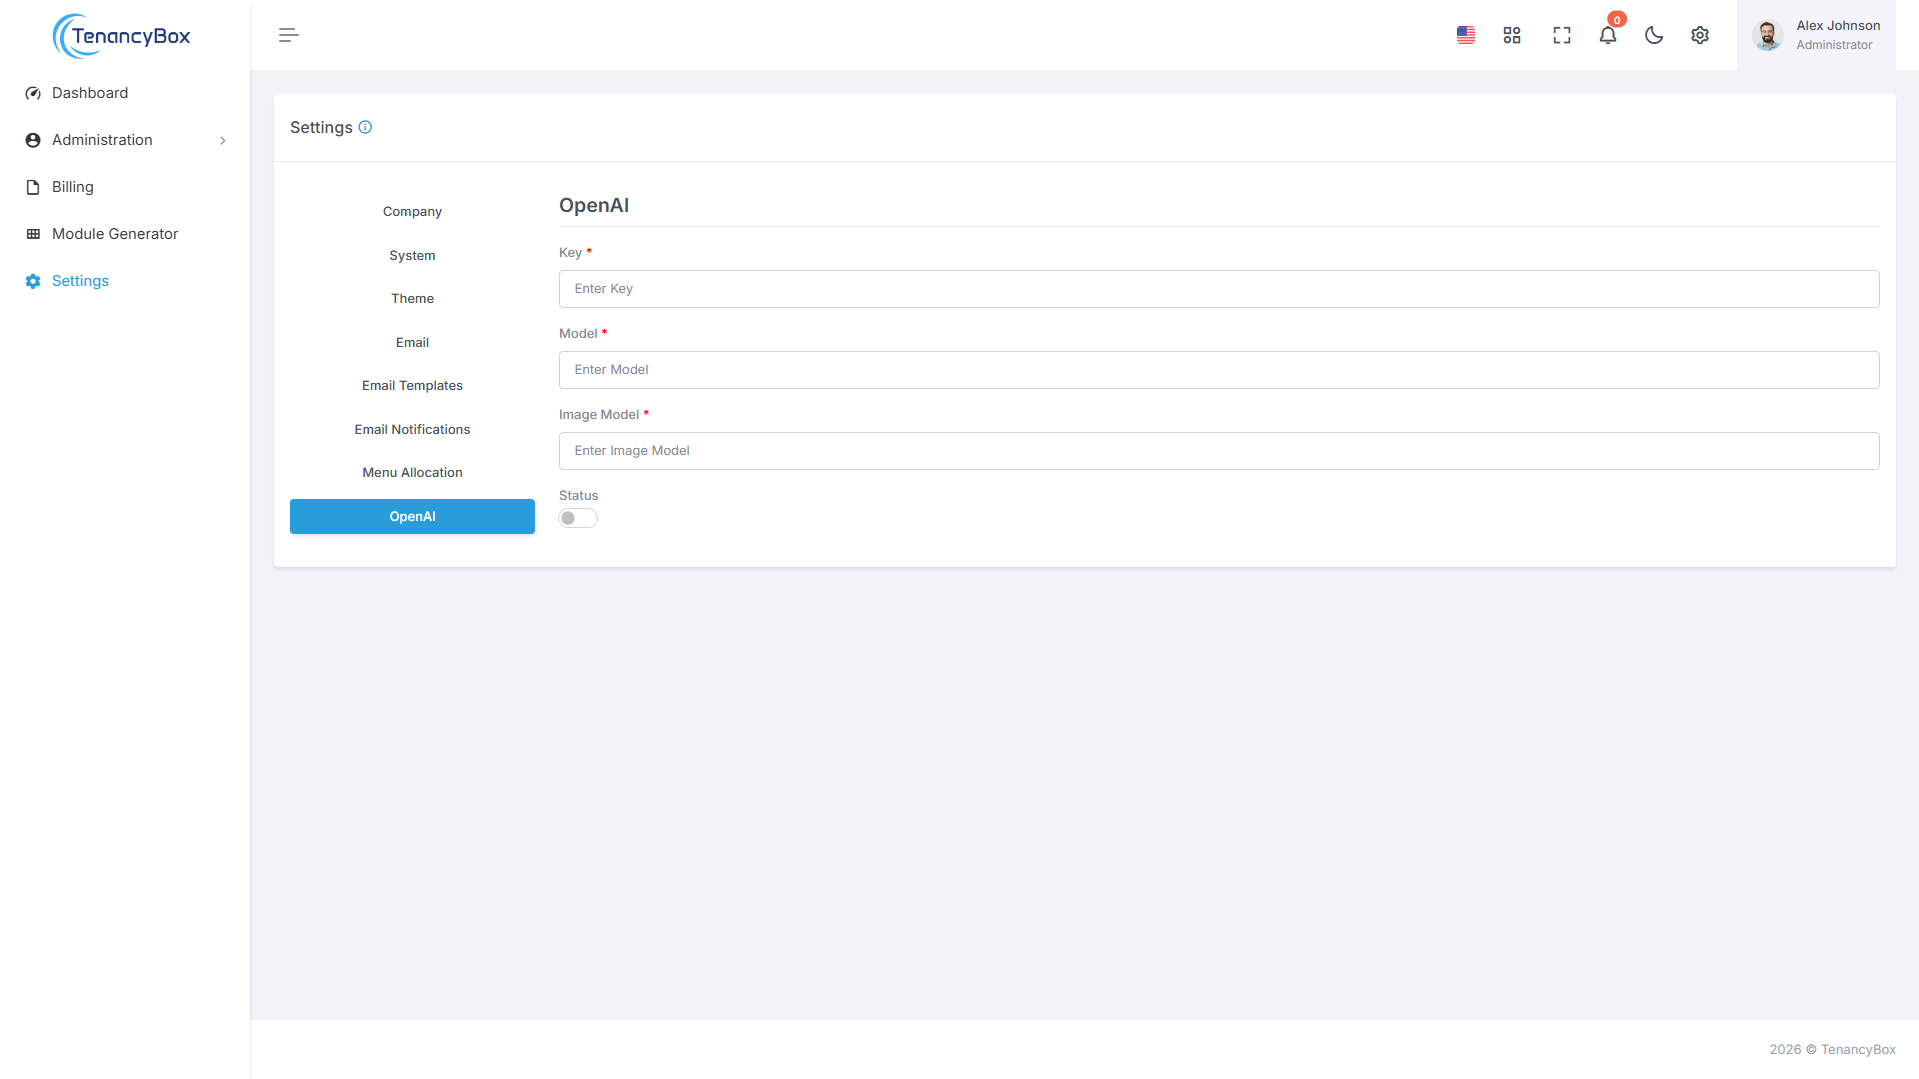
OpenAI
- Integrate OpenAI: Connect OpenAI with your platform by using API keys to enable advanced AI-driven features such as text generation and image creation.
- OpenAI Integration: Set up API keys, select the desired models, and monitor the status to seamlessly integrate OpenAI's powerful AI models into your platform.
- AI-Powered Features: Configure OpenAI API keys, choose text and image models, and track integration status to optimize system performance with AI capabilities.
8 Source Code Structure
- Built using Frontend Bootstrap 5.* and Backend Laravel 12.*.
- For more information on Bootstrap, visit: https://getbootstrap.com/
- For more information on Laravel, visit: https://laravel.com/docs/12.x
9 Sources and Credits
We've used the following packages, libraries, and assets as listed below with their official links.
JavaScript / NPM Packages
| Package Name | License |
|---|---|
| glob | ISC |
| laravel-vite-plugin | MIT |
| sass | MIT |
| vite | MIT |
| vite-plugin-static-copy | MIT |
| axios | MIT |
| bootstrap | MIT |
| choices.js | MIT |
| datatables.net-bs5 | MIT |
| datatables.net-buttons | MIT |
| datatables.net-buttons-dt | MIT |
| datatables.net-responsive-bs5 | MIT |
| dropzone | MIT |
| feather-icons | MIT |
| flatpickr | MIT |
| jquery | MIT |
| jquery-validation | MIT |
| jquery.repeater | MIT |
| jszip | MIT |
| node-waves | MIT |
| particles.js | MIT |
| pdfmake | MIT |
| select2 | MIT |
| simplebar | MIT |
| sortablejs | MIT |
| summernote | MIT |
| sweetalert2 | MIT |
| swiper | MIT |
| toastify-js | MIT |
PHP / Composer Packages
| Package Name | License |
|---|---|
| PHP | PHP License |
| barryvdh/laravel-dompdf | MIT |
| barryvdh/laravel-translation-manager | MIT |
| guzzlehttp/guzzle | MIT |
| josiasmontag/laravel-recaptchav3 | MIT |
| konekt/html | MIT |
| laravel/cashier | MIT |
| laravel/framework | MIT |
| laravel/nightwatch | MIT |
| laravel/pulse | MIT |
| laravel/sanctum | MIT |
| laravel/tinker | MIT |
| laravel/ui | MIT |
| mcamara/laravel-localization | MIT |
| nwidart/laravel-modules | MIT |
| orhanerday/open-ai | MIT |
| overtrue/laravel-pinyin | MIT |
| predis/predis | MIT |
| psr/simple-cache | MIT |
| spatie/laravel-sitemap | MIT |
| srmklive/paypal | MIT |
| stancl/tenancy | MIT |
| statikbe/laravel-cookie-consent | MIT |
| stichoza/google-translate-php | MIT |
| stripe/stripe-php | MIT |
| symfony/http-client | MIT |
| yajra/laravel-datatables | MIT |
| yajra/laravel-datatables-buttons | MIT |
| yajra/laravel-datatables-oracle | MIT |
| fakerphp/faker | MIT |
| larastan/larastan | MIT |
| laravel/boost | MIT |
| laravel/pint | MIT |
| laravel/sail | MIT |
| mockery/mockery | BSD-3-Clause |
| nunomaduro/collision | MIT |
| phpunit/phpunit | BSD-3-Clause |
10 Customization
This section provides guidance on customizing Laravel PHP files, SCSS styles, and JavaScript functionality, along with the necessary commands for development and production builds.
Laravel PHP Customization
To customize Laravel backend functionality:
- Controllers: Located in
app/Http/Controllers/andModules/*/Http/Controllers/- Modify existing controllers or create new ones for custom business logic - Models: Located in
Modules/*/Entities/- Update or create Eloquent models for database interactions - Routes: Located in
routes/andModules/*/Routes/- Define custom routes for your application - Middleware: Located in
app/Http/Middleware/- Create custom middleware for request filtering - Views: Located in
resources/views/andModules/*/Resources/Views/- Customize Blade templates for your pages
Common Artisan Commands:
# Create a new controller
php artisan make:controller YourController

# Create a new model with migration
php artisan make:model YourModel -m

# Run database migrations
php artisan migrate

# Clear application cache
php artisan cache:clear

# Clear configuration cache
php artisan config:clear

# Clear route cache
php artisan route:clear

# Clear view cache
php artisan view:clear
Laravel Modules (nwidart/laravel-modules):
This application uses Laravel Modules for modular architecture. All modules are
located in the
Modules/ directory.
Module Commands:
# Create a new module
php artisan module:make ModuleName

# List all modules
php artisan module:list

# Enable a module
php artisan module:enable ModuleName

# Disable a module
php artisan module:disable ModuleName

# Create module controller
php artisan module:make-controller ControllerName ModuleName

# Create module model
php artisan module:make-model ModelName ModuleName

# Create module migration
php artisan module:make-migration create_table_name ModuleName

# Run module migrations
php artisan module:migrate ModuleName

# Run all modules migrations
php artisan module:migrate

# Seed a specific module
php artisan module:seed ModuleName

# Create module request
php artisan module:make-request RequestName ModuleName

# Create module resource
php artisan module:make-resource ResourceName ModuleName
Module Structure Example:
Modules/
└── YourModule/
    ├── Config/
    ├── Database/
    │   ├── factories/
    │   ├── Migrations/
    │   └── Seeders/
    ├── Entities/          # Models
    │   ├── Attribut/
    │   └── Relationship/
    ├── Http/
    │   ├── Controllers/
    │   ├── Middleware/
    │   └── Requests/
    ├── Providers/
    ├── Repositories/
    ├── Resources/
    ├── Routes/
    │   ├── api.php
    │   └── web.php
    ├── Tests/
    ├── composer.json
    ├── module.json
    └── package.json
SCSS Customization
To customize styles using SCSS:
- Main SCSS File: Located in
resources/scss/app.scss- Import and customize Bootstrap variables and your custom styles - Custom SCSS Files: Create new SCSS files in
resources/scss/directory for modular styling - Bootstrap Variables: Override Bootstrap variables before importing
Bootstrap in
app.scss - Custom Components: Create component-specific SCSS files for better organization
SCSS Structure Example:
// resources/scss/app.scss

// Custom variables (override Bootstrap defaults)
$primary: #your-color;
$secondary: #your-color;

// Import Bootstrap
@import "./node_modules/bootstrap/scss/bootstrap";

// Import your custom styles
@import 'custom/layout';
@import 'custom/components';
@import 'custom/utilities';
JavaScript Customization
To customize JavaScript functionality:
- Main JS File: Located in
resources/js/app.js- Import and initialize JavaScript libraries - Custom JS Files: Create new JavaScript files in
resources/js/directory for custom functionality - External Libraries: Install via npm and import in your JS files
JavaScript Example:
// resources/js/app.js

import './bootstrap';
import './constant';
import './custom';

// Import custom modules
import './custom/your-module';

// Custom code
$(document).ready(function() {
    // Your custom JavaScript
});
Build Commands
Use these commands to compile and build your assets:
Development Mode:
# Install npm dependencies (first time only)
npm install

# Compile assets for development
npm run dev

# Watch for changes and auto-compile (recommended during development)
npm run watch

# Watch with polling (useful for Docker/VM environments)
npm run watch-poll
Production Mode:
# Build and minify assets for production
npm run build

# Or using the production flag
npm run prodnpm run build before deploying to production to ensure optimized and minified
assets.
Cache Management
After making changes, you may need to clear various caches:
# Clear all caches in one command
php artisan optimize:clear

# Or clear individual caches:
php artisan cache:clear        # Application cache
php artisan config:clear       # Configuration cache
php artisan route:clear        # Route cache
php artisan view:clear         # Compiled views

# Optimize for production (caches config, routes, and views)
php artisan optimize
Hot Module Replacement (Optional)
For faster development with instant updates:
# Start Vite development server with HMR
npm run dev

# In a separate terminal, run your Laravel server
php artisan servevite.config.js is properly configured for HMR to work correctly.
11 Notes
If there are any issues related to the database or SQL connection, check your environment settings such as the database name, host, port, etc.
If there are any changes in the .env file, run php artisan config:cache to
clear the configuration cache.
If the issue is related to storage, ensure you set full permissions for the storage
folder, then run php artisan storage:link to create a symbolic link.
If you encounter issues with the bootstrap/cache folder, ensure it has the proper
permissions set.
If you need help with installation or have any queries, feel free to contact us directly via our support@chetsapp.com.